This checklist provides an actionable guide for implementing Facebook’s Conversion API. For a more detailed outline of this process, we wrote a comprehensive beginner guide.
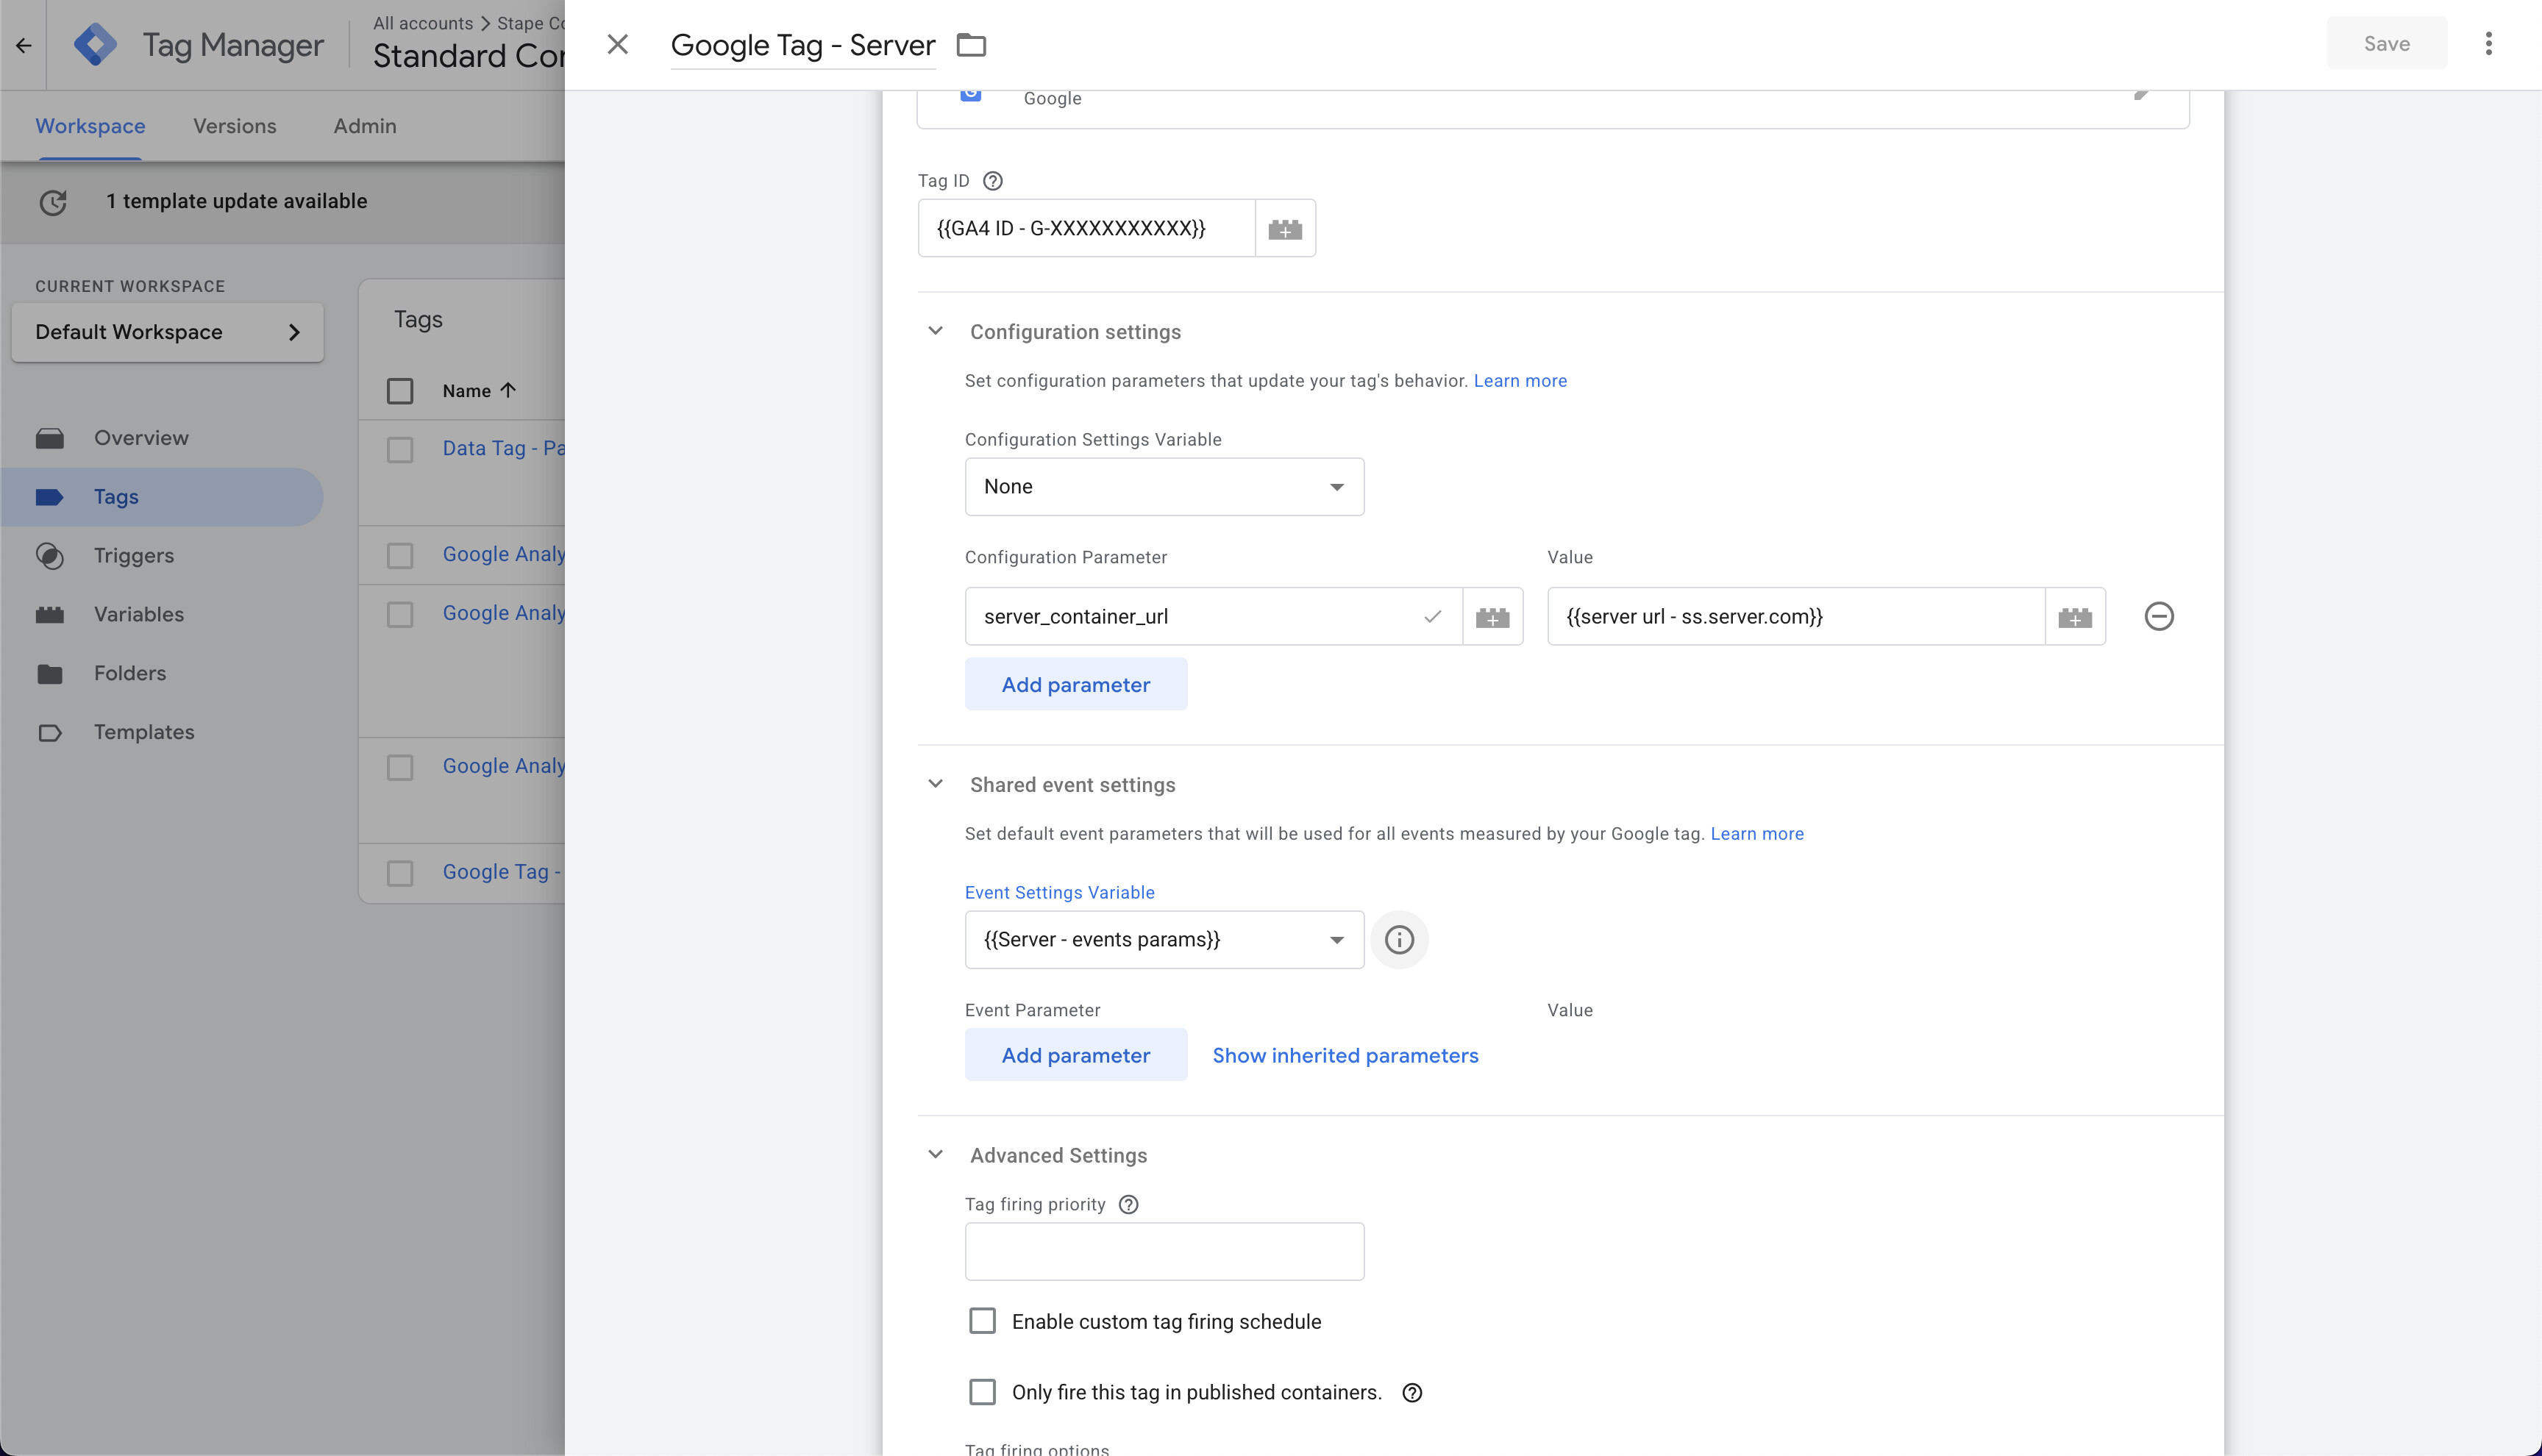
Create a Google tag and add server_container_url in Configuration settings
This parameter is crucial—it’s how we transport data to the server.
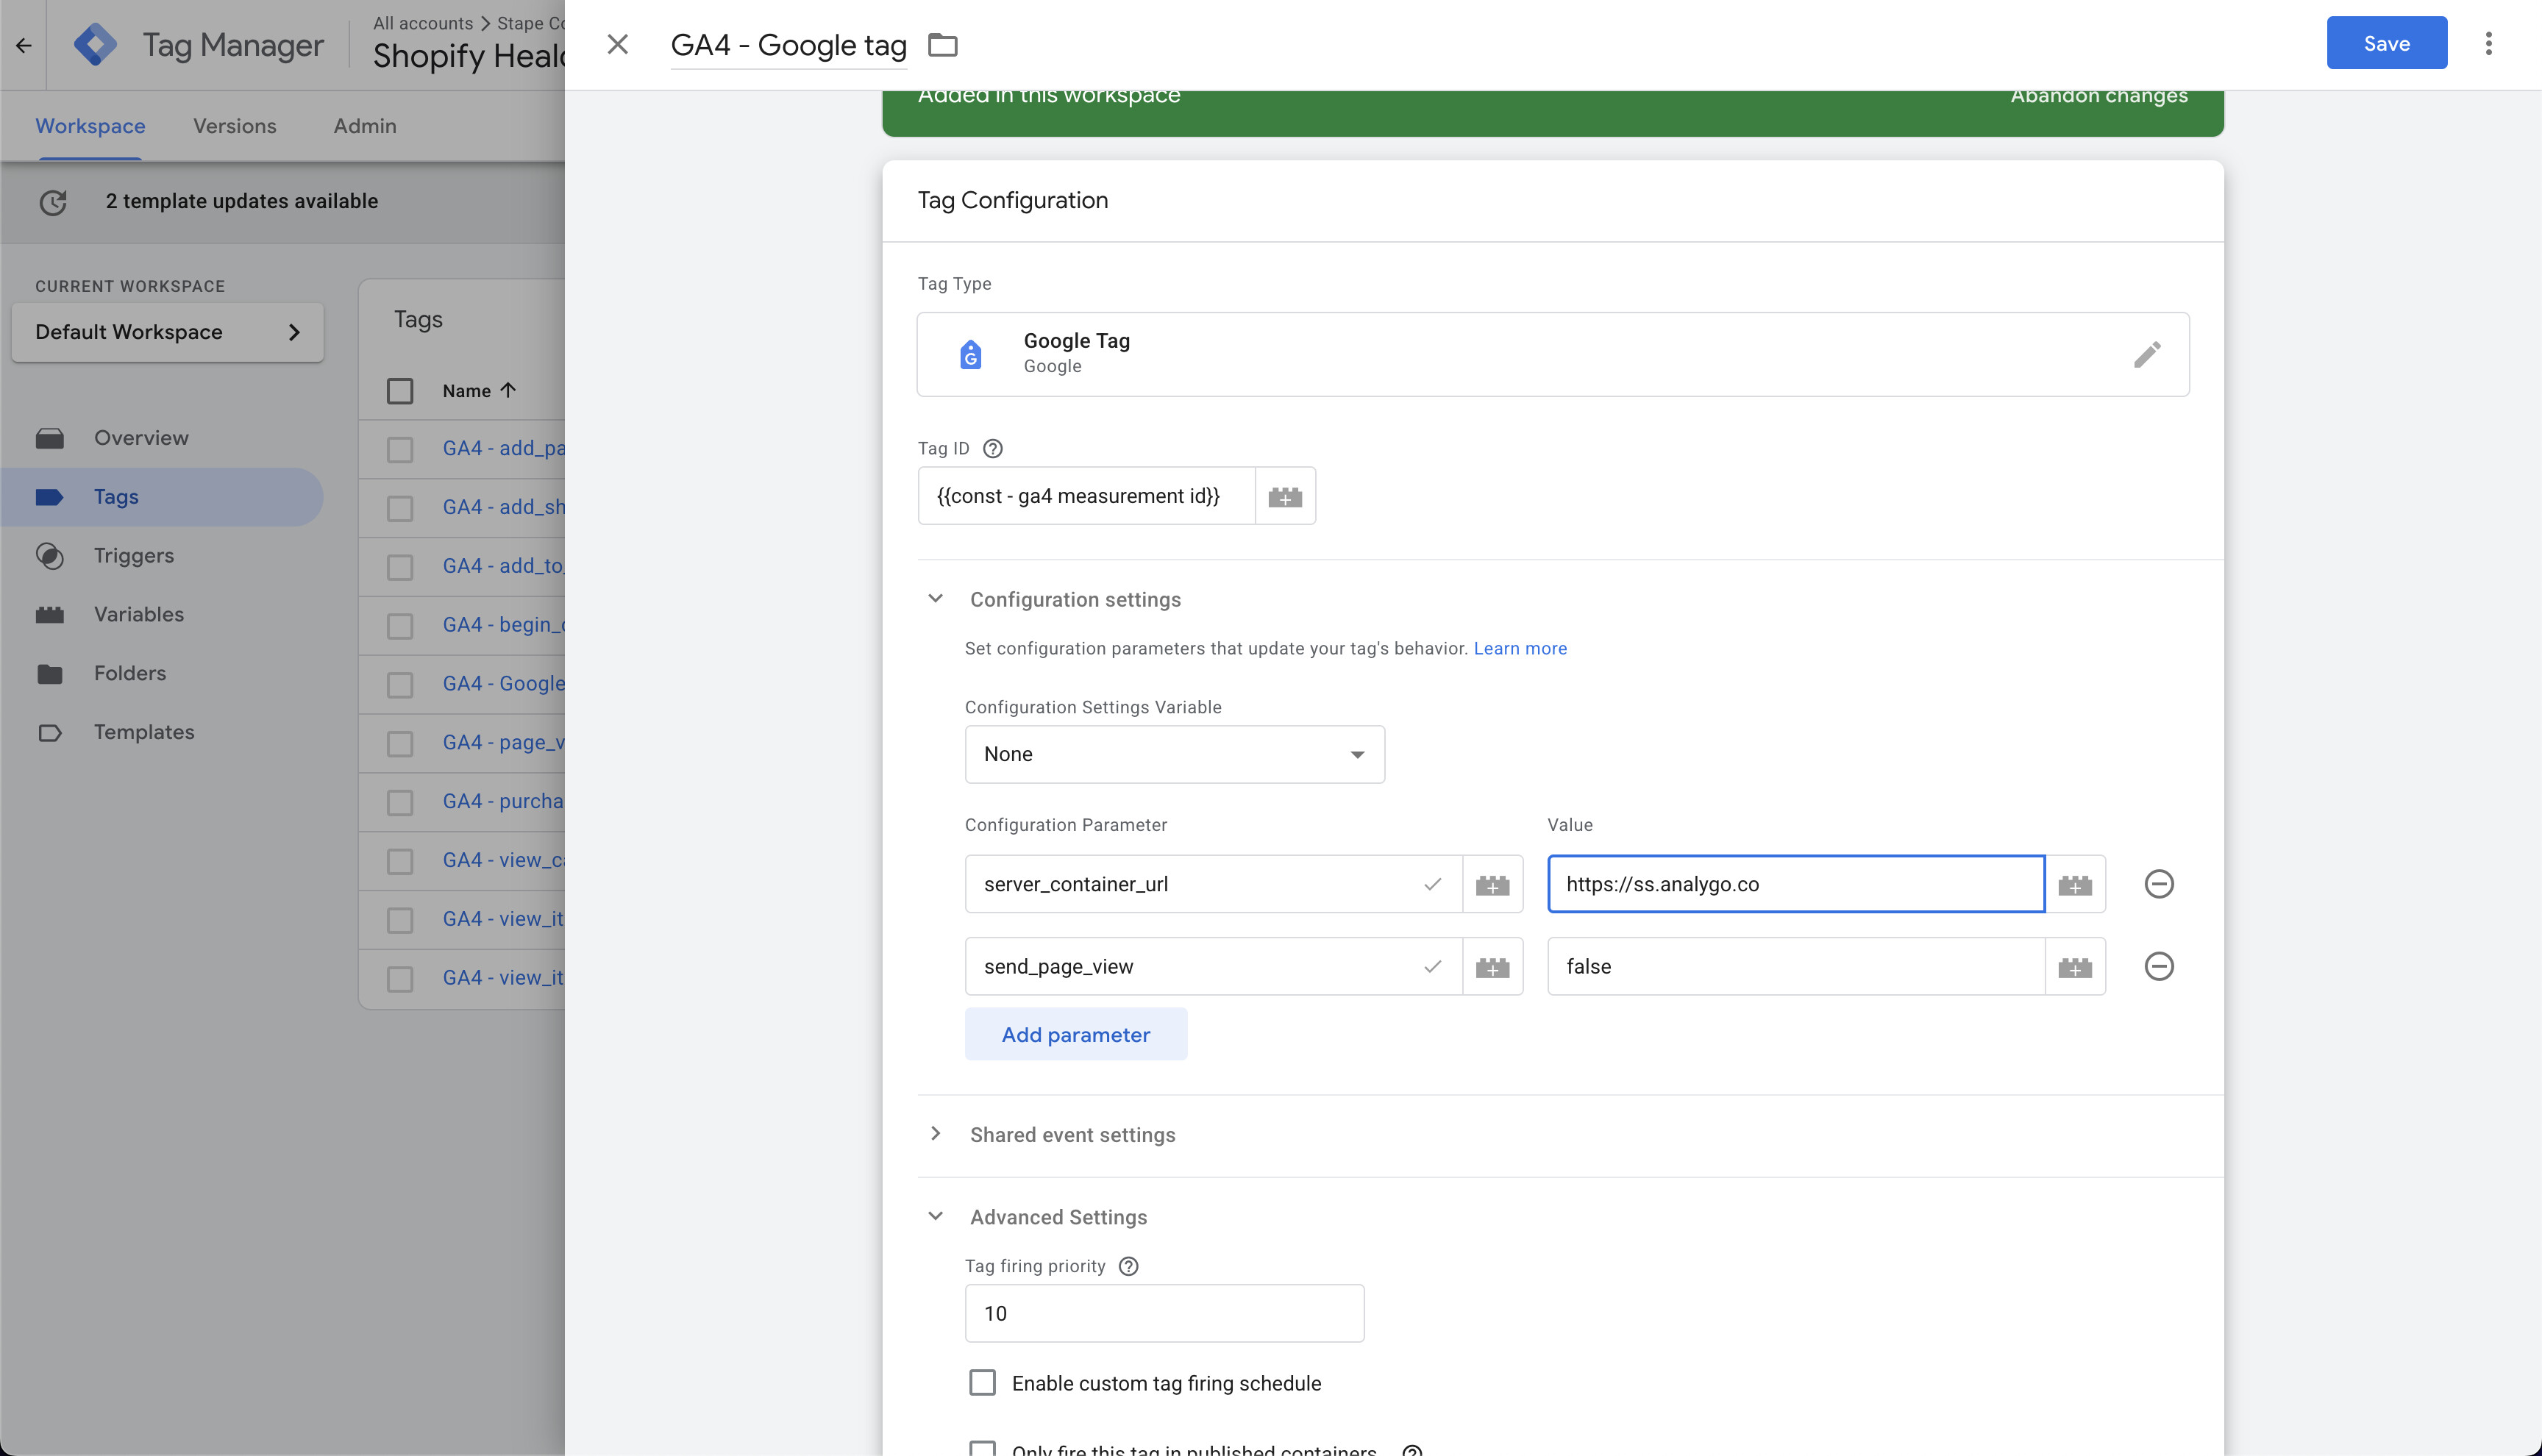
- Add server_container_url in Events Settings as a backup in case the Google tag doesn’t fire.
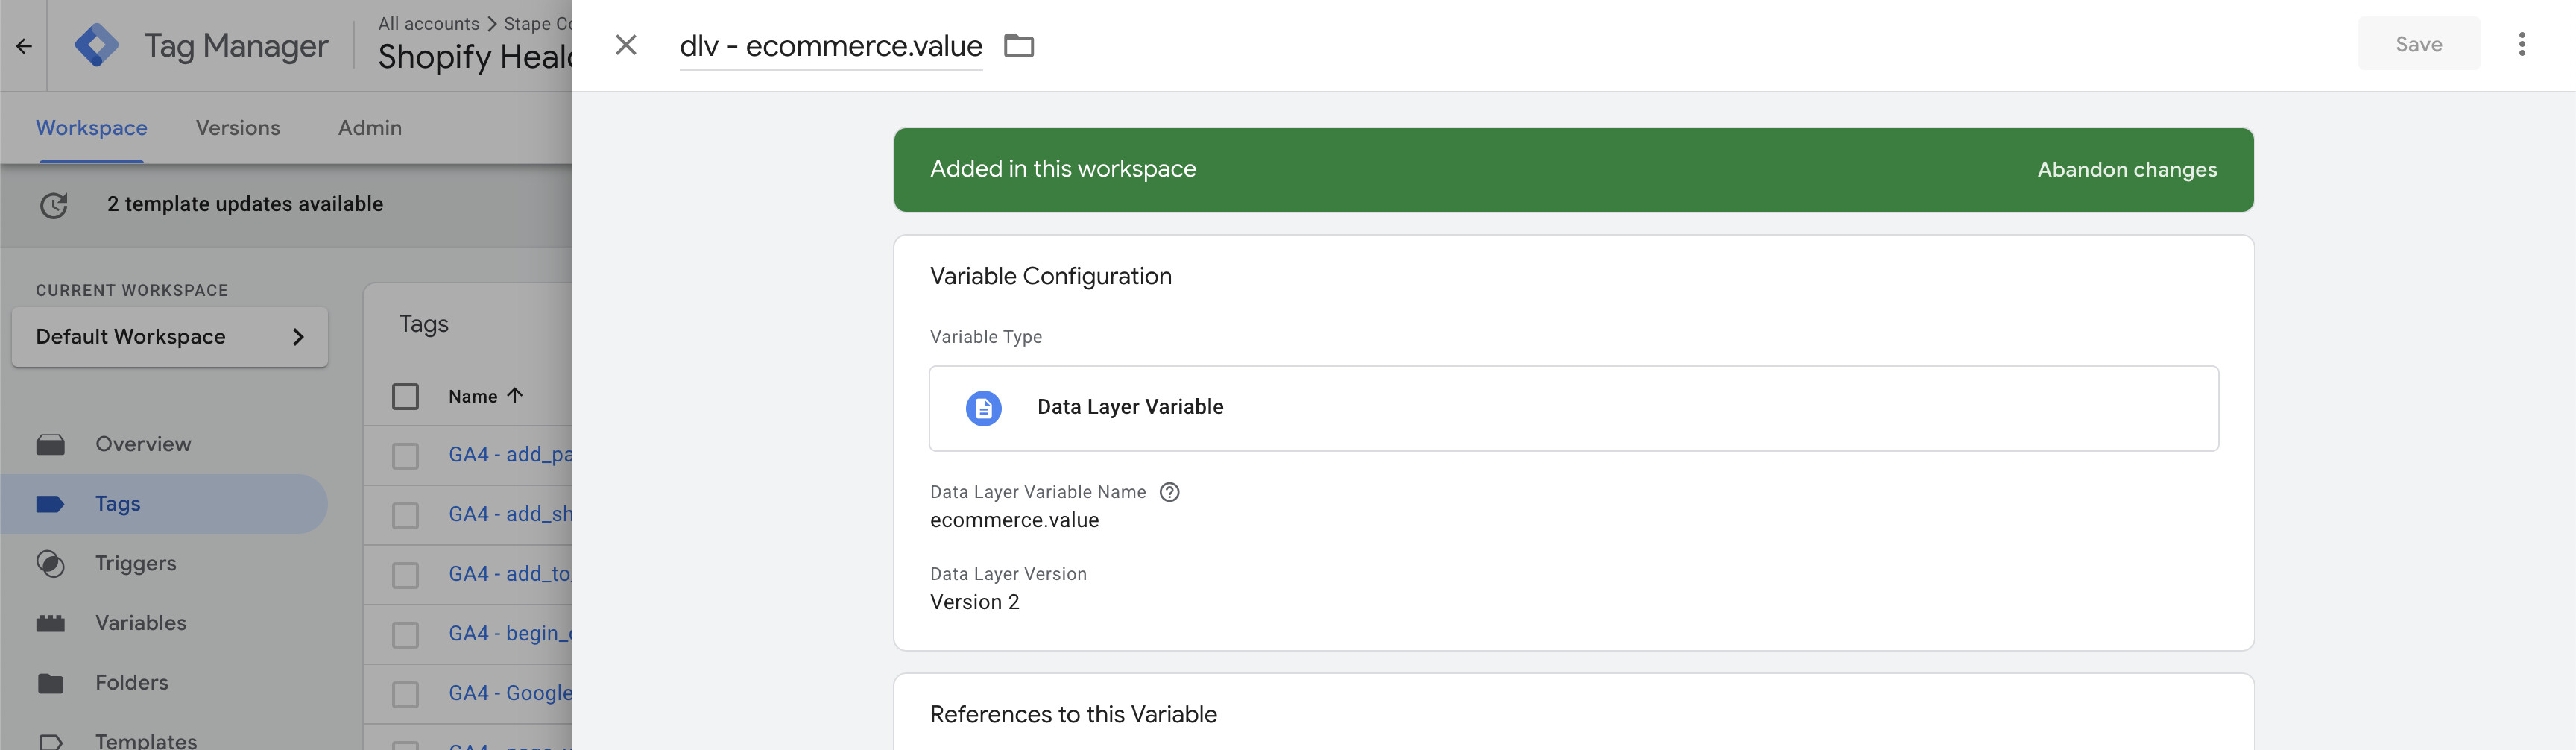
Add data layers to fetch user_data and ecommerce objects
We assume you have a well-structured data layer. If not, use another approach to fetch the data from your site. This is generally less reliable and should be avoided if you have access to a developer.
Below is an example of a view_item data layer event:
dataLayer.push({
  event: "view_item",
  user_data: {
    visitor_type: "logged_in",
    customer_email: "[email protected]", // Include only if available
    customer_first_name: "John",
    customer_last_name: "Smith",
    customer_phone: "+442071234567", // Include only if available
    customer_city: "London",
    customer_zip: "EC1A 1BB",
    customer_address_1: "45 Baker Street", // Include only if available
    customer_address_2: "Flat 3", // Include only if available
    customer_country: "GB",
    customer_country_code: "GB",
    user_id: "USER7890"
  },
  ecommerce: {
    currency: "GBP", // Currency code (ISO 4217)
    value: 49.99, // Total value of the viewed item
    items: [
      {
        item_id: "SKU456",
        item_name: "Organic Whey Protein Powder",
        affiliation: "Nutrition World",
        coupon: "HEALTH20",
        discount: 5.00,
        index: 0,
        item_brand: "Pure Nutrition",
        item_category: "Sports Nutrition",
        item_category2: "Protein",
        item_category3: "Whey",
        item_category4: "Organic",
        item_category5: "Unflavored",
        item_list_id: "protein_list",
        item_list_name: "Protein Products",
        item_variant: "500g",
        variant_id: "87654321098765",
        image: "https://example.com/images/products/organic-whey-protein.jpg",
        url: "https://example.com/products/organic-whey-protein",
        selling_plan_name: "subscription",
        location_id: "ChIJdd4hrwug2EcRmSrV3Vo6llI",
        price: 49.99,
        quantity: 1
      }
    ]
  }
});
You can use this data to fetch values—for example, the total cart value from an ecommerce object.
Prerequisites
Another example with user_data.email to get the user’s personal email

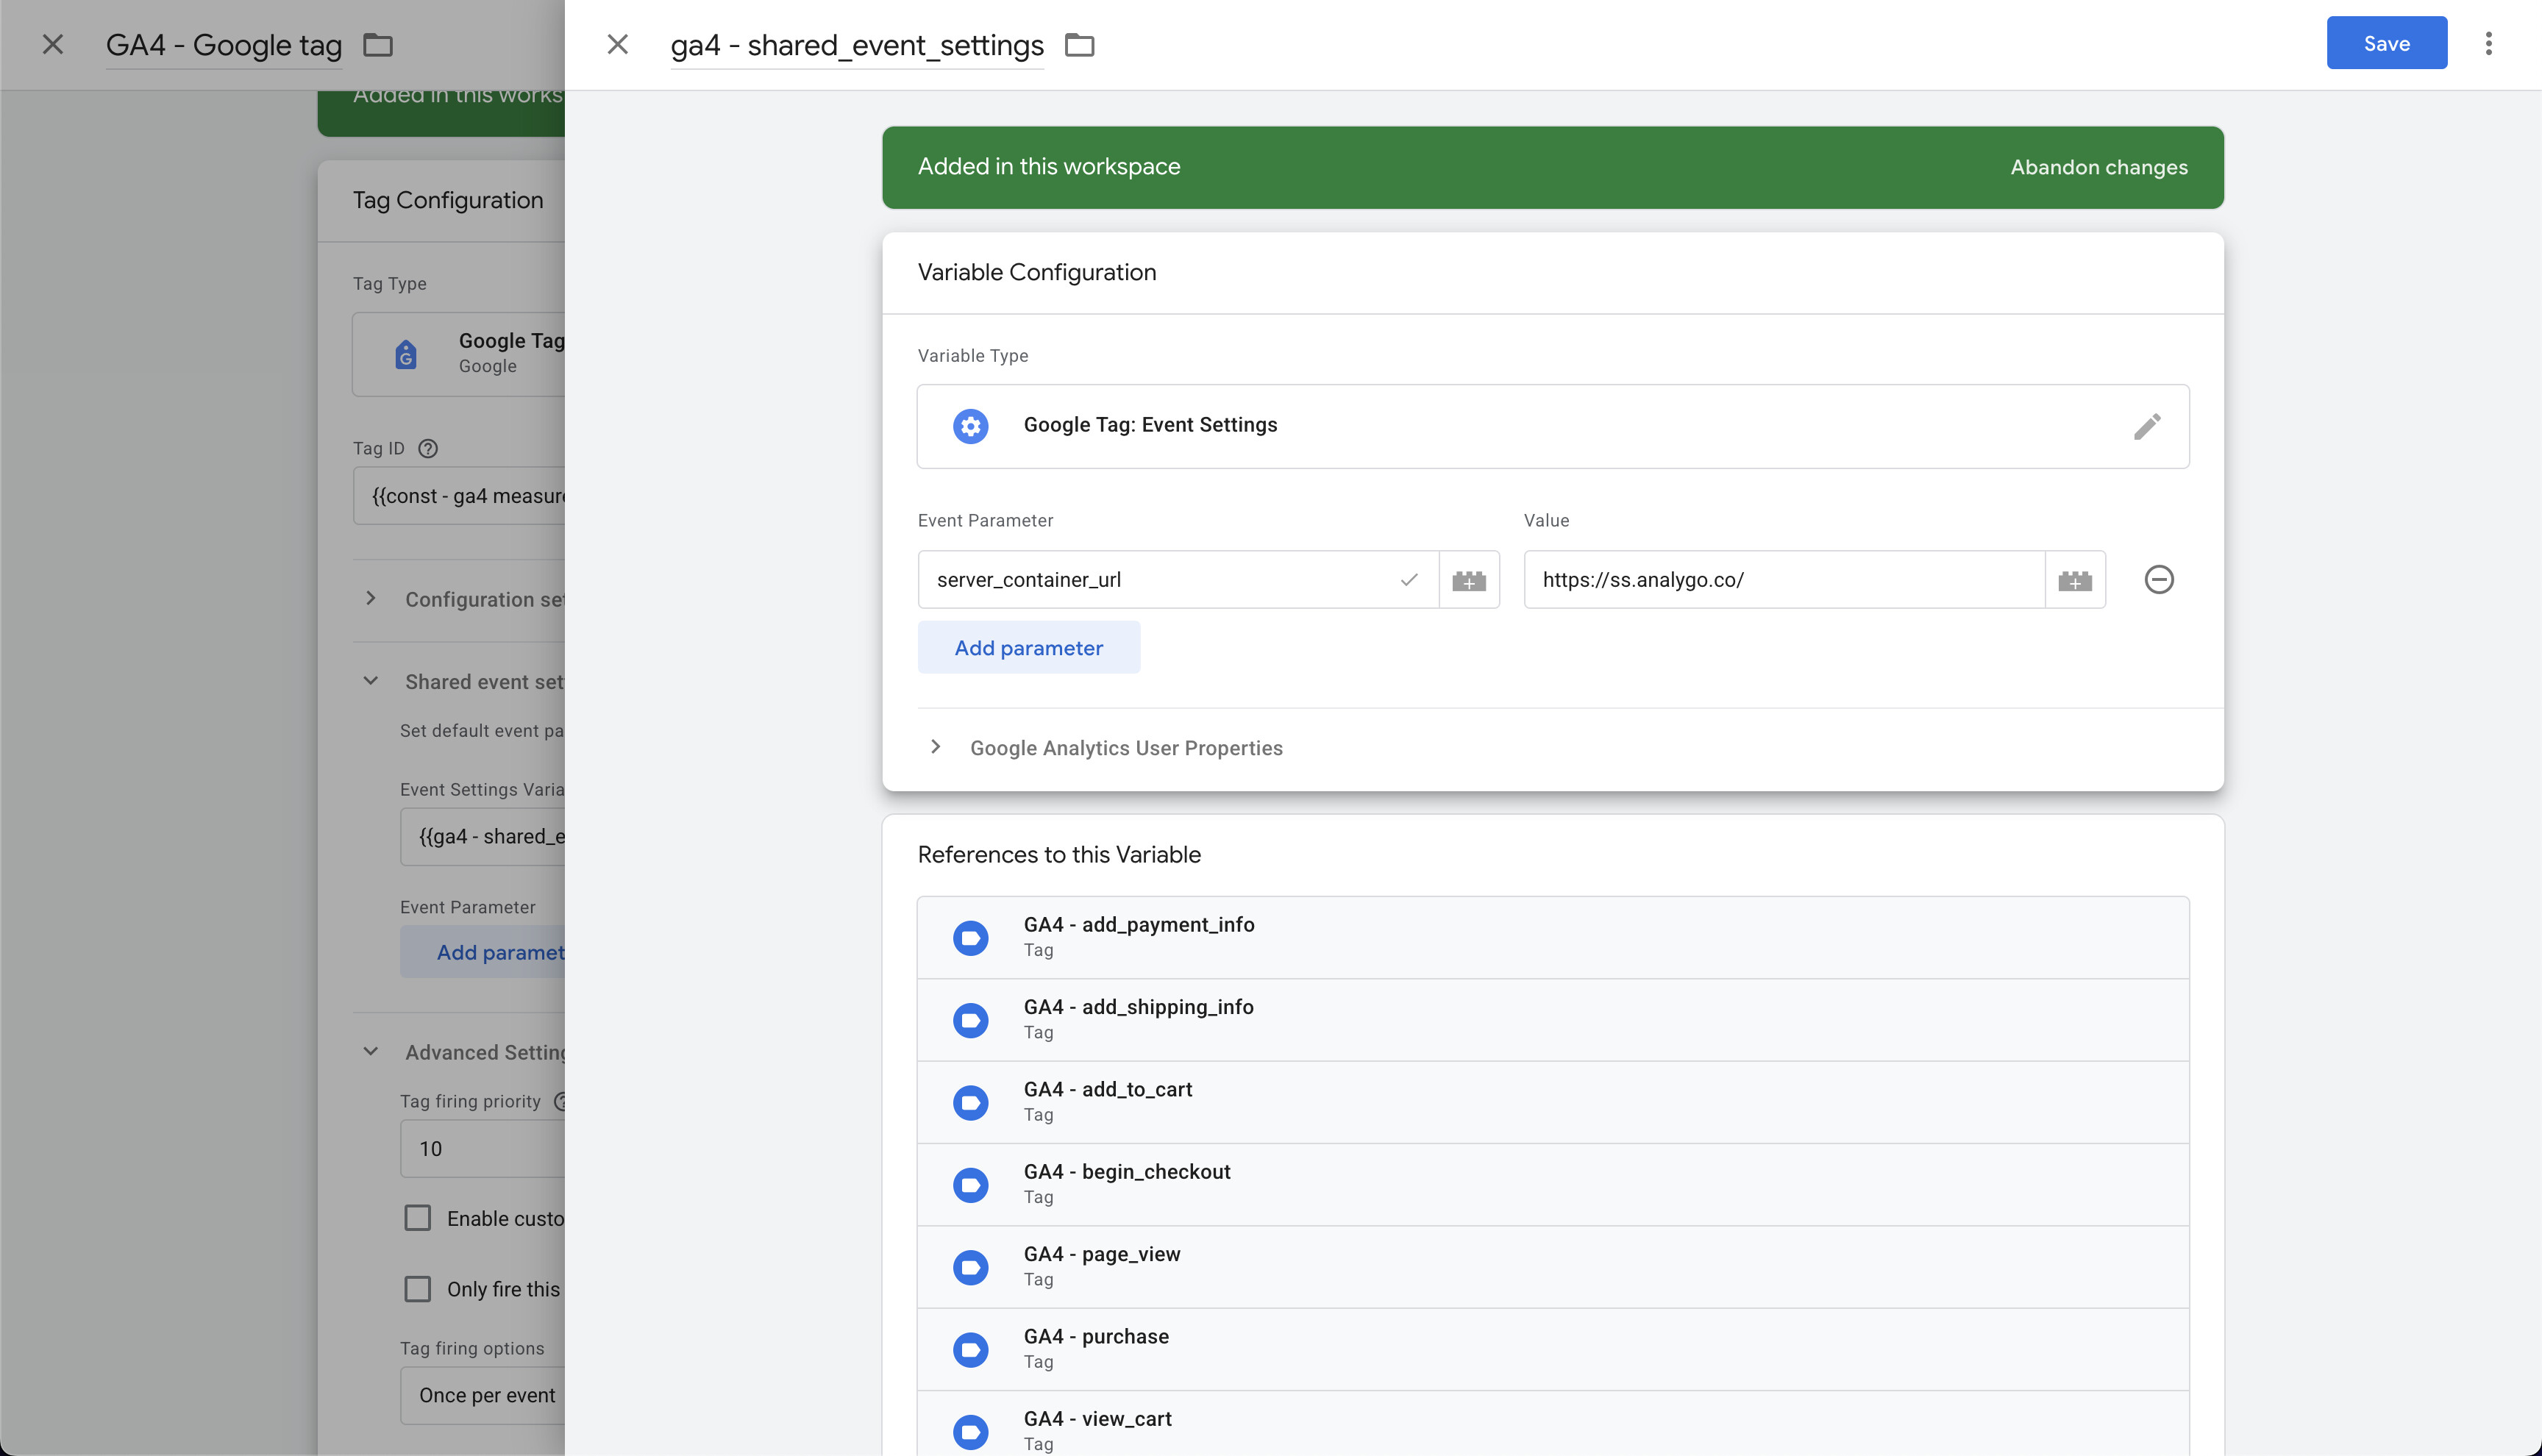
- Add shared Events Settings variable so all events inherit the same params
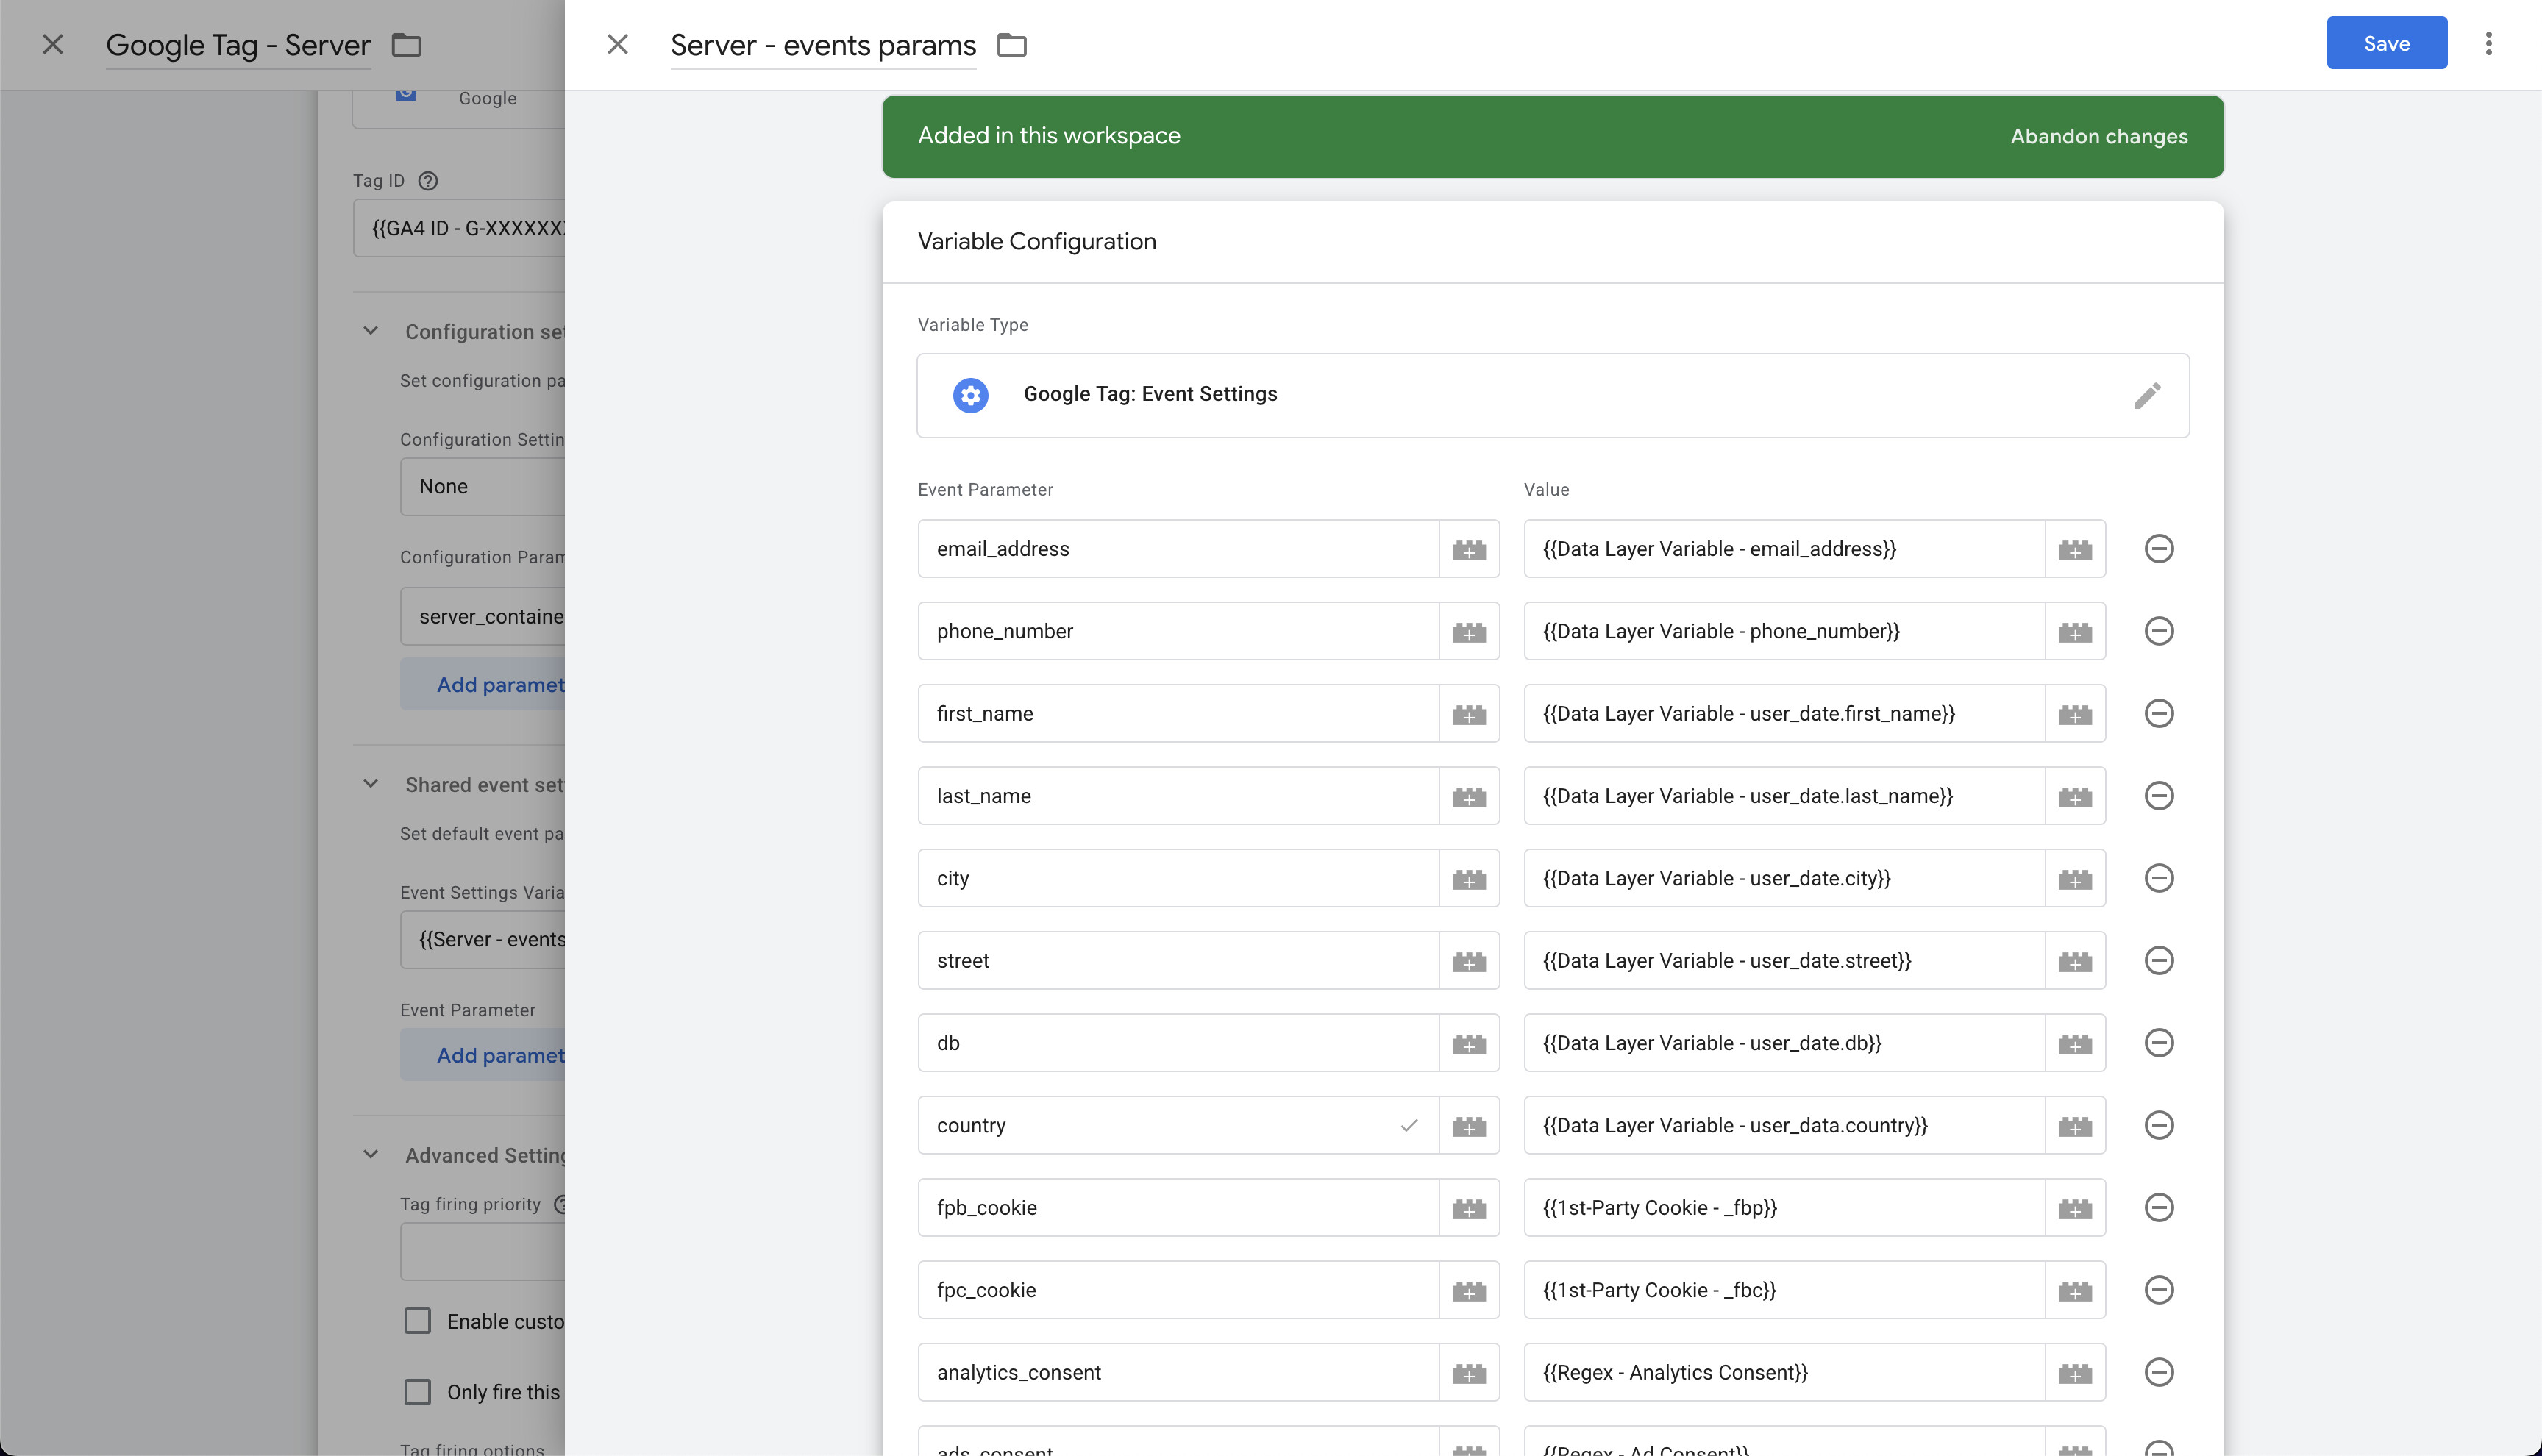
Map GA4 items → Facebook
This applies only if you have an ecommerce site or section where you send ecommerce data (such as courses).
There are two main ways to do this. The easiest is a GTM template by Stape.
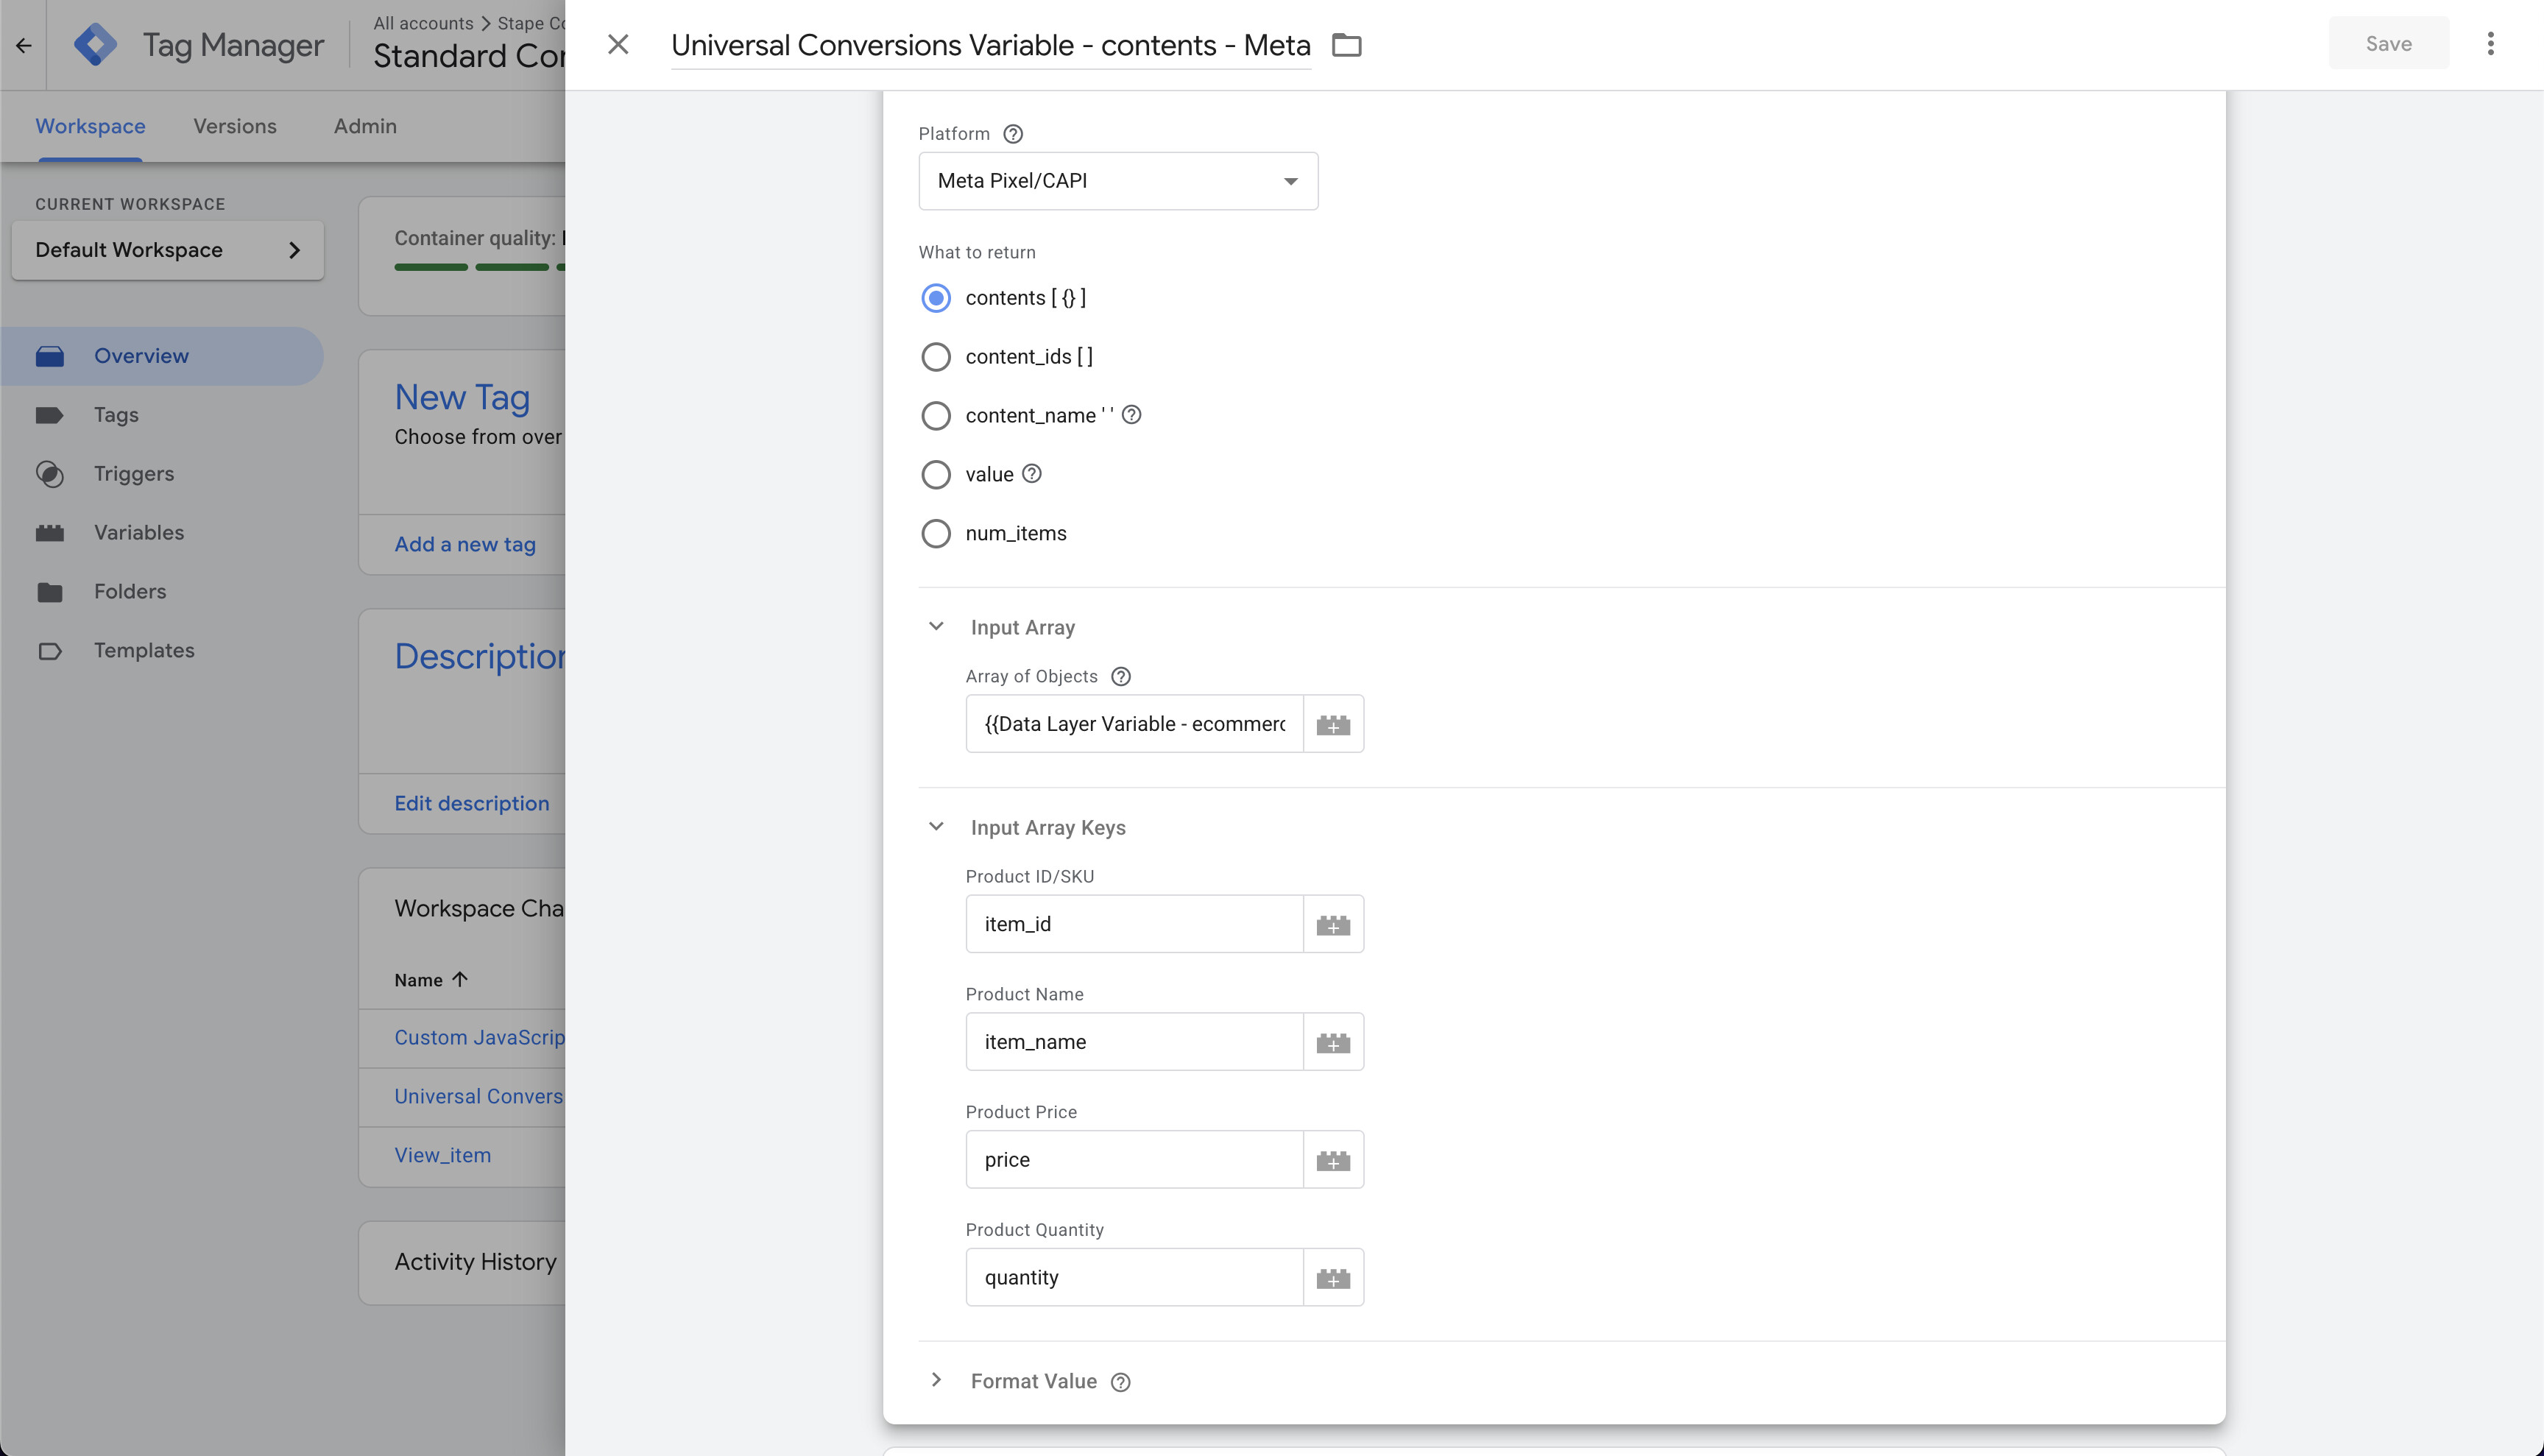
Alternatively, you can use Custom JavaScript variable to achieve a similar result with some extra control.
Make sure you have all the below before proceeding with the setup.
function() {
  var items = {{Data Layer Variable - ecommerce.items}};

  // Check for null or undefined products
  if (!items || !Array.isArray(items)) {
    return [];
  }

  return items.map(function(product) {
    // Ensure each item has a unique ID and proper mapping
    return {
      'id': item.item_id,
      'name': item.item_name,
      'content_category': item.item_category,
      'item_price': item.price,
      'quantity': item.quantity
    }
  });
}
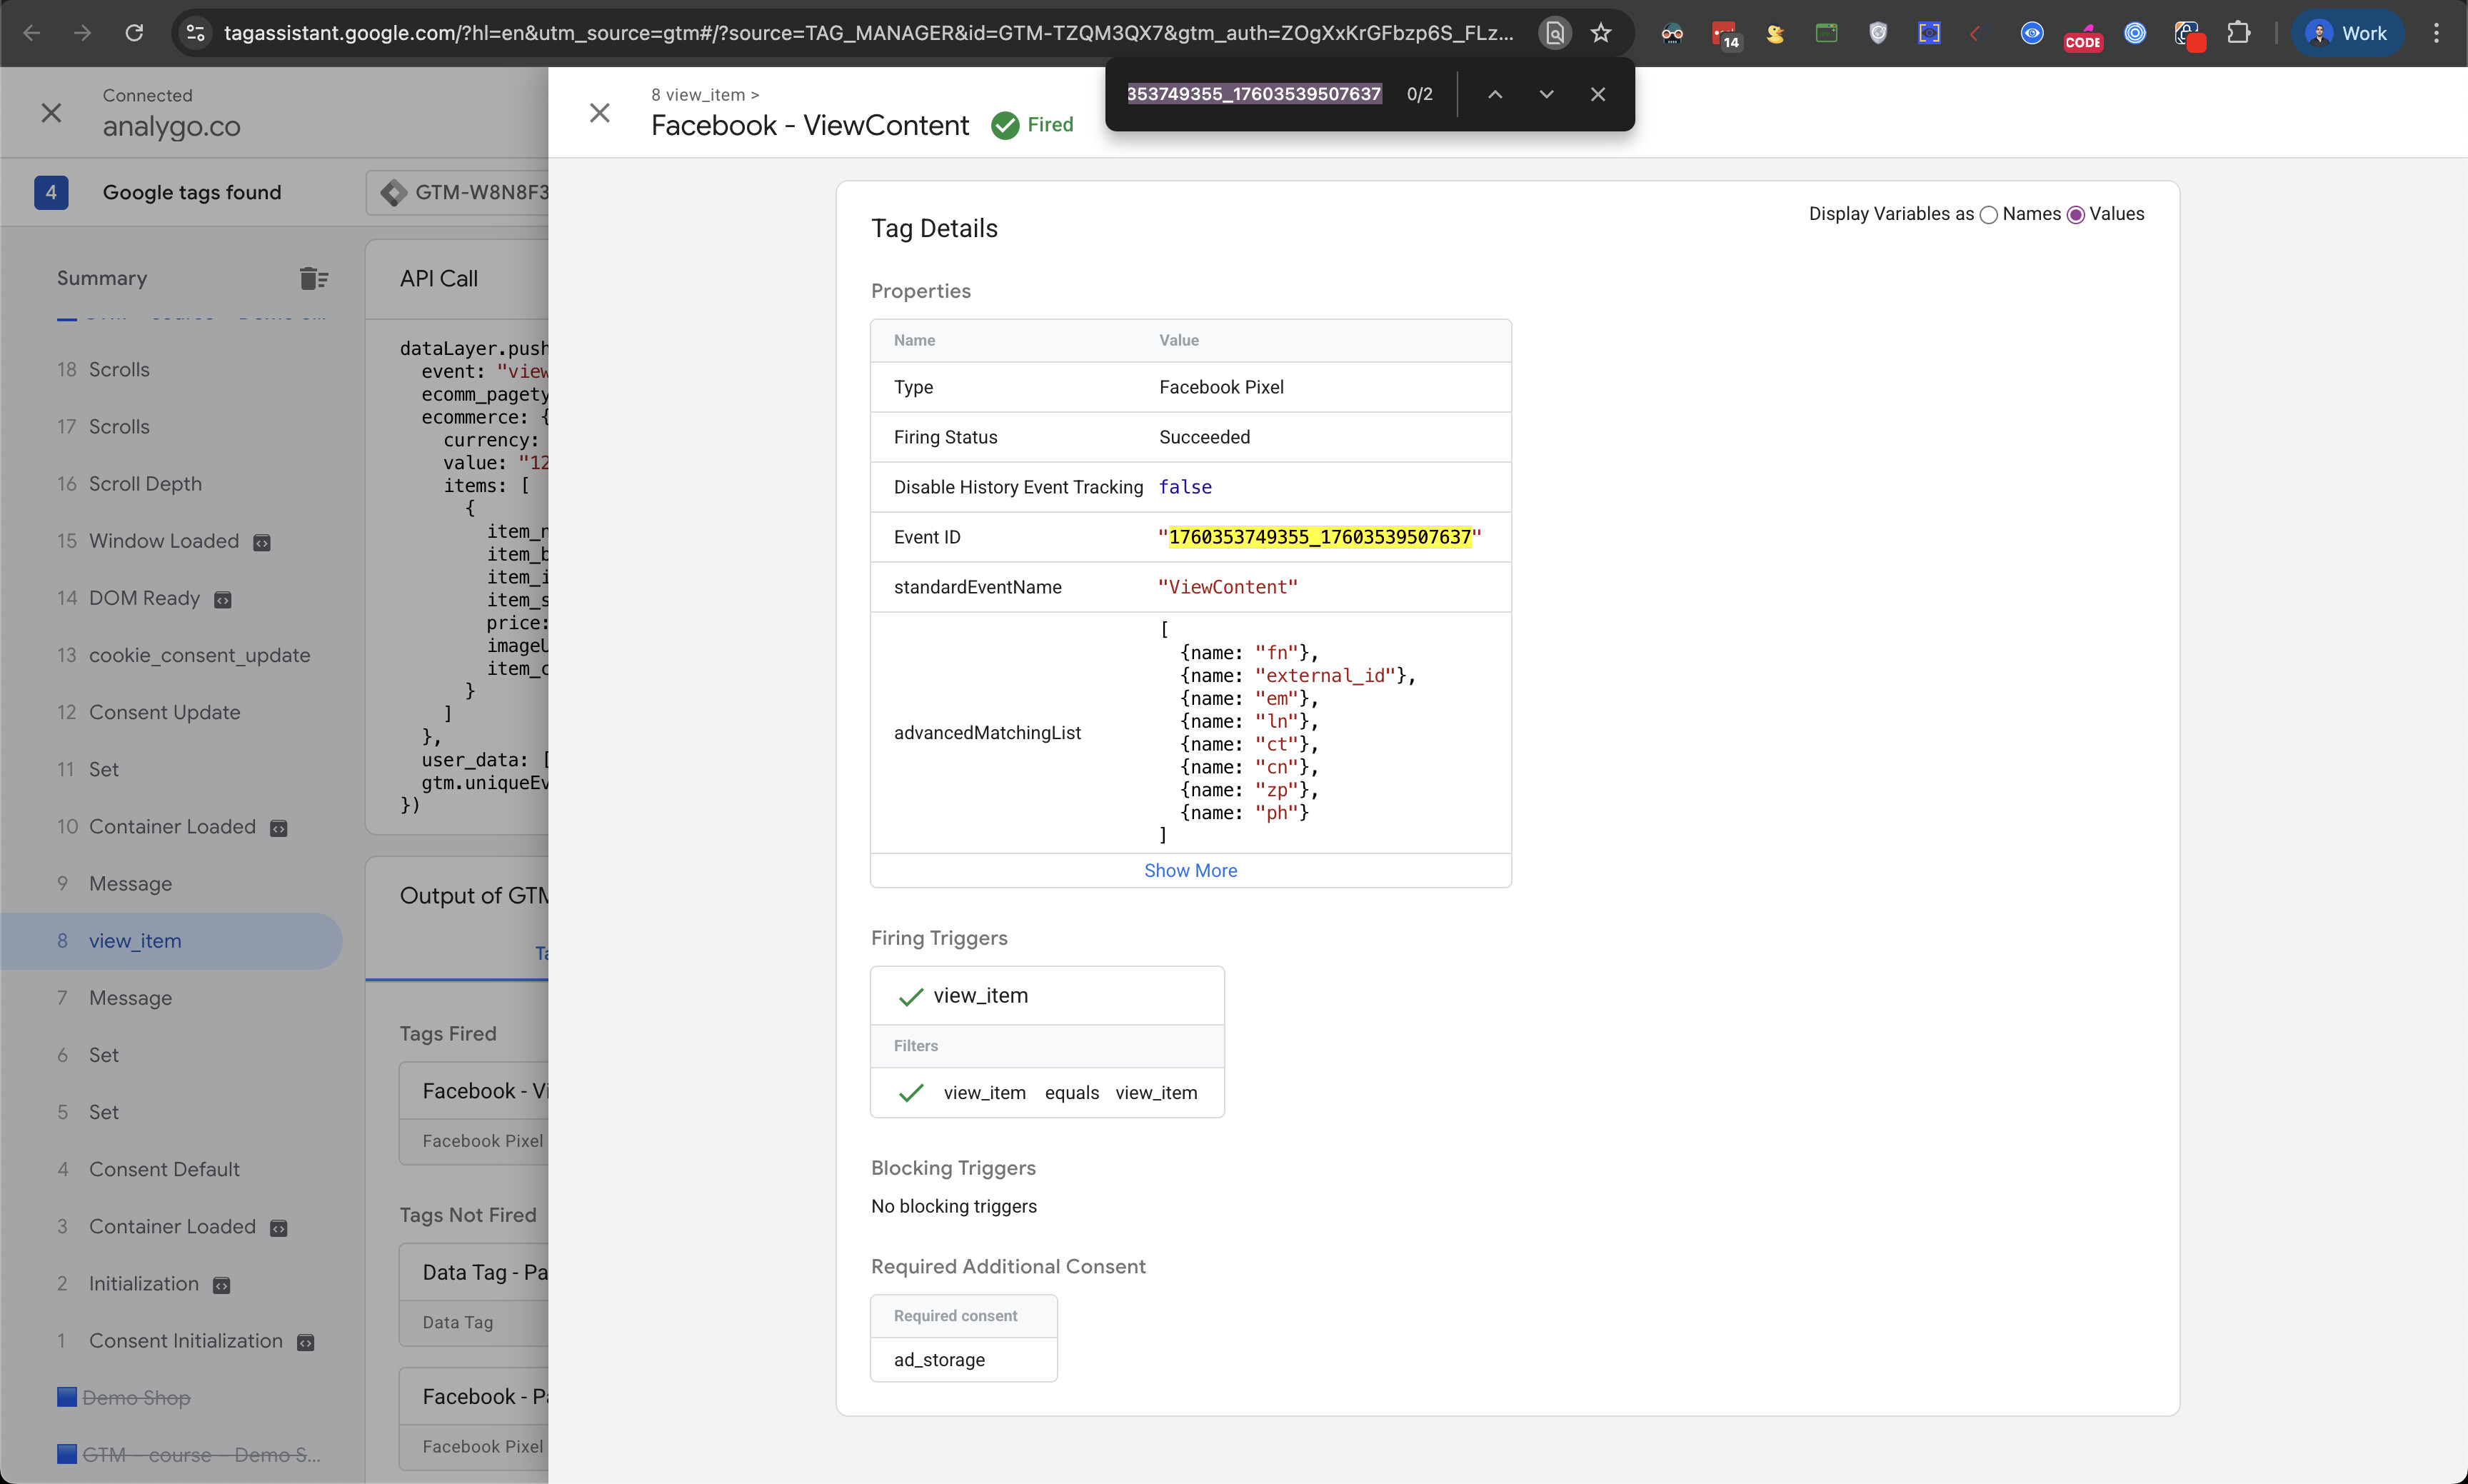
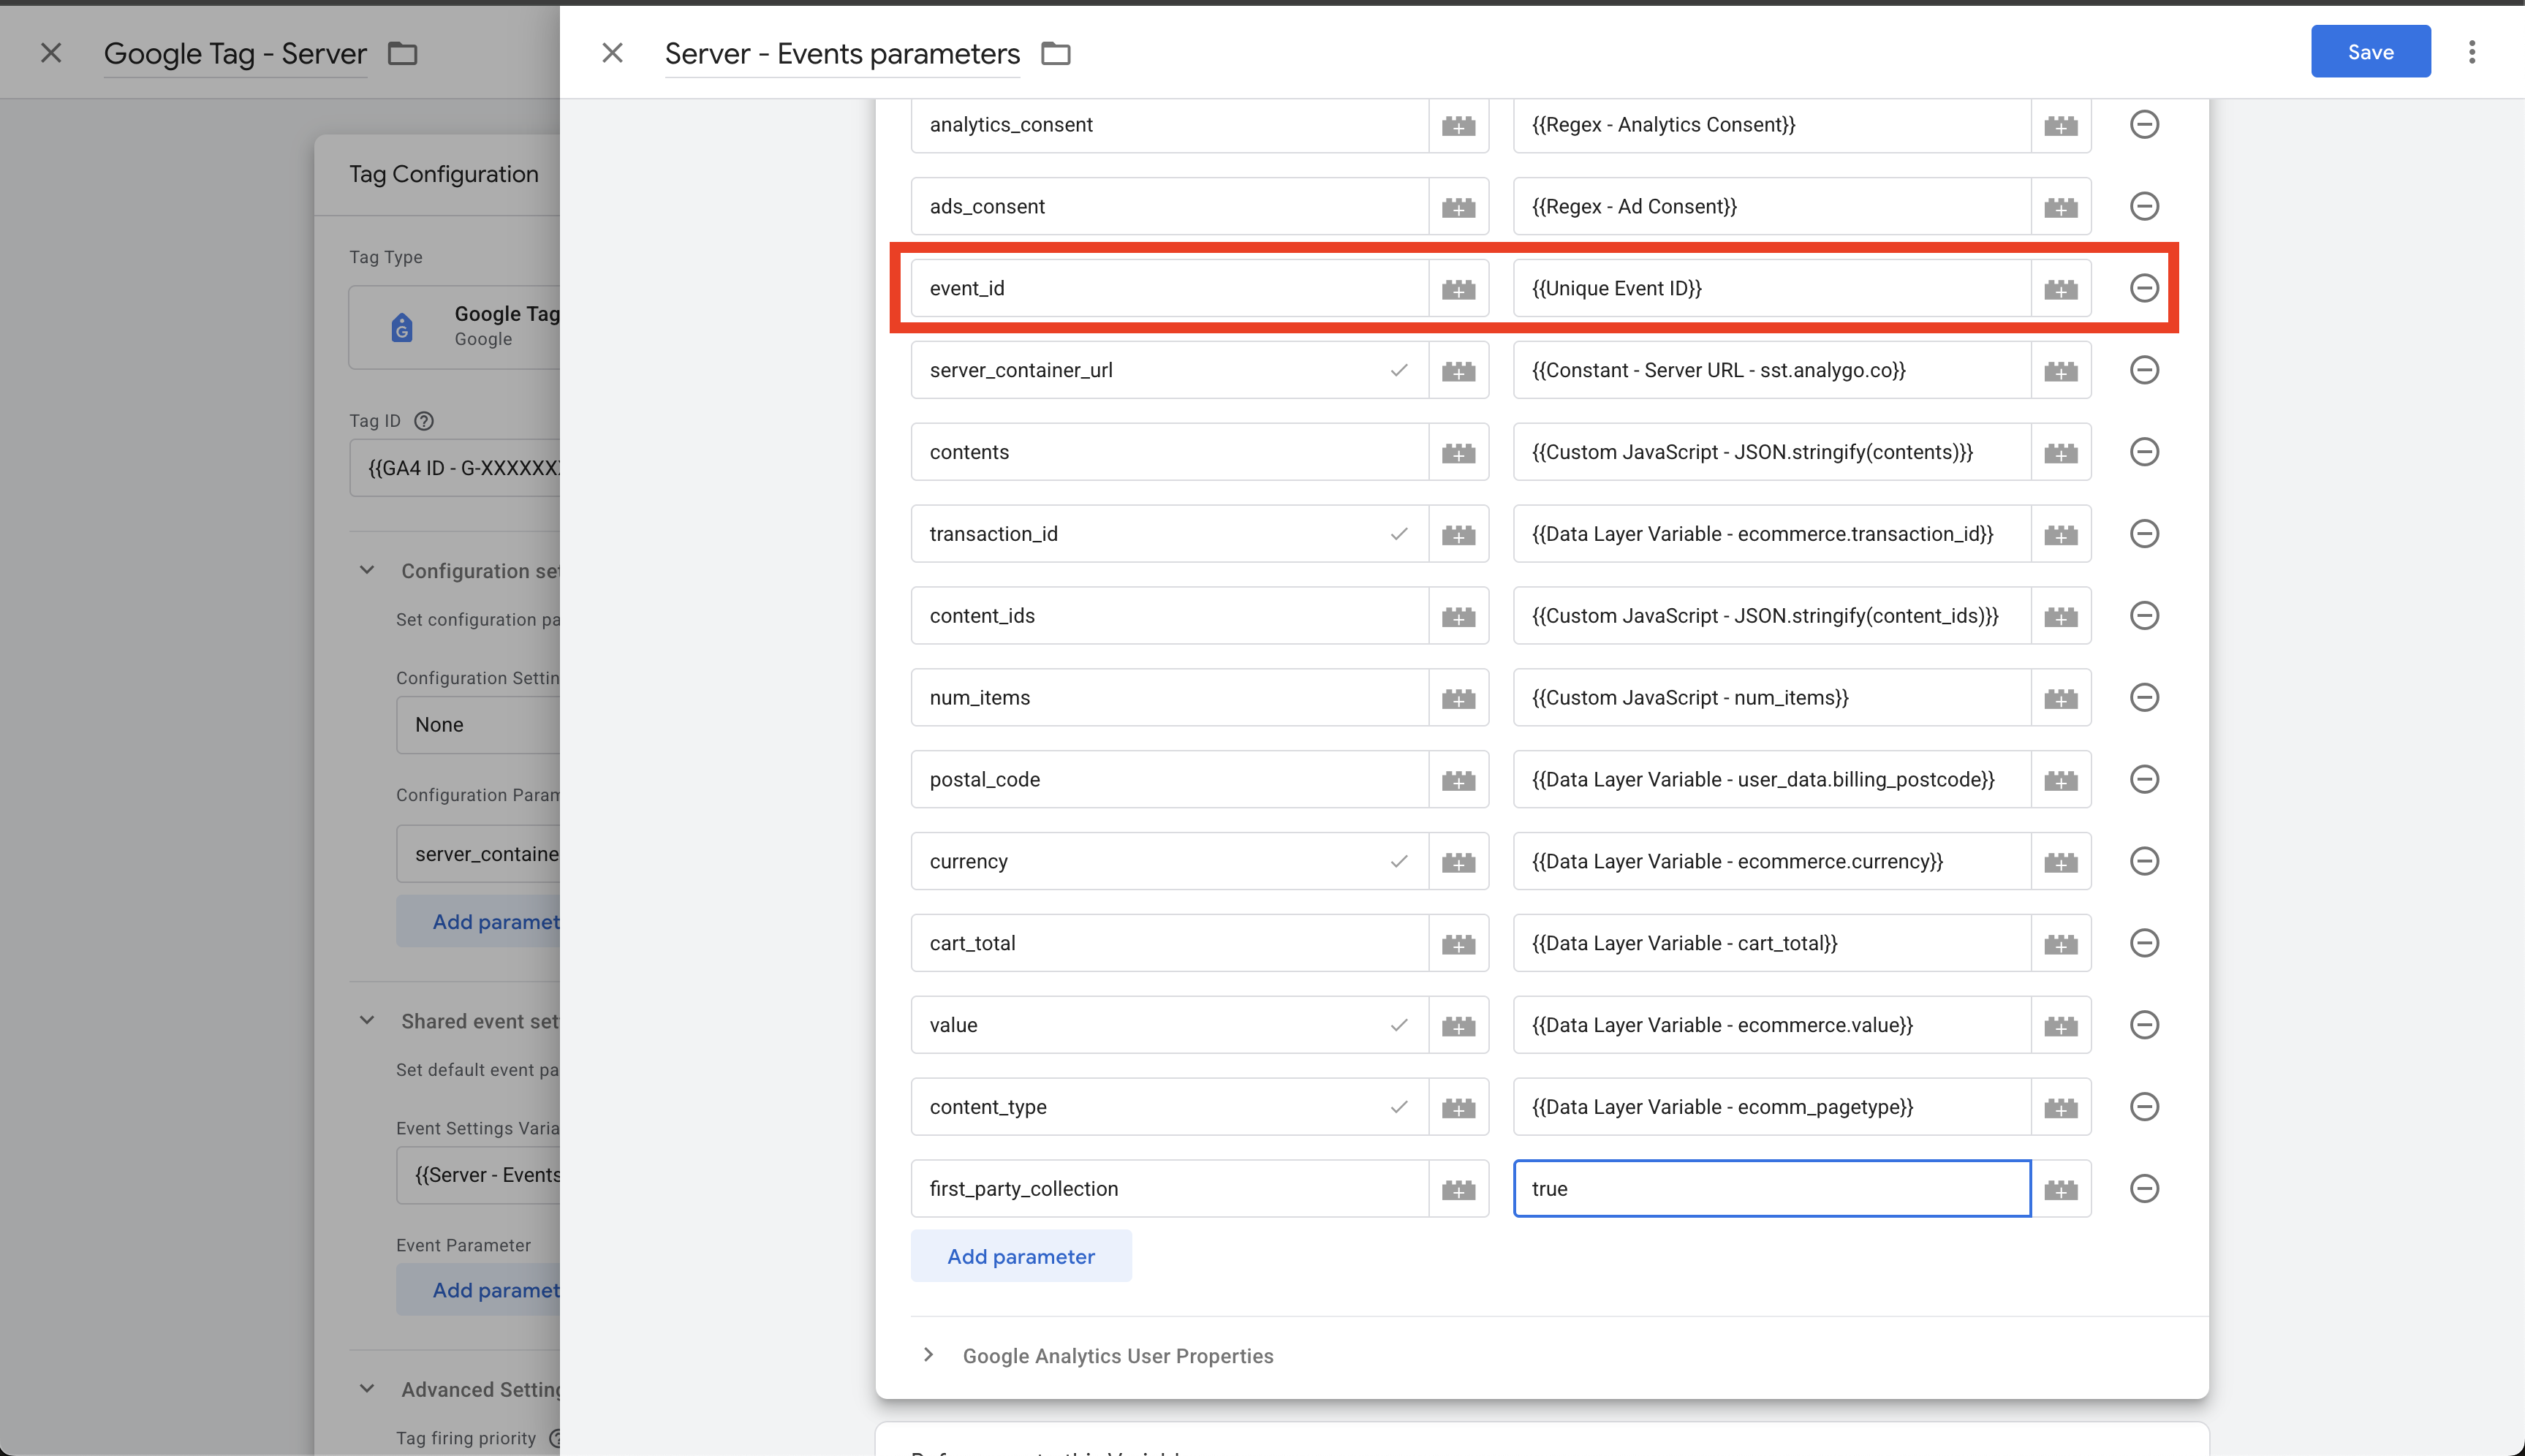
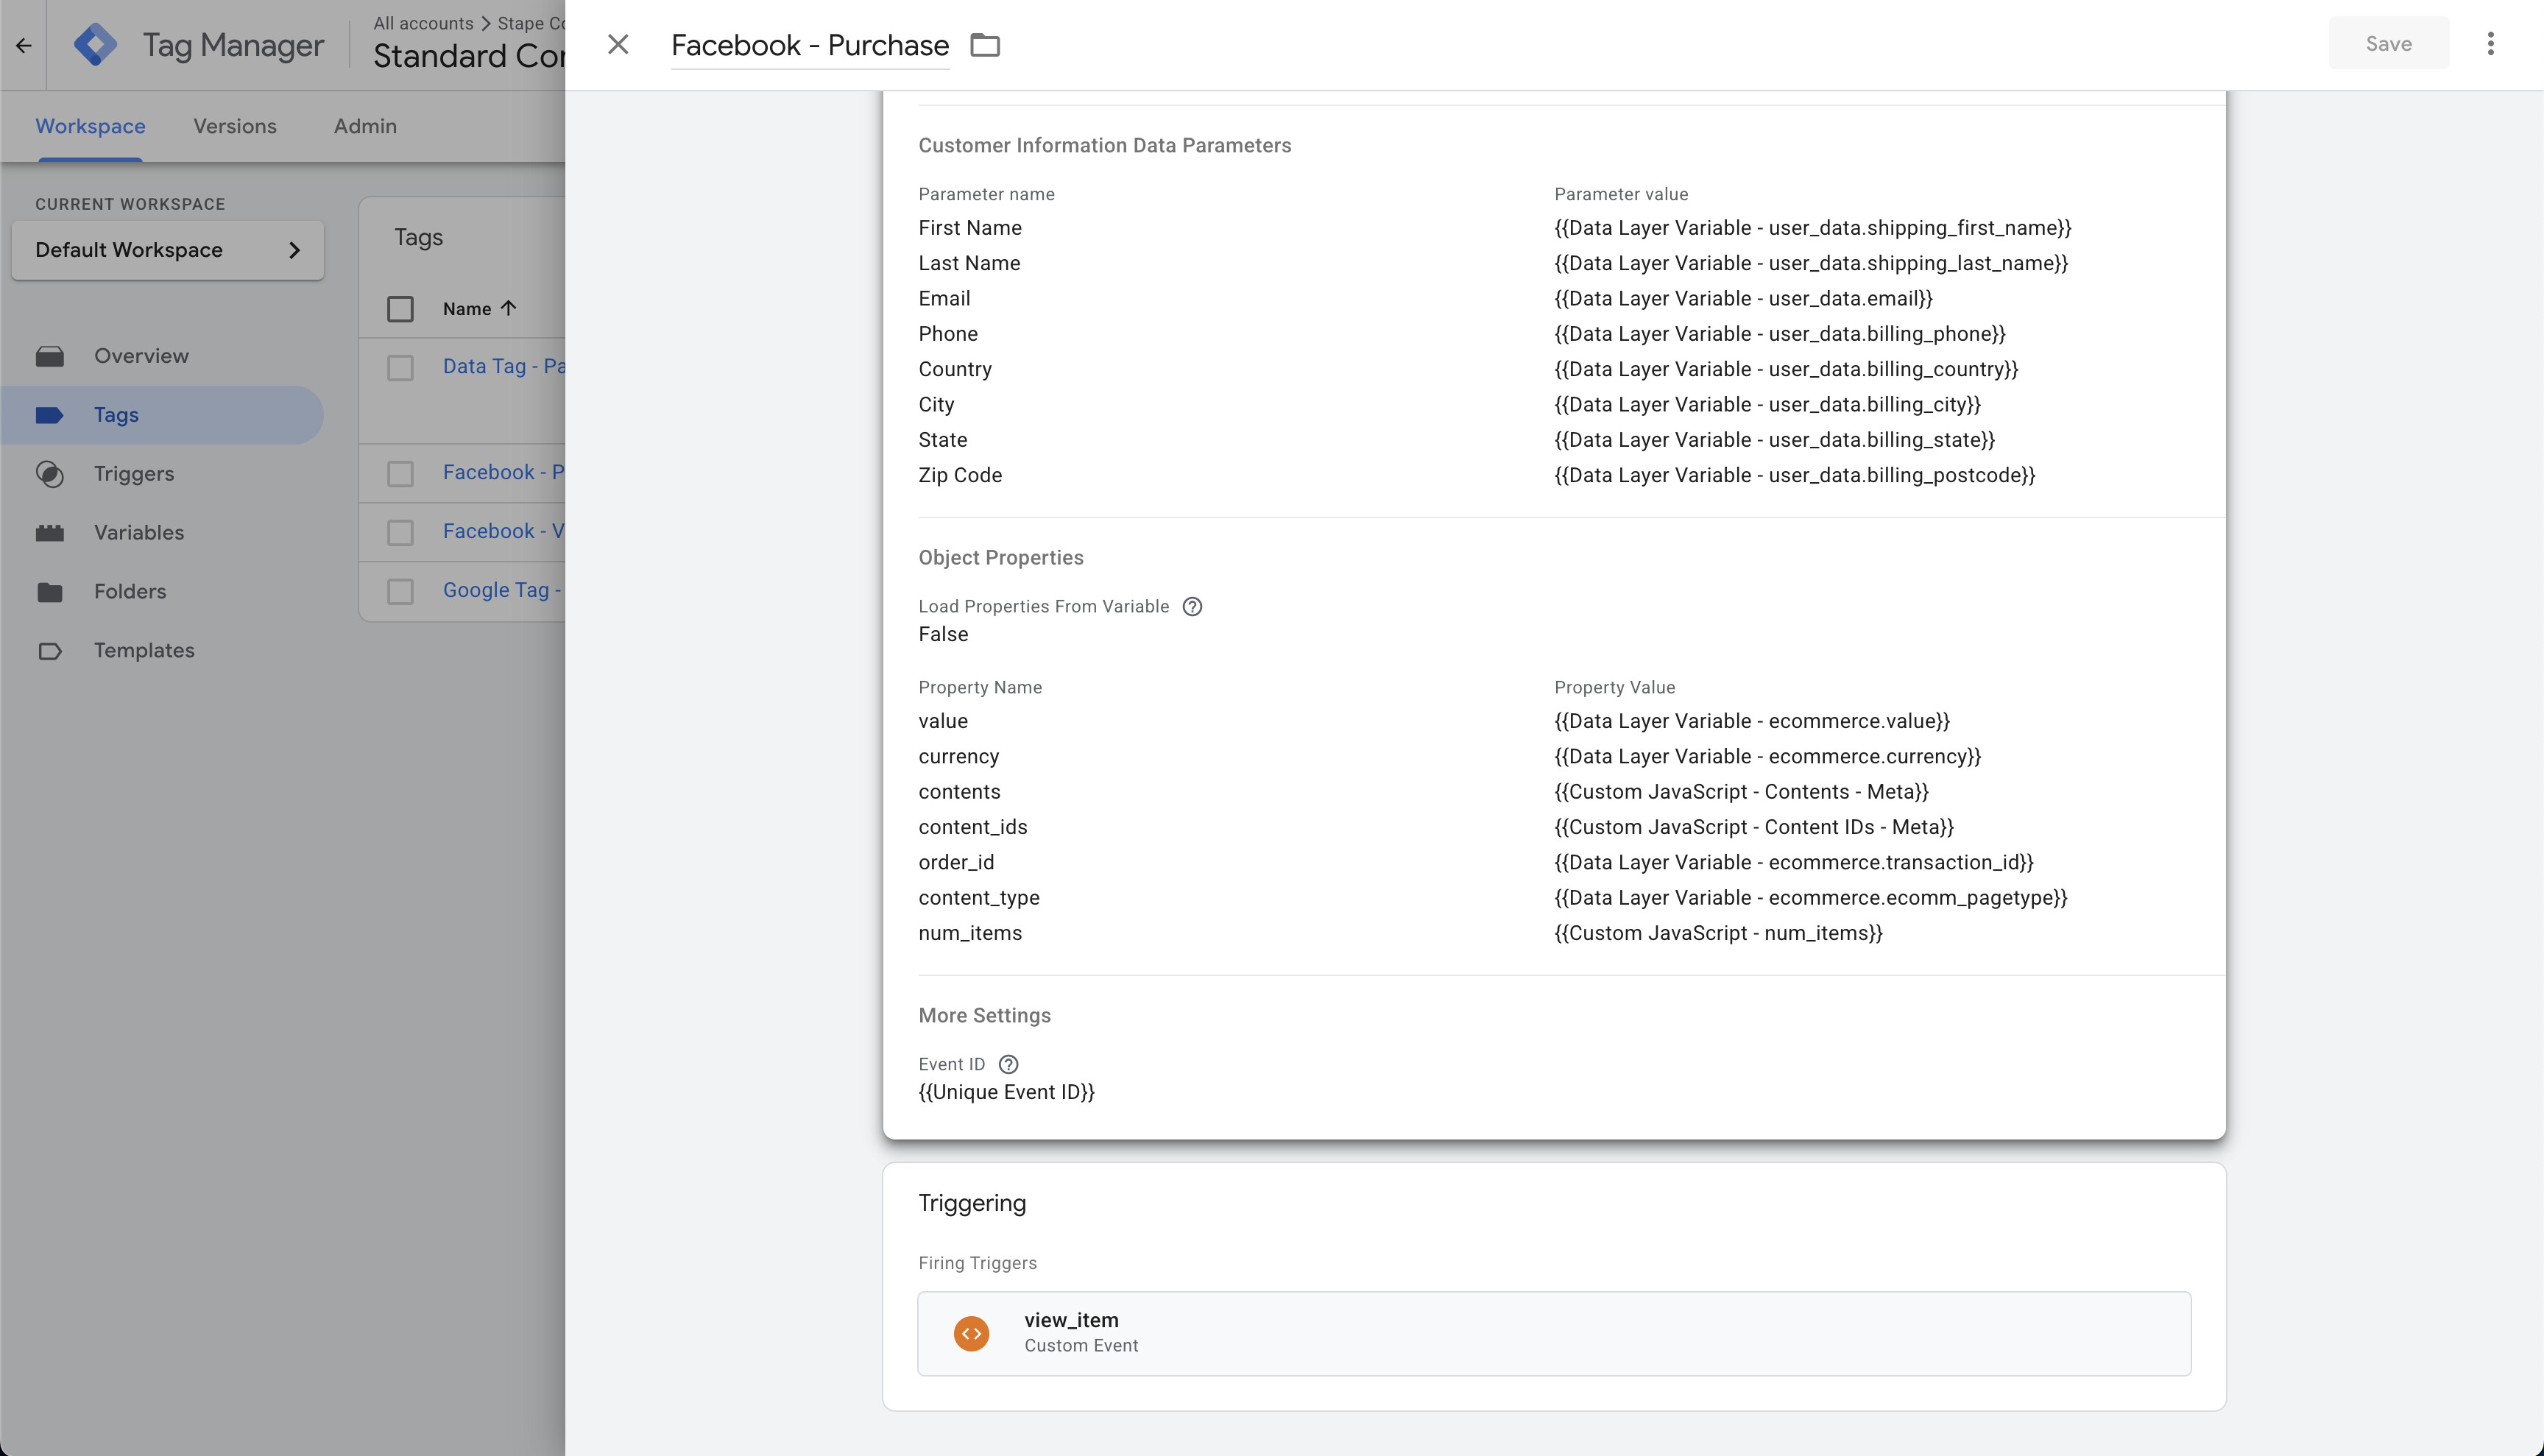
Generate and attach a unique event ID per fired event
The event ID is a unique identifier that allows Facebook to deduplicate events sent from multiple sources (browser Pixel and server CAPI). When the same event fires from both client and server with matching event IDs, Facebook recognizes them as a single conversion rather than counting them twice. This prevents inflated metrics and ensures accurate reporting.
We’ll use another template by Stape. Make sure to add it to:
- Google tag (to transfer the same ID to the server for a given event)
- Facebook browser pixel
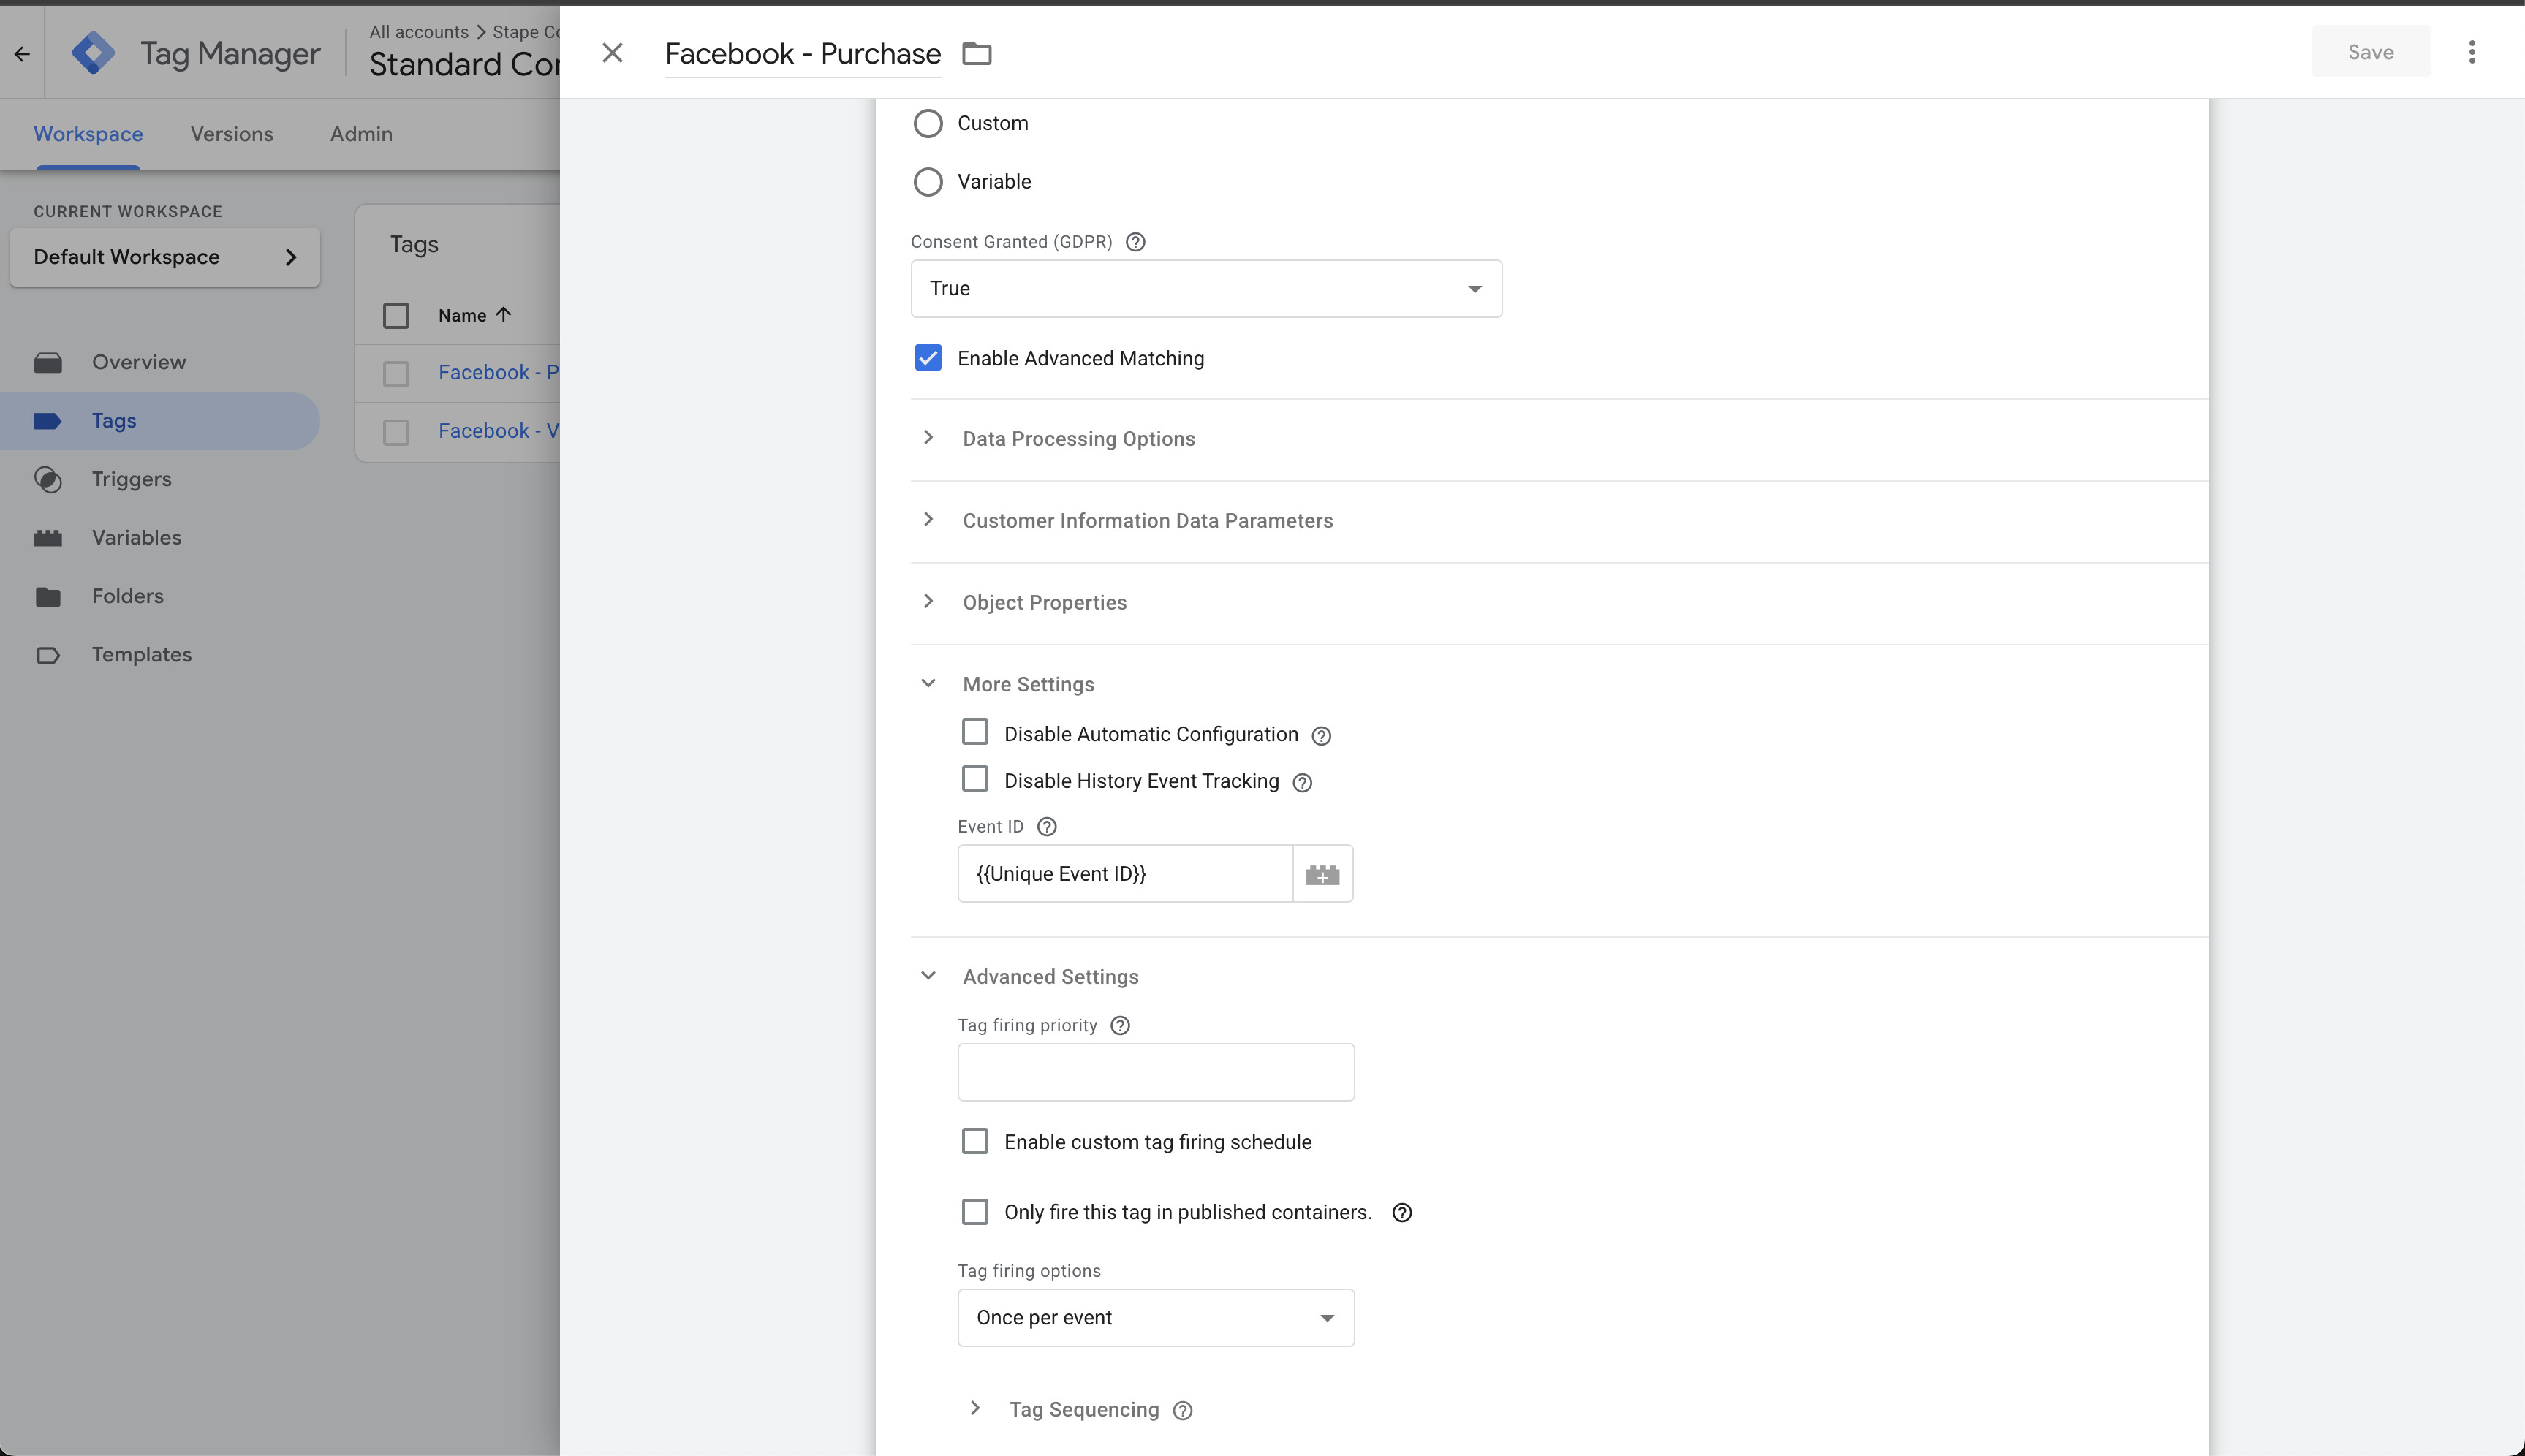
Add Facebook Pixel events (client)
You can add any event on the browser side as long as you follow the approach we outlined.
- Access: Admin access in Business Manager that owns the Pixel. This is necessary to:
- Create a Constant for Pixel ID and reuse in tags
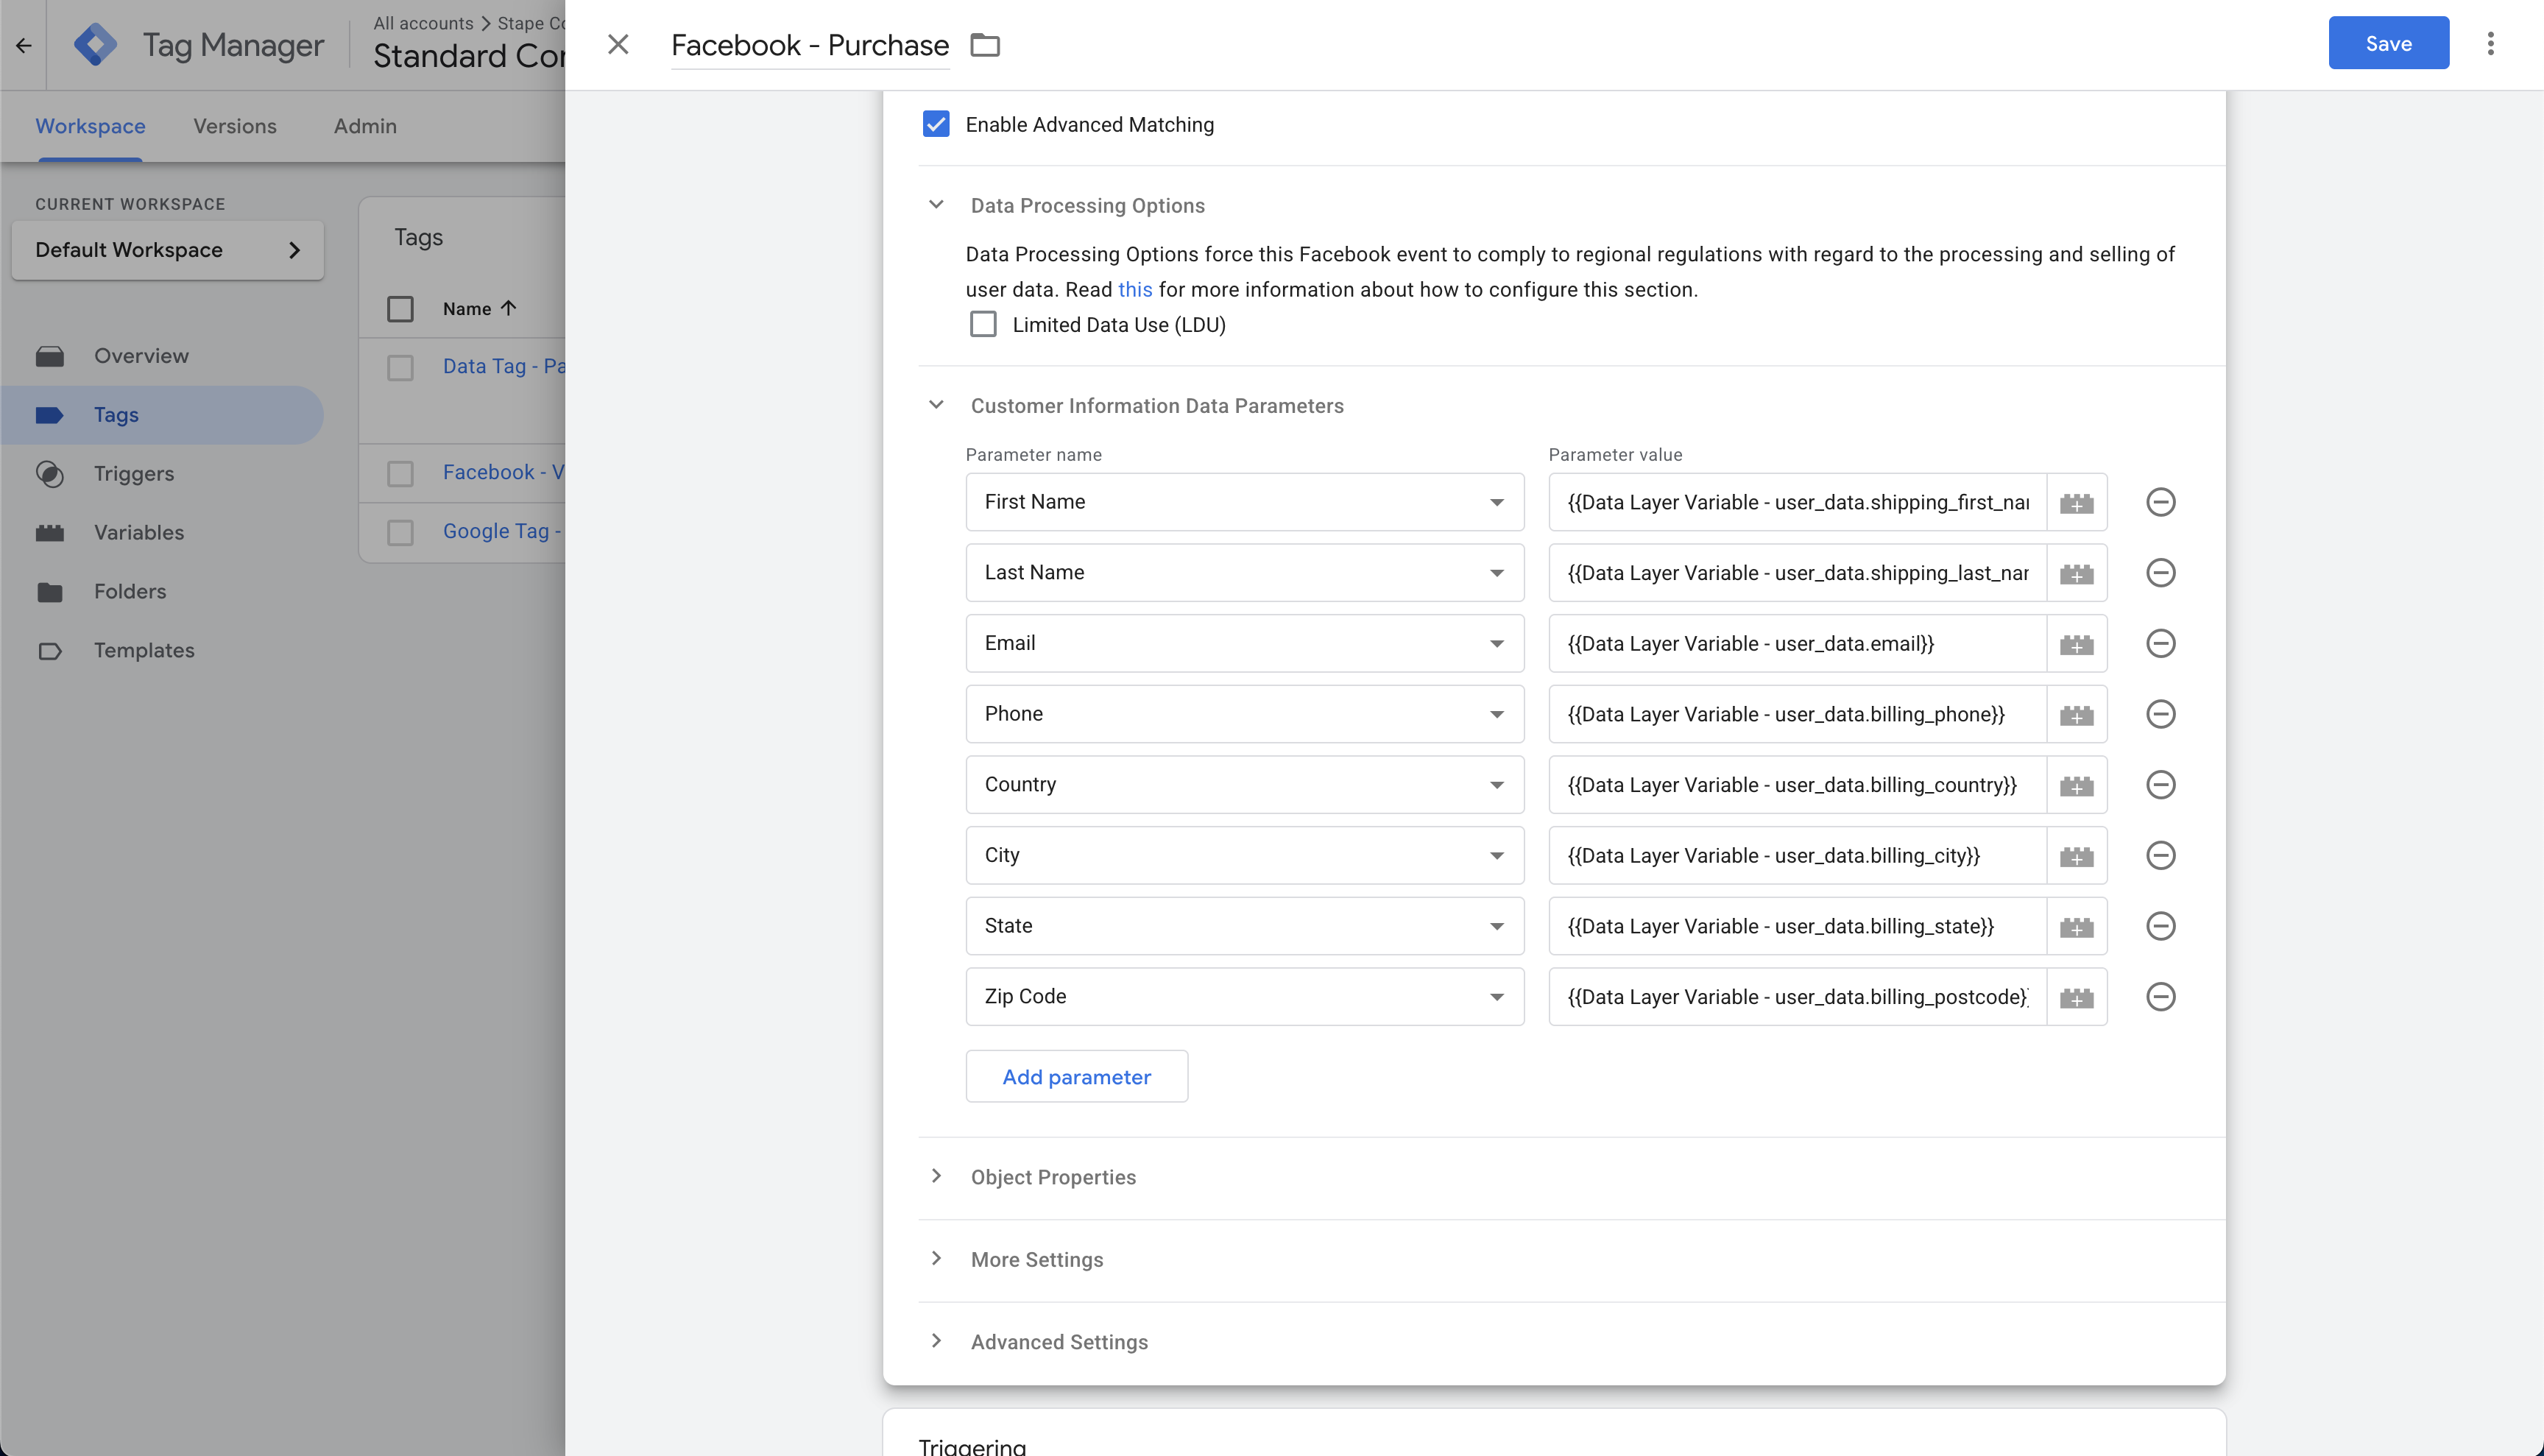
- Customer information data parameters
We can add customer data parameters on the client side as well. These will be used for advanced matching later on.
These parameters are very important if the goal is to get the most out of server-side tracking.
- Item-level data (optional)
- Create web event tags (e.g., view_item, purchase) using the shared Events Settings variable
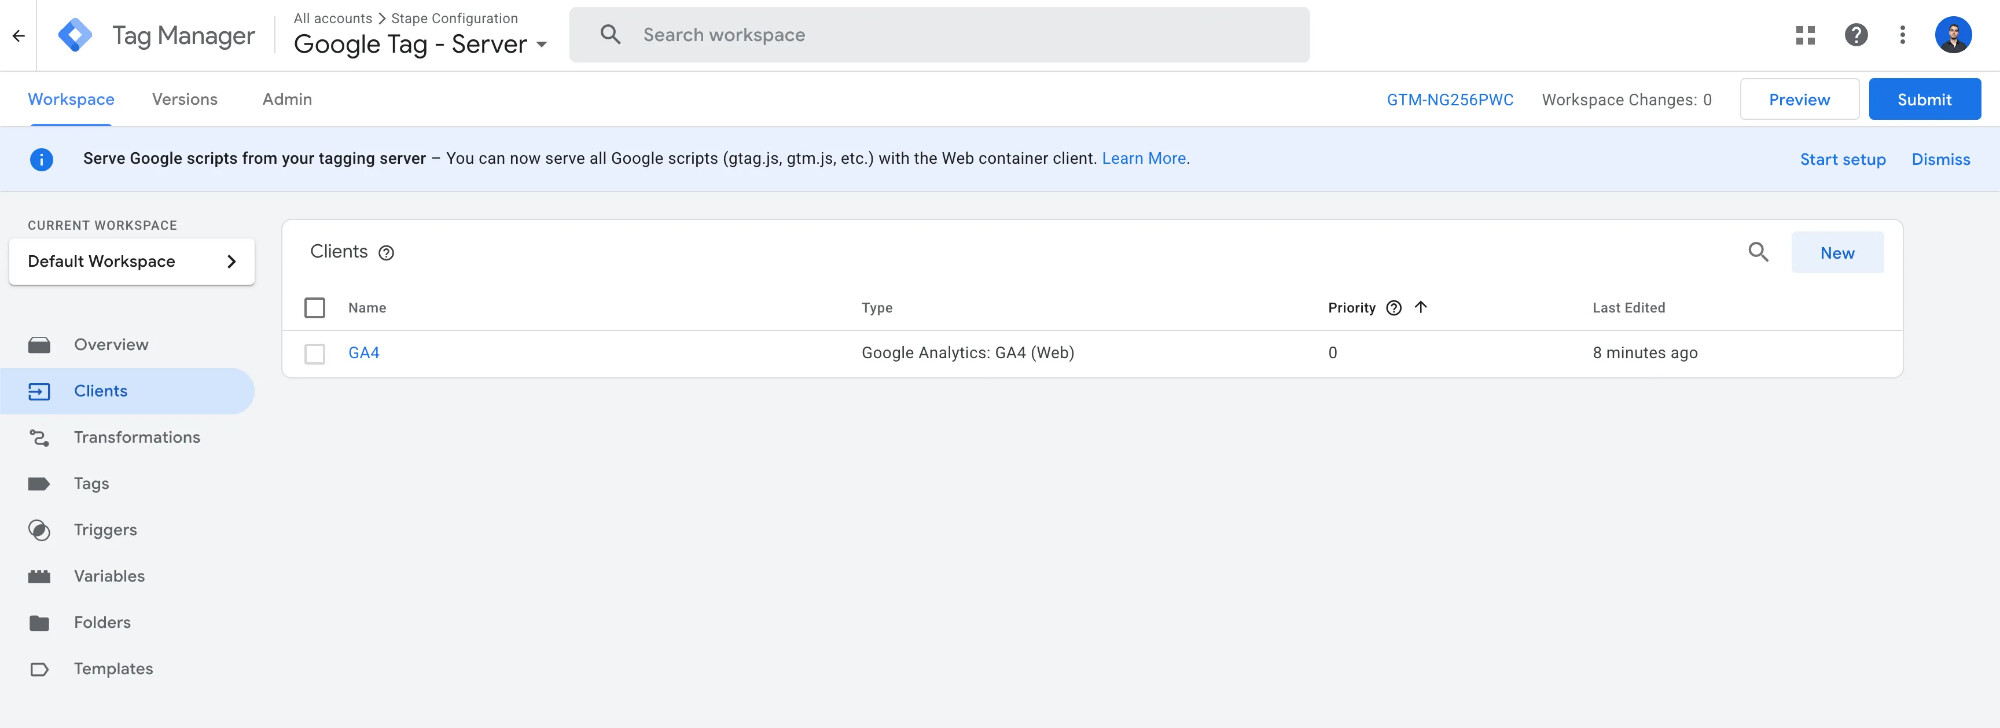
GTM Server container (sGTM)
- Get the Pixel ID you want to focus on
- Make sure you have GA4 Client available in Clients section
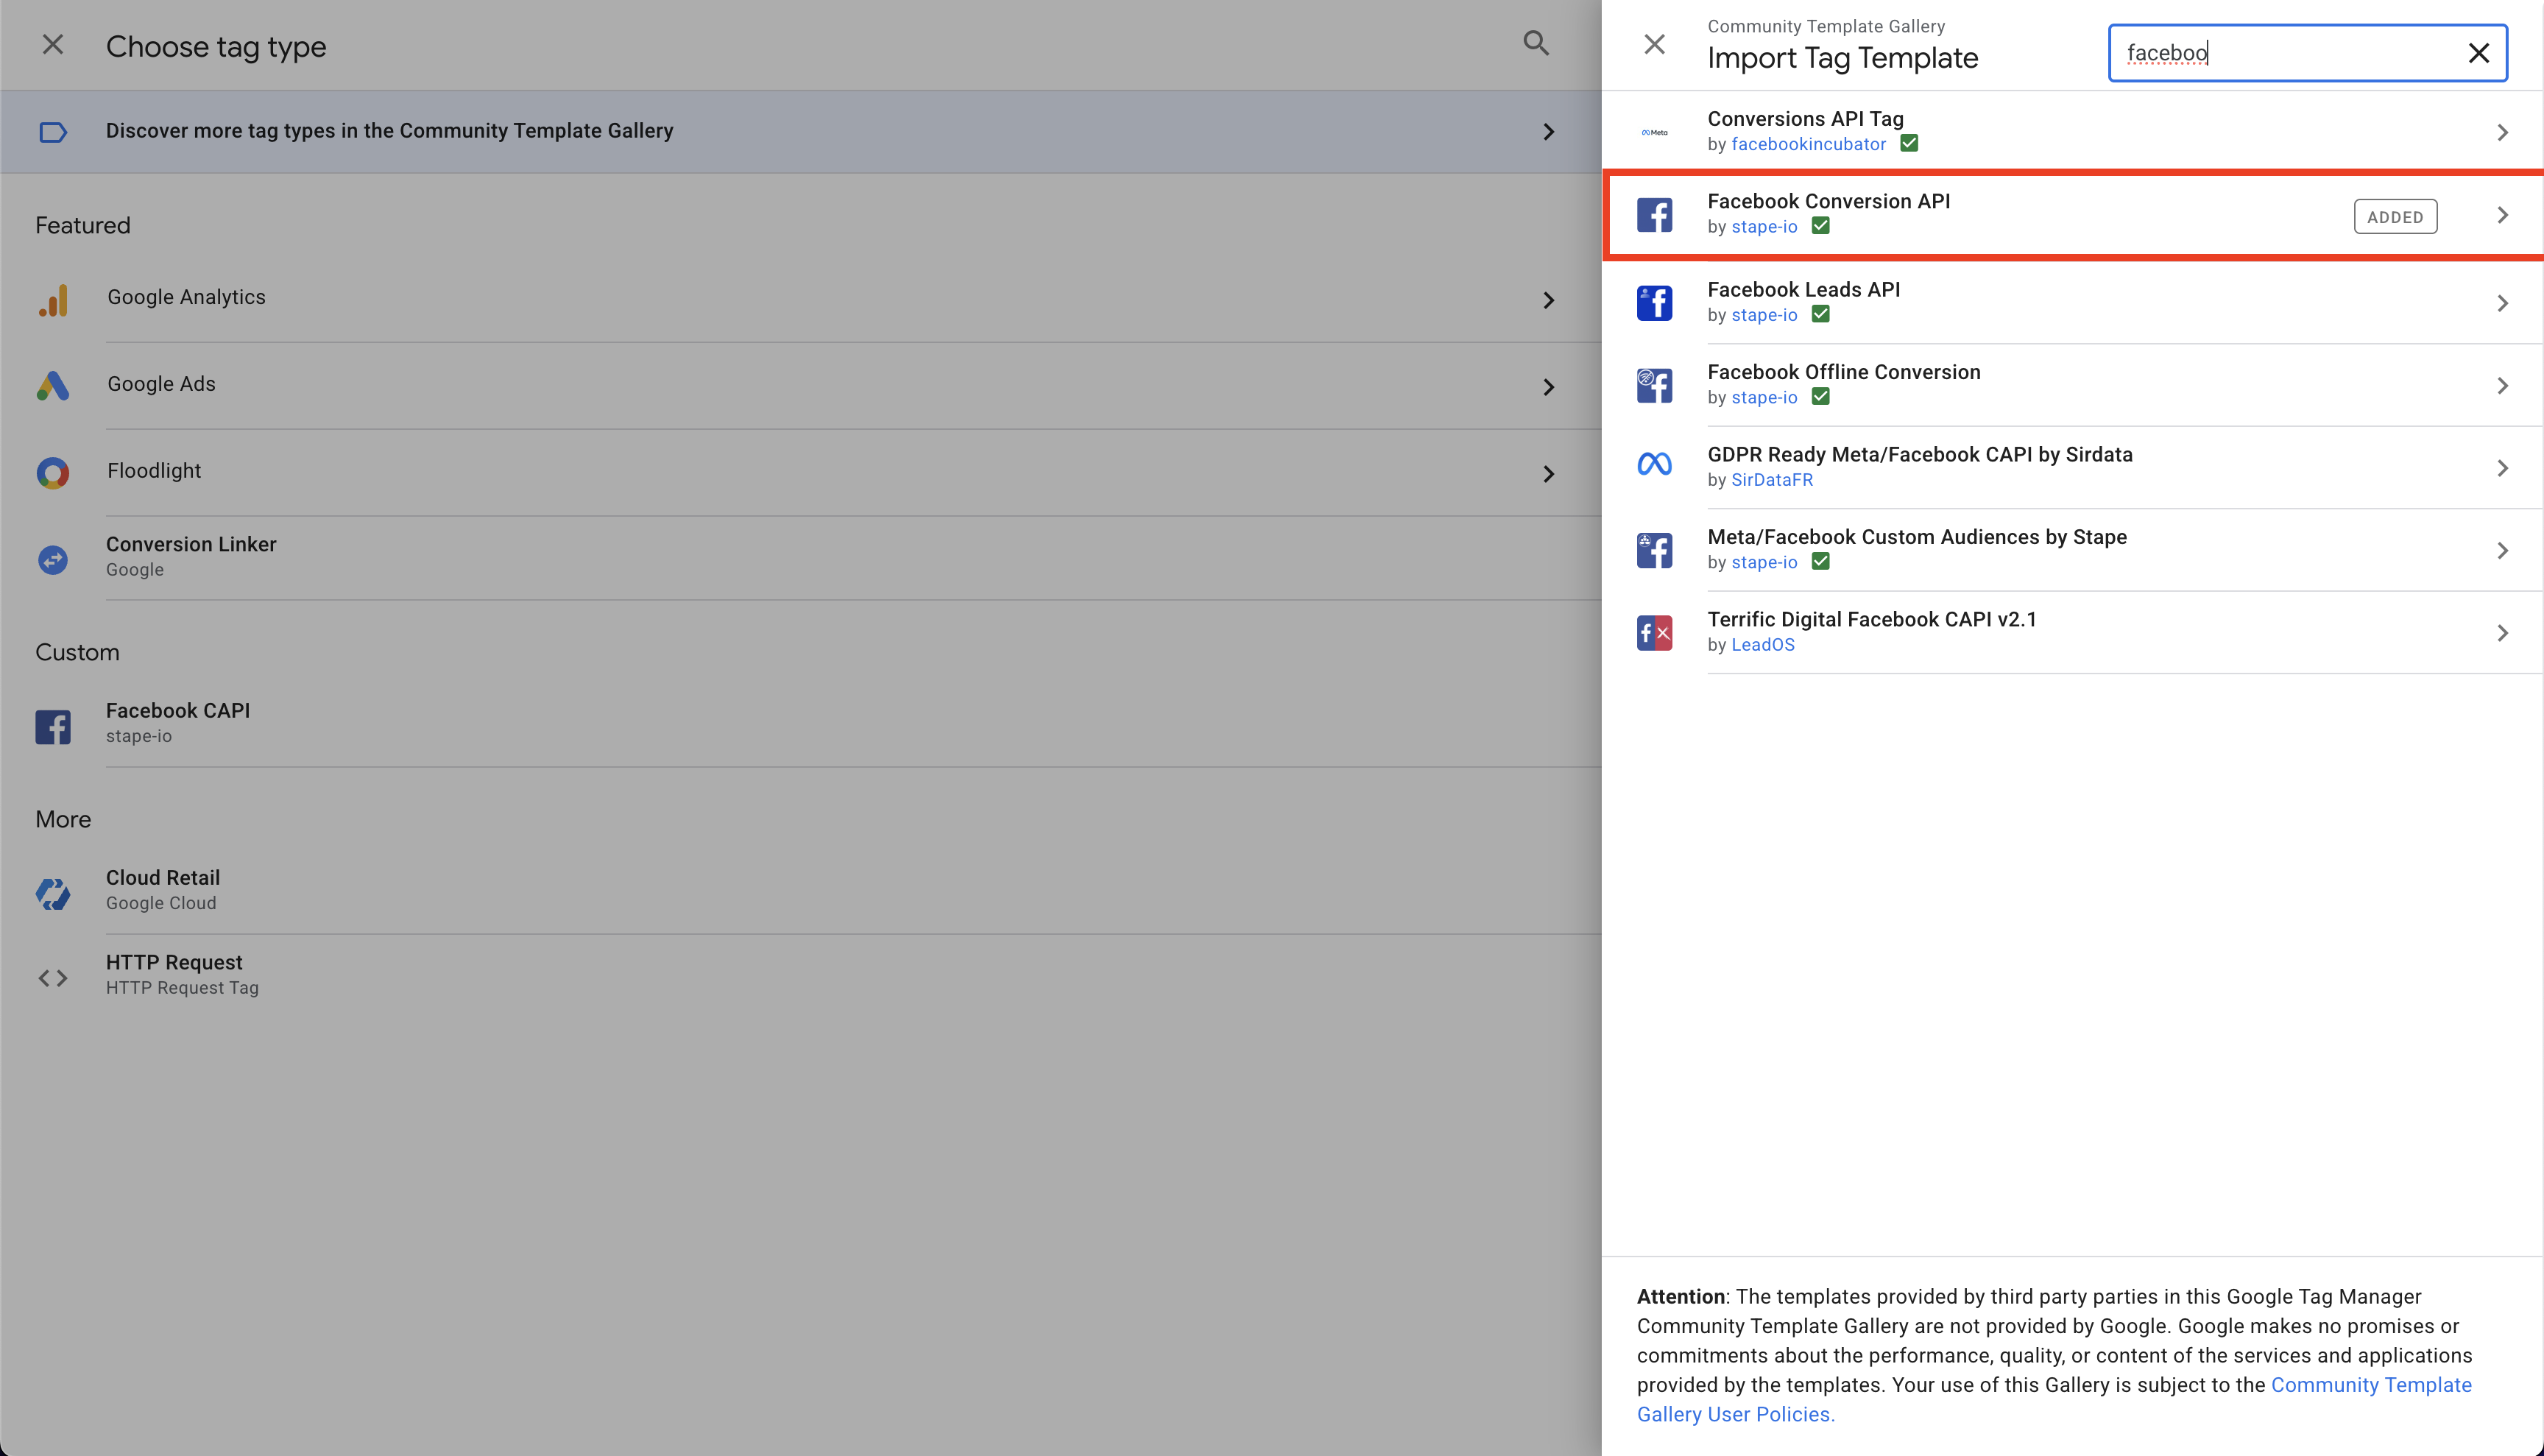
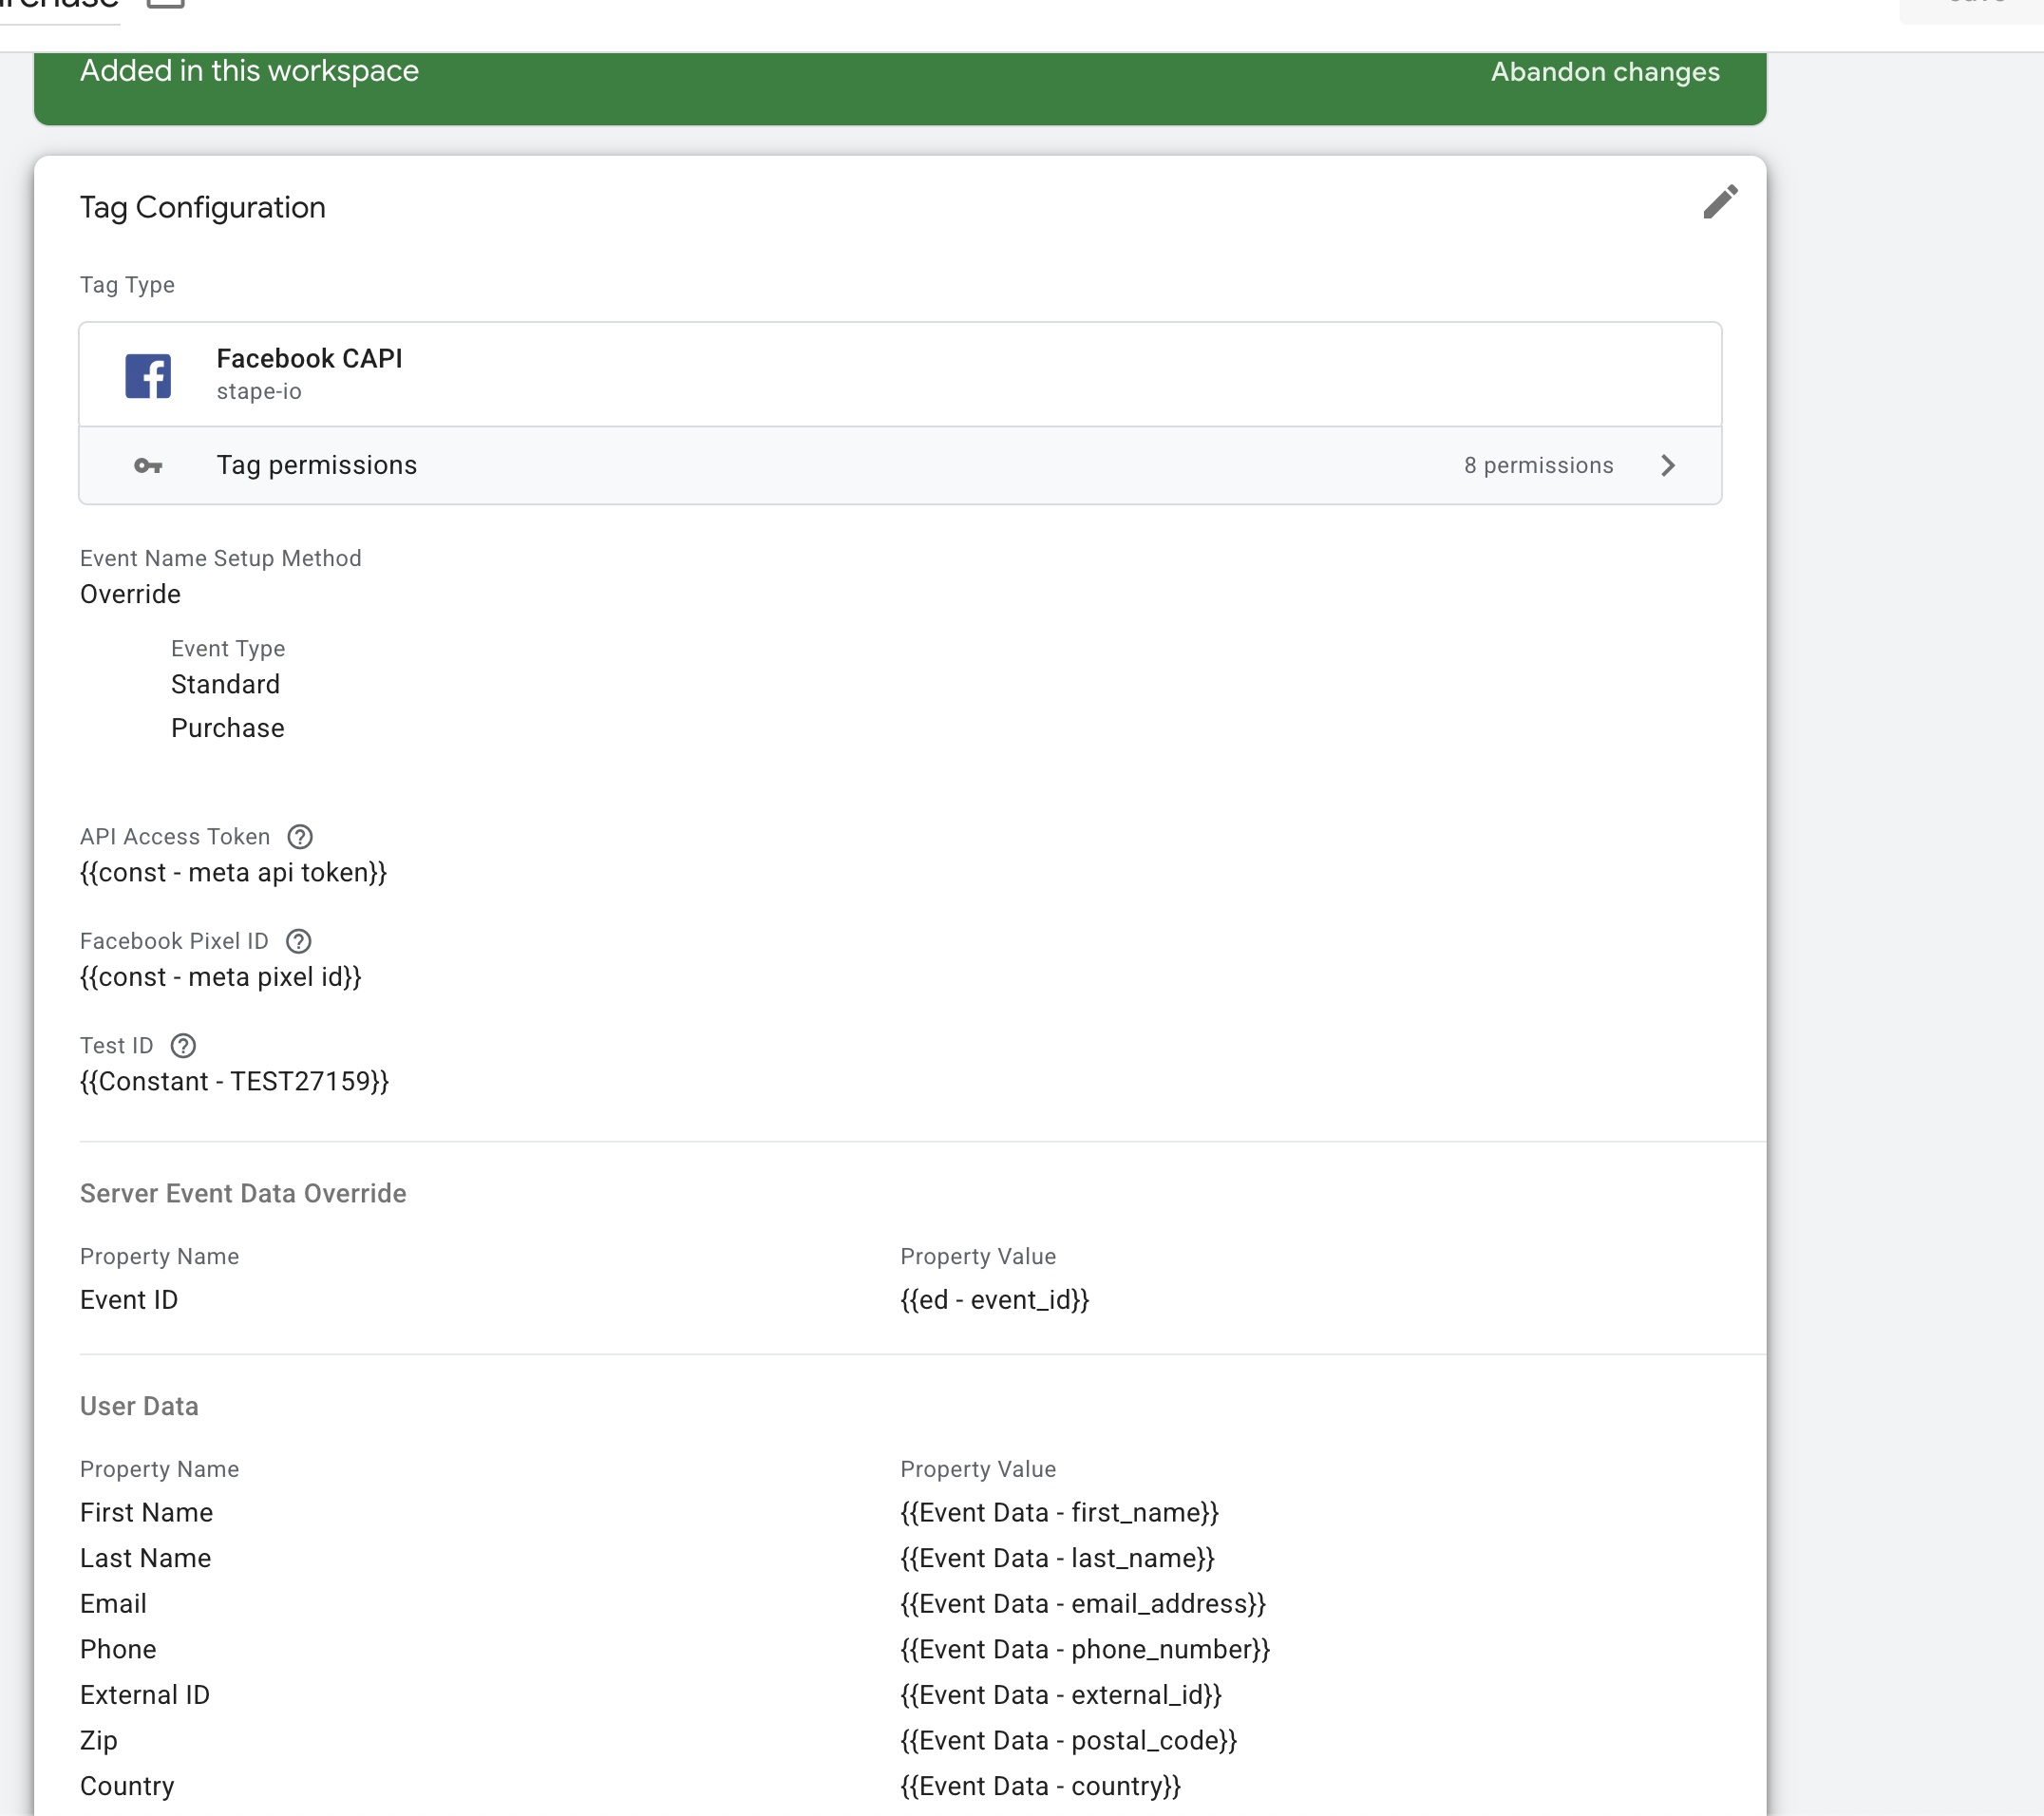
Add “Facebook Conversion API” server tag template (by Stape)
You’ll find it by navigating to the Tags section in Facebook and heading to the Tag Templates gallery.
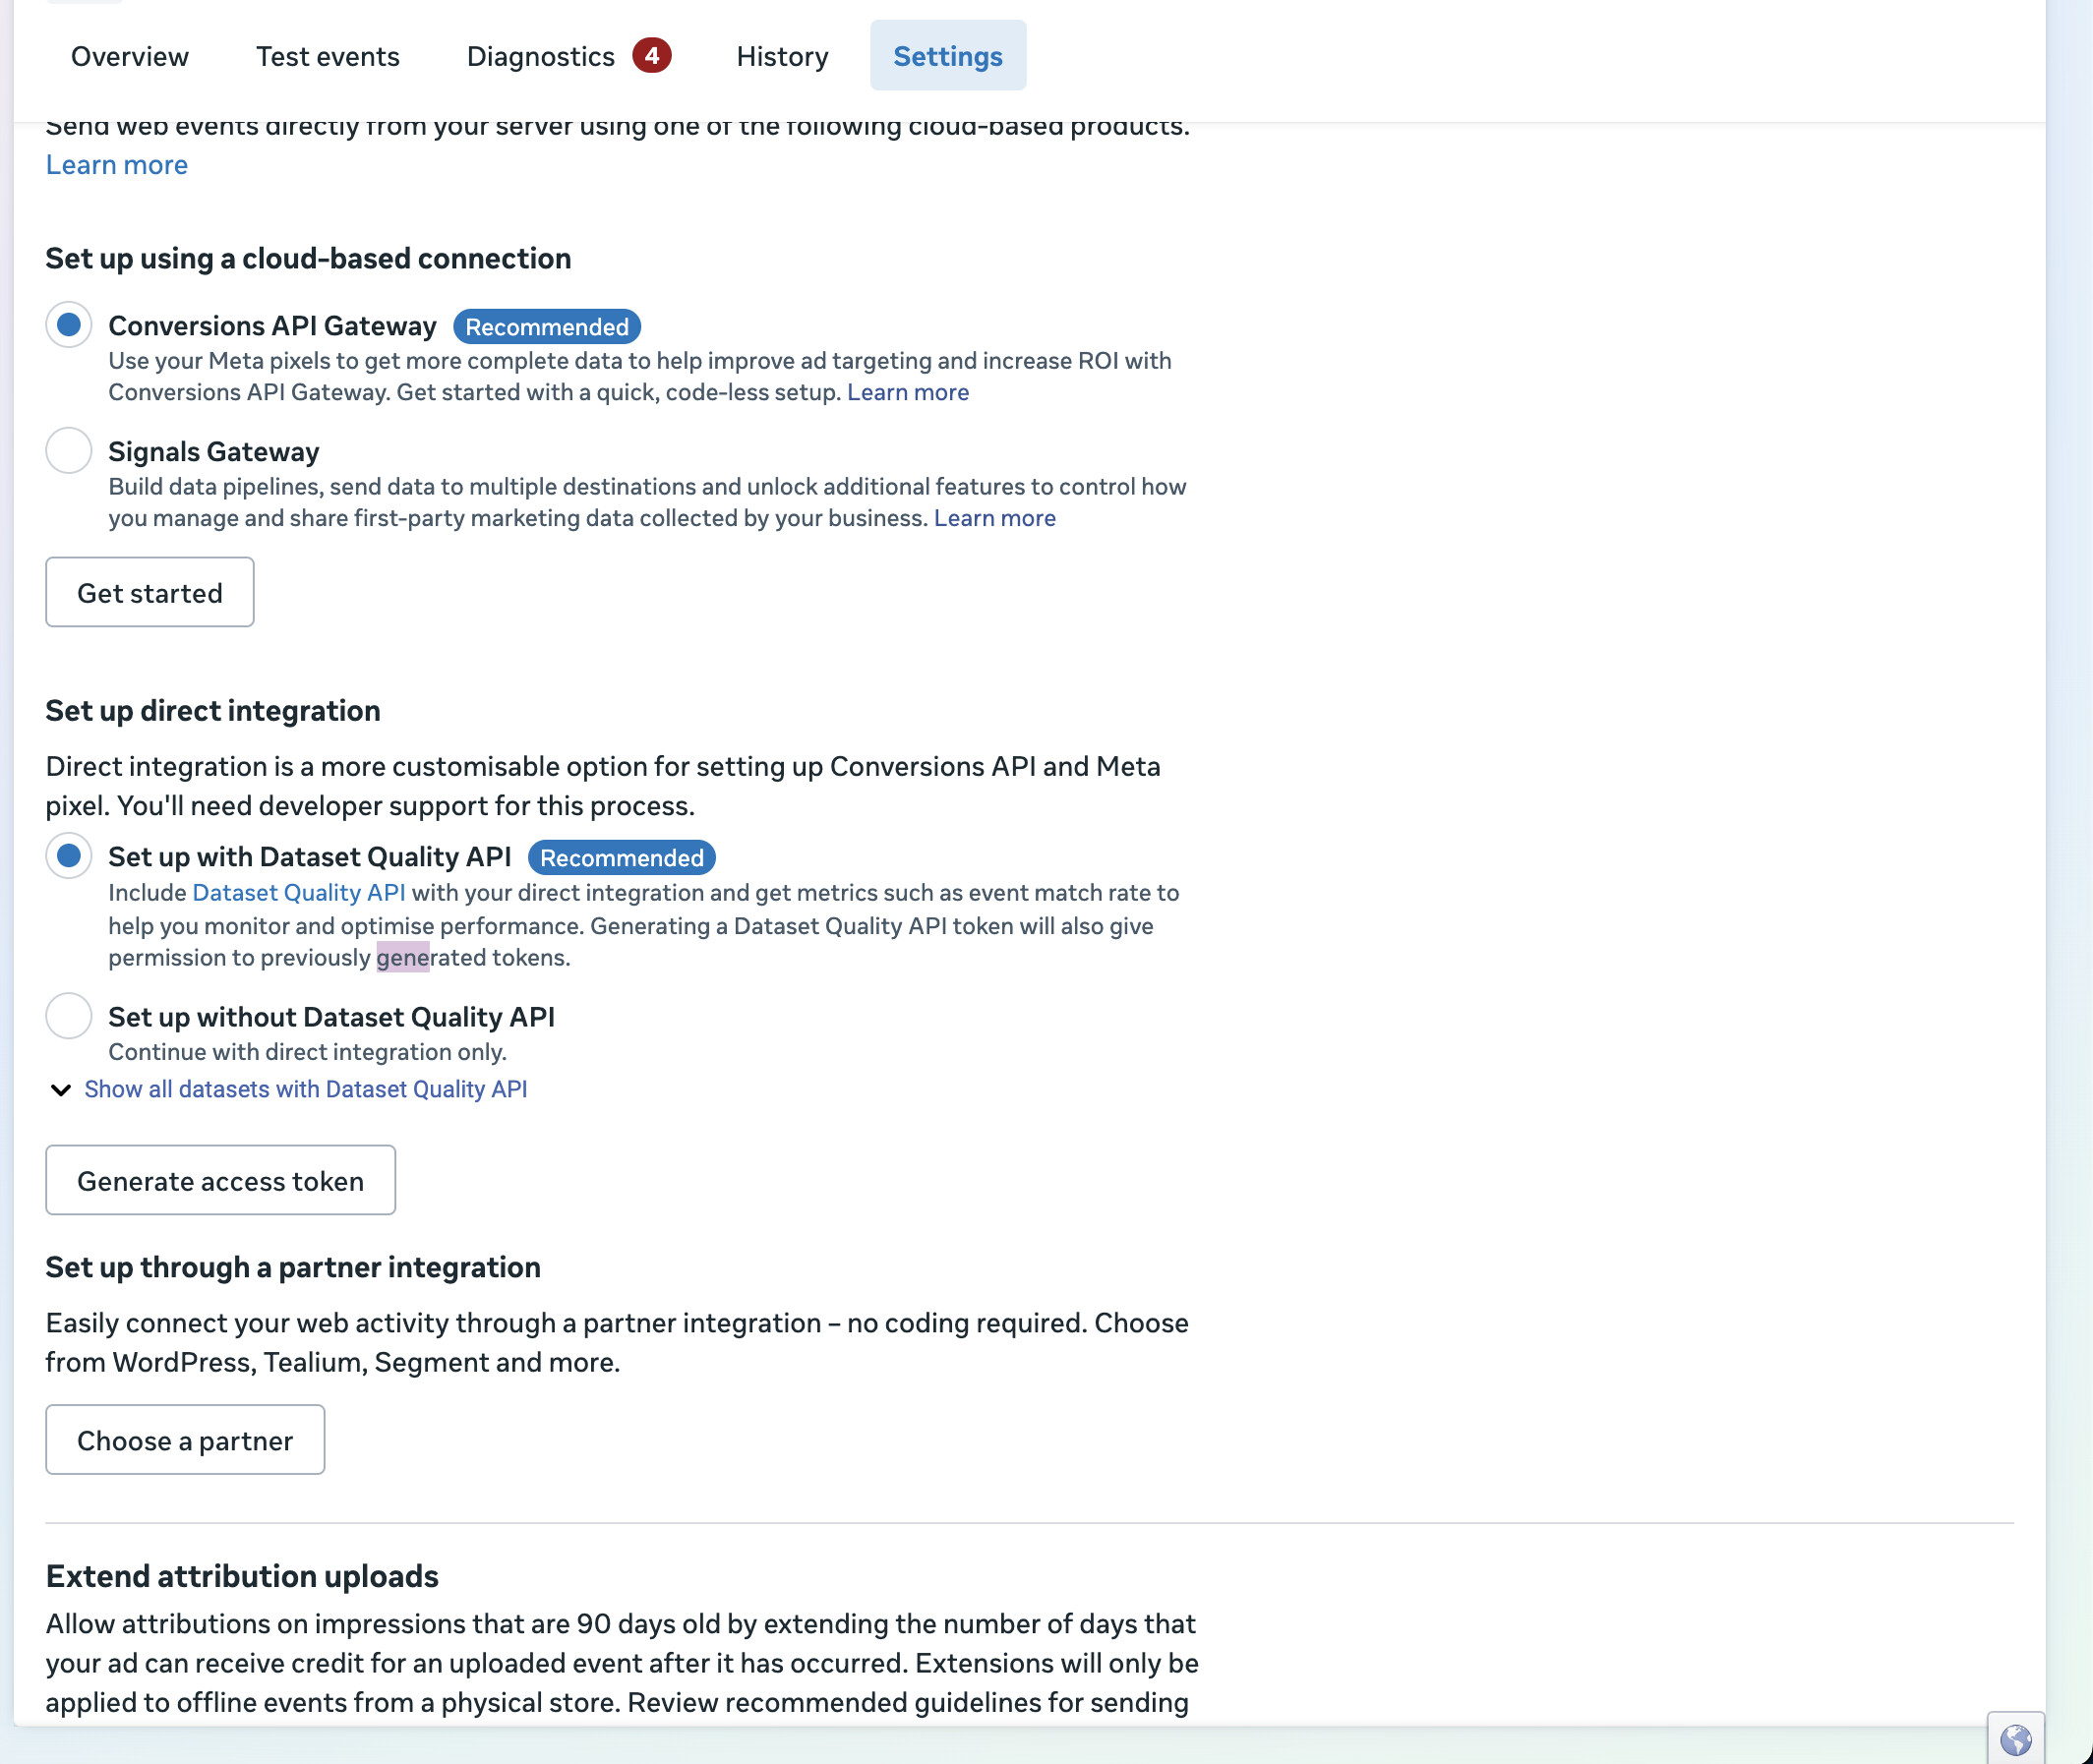
- Generate Access Token in Events Manager: it can be found in the Events Manager section. Use a constant to store it once you go back to sGTM.
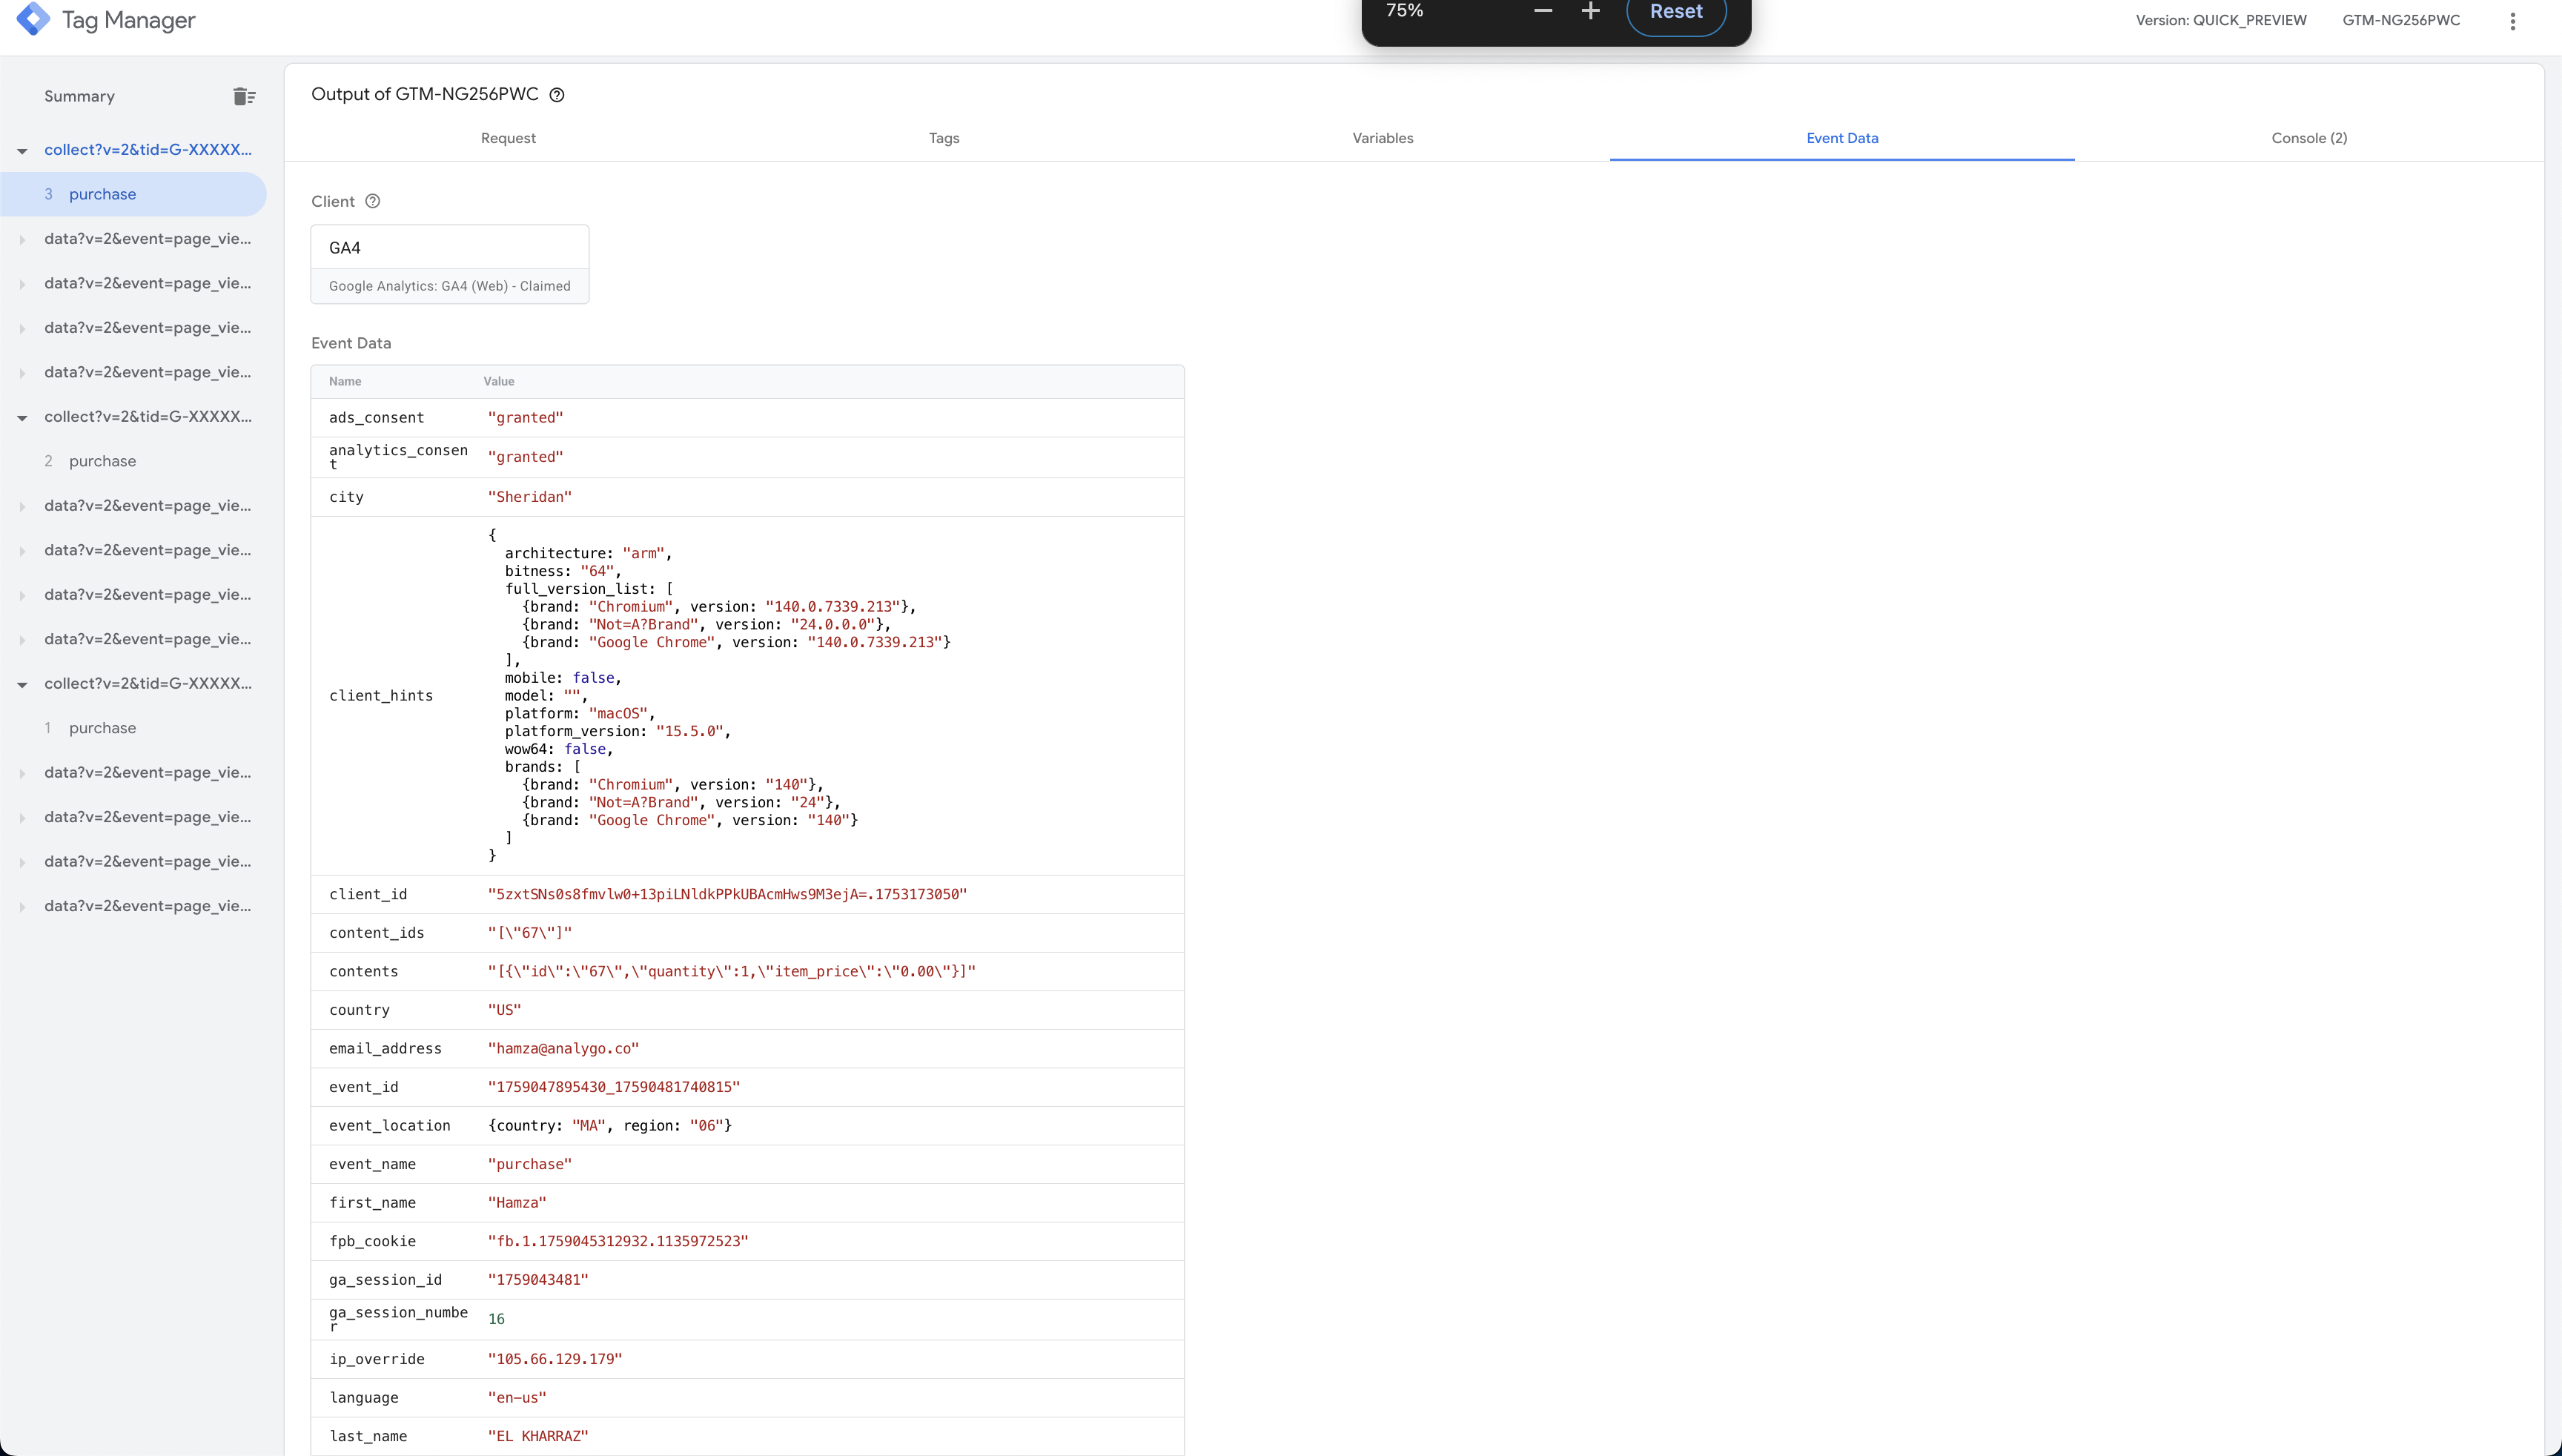
Pull GA4 request params into Event data variables
Event Data variables in server-side GTM allow you to extract specific parameters from incoming requests (like GA4 events) and store them as reusable variables. These variables pull data from the event model—such as ecommerce items, user properties, or custom parameters—so you can map them to other tags like Facebook CAPI.
- Generate a token for the Conversion API
Any field sent with the purchase event can be pulled using this variable (e.g., event_location.country will return the country).
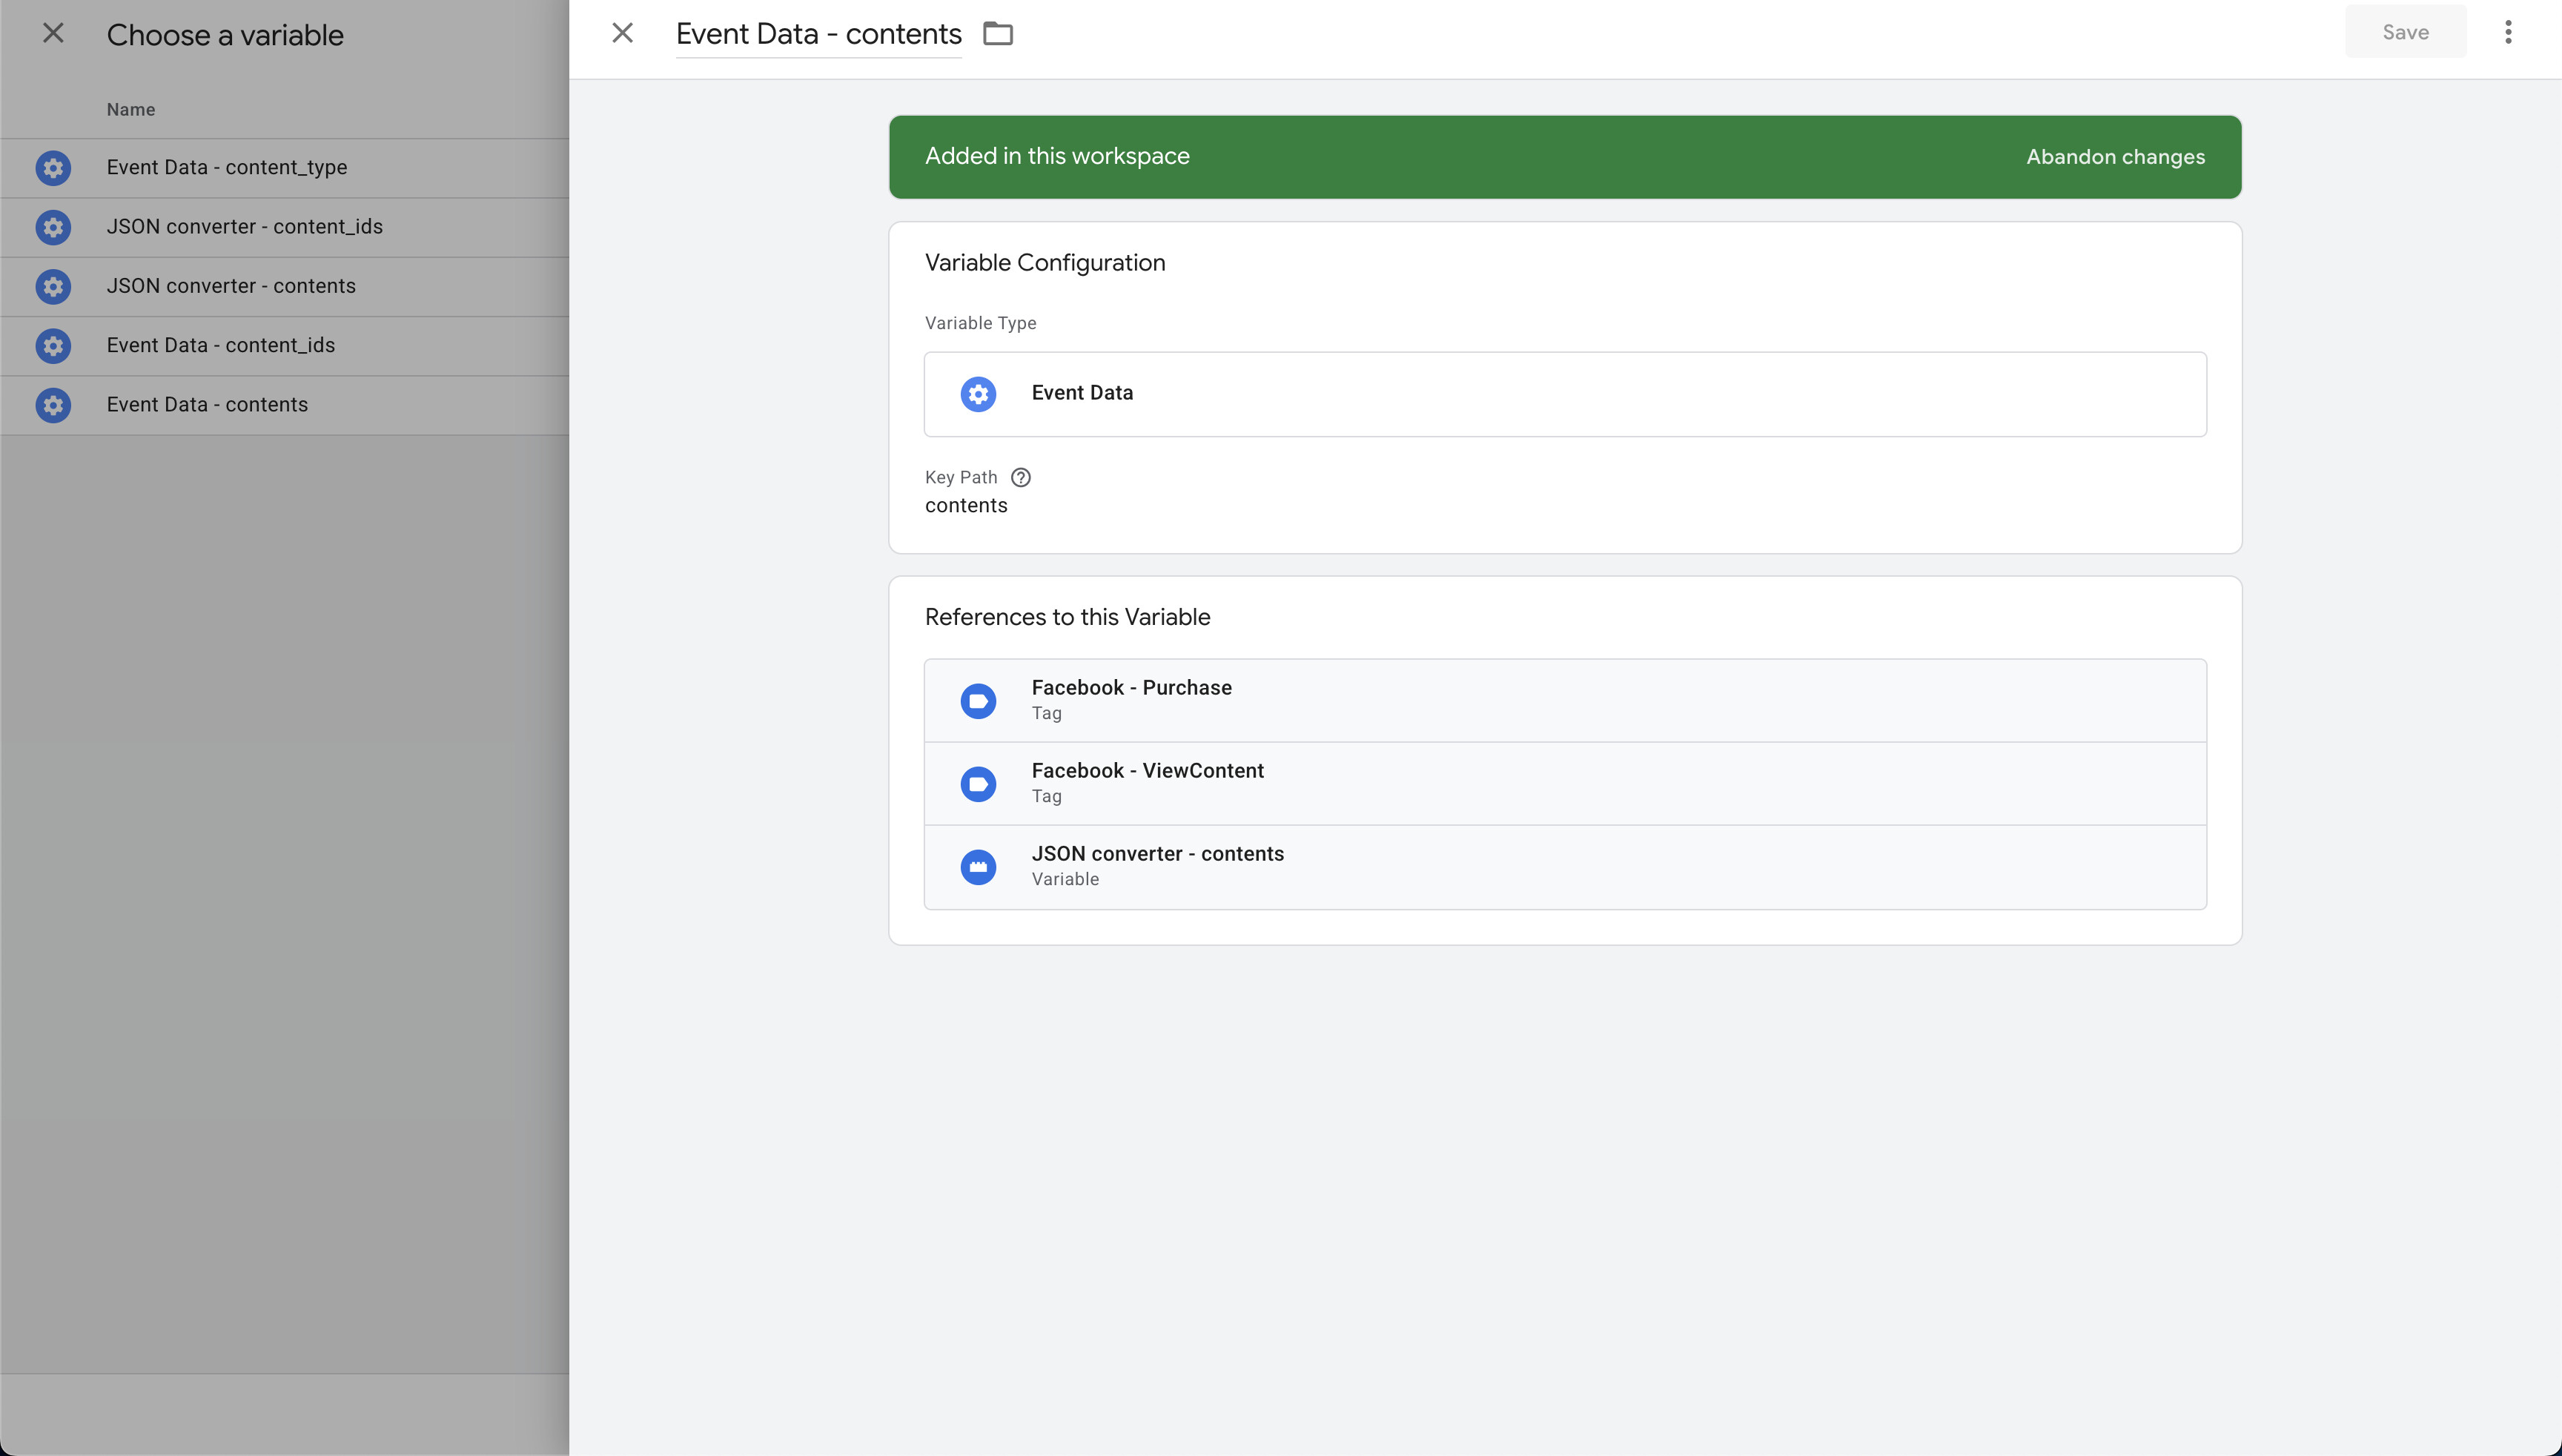
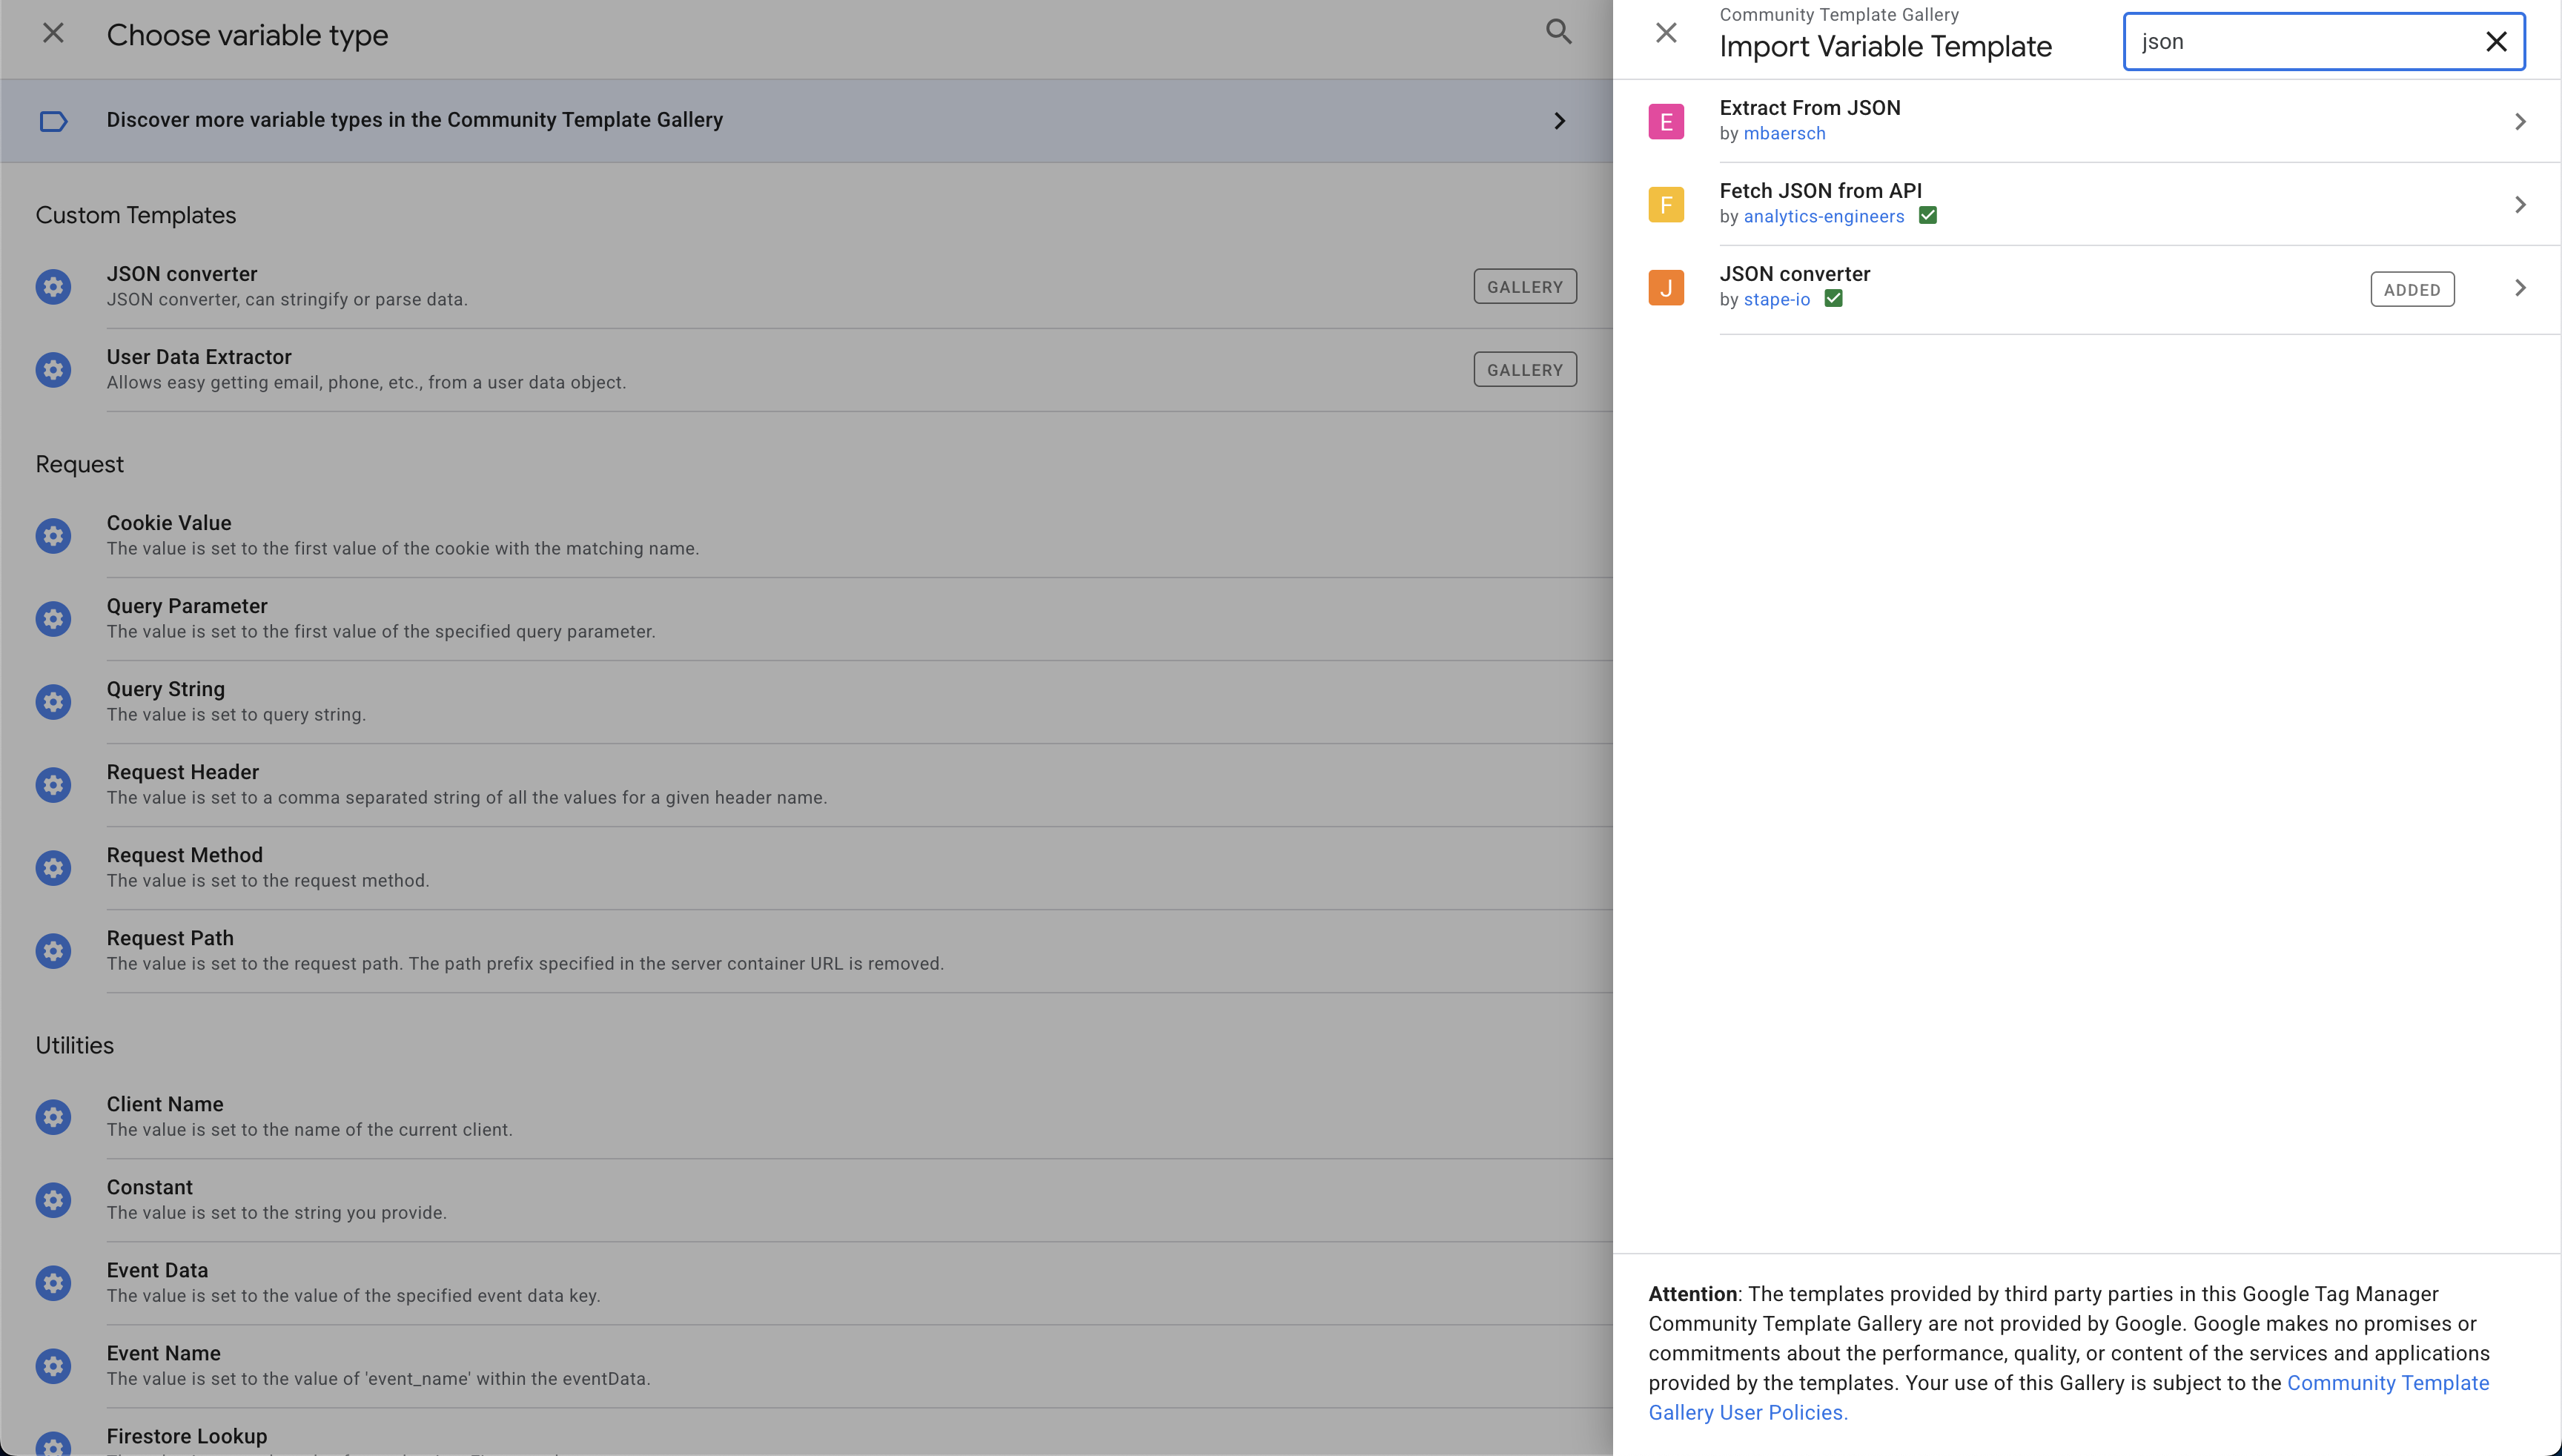
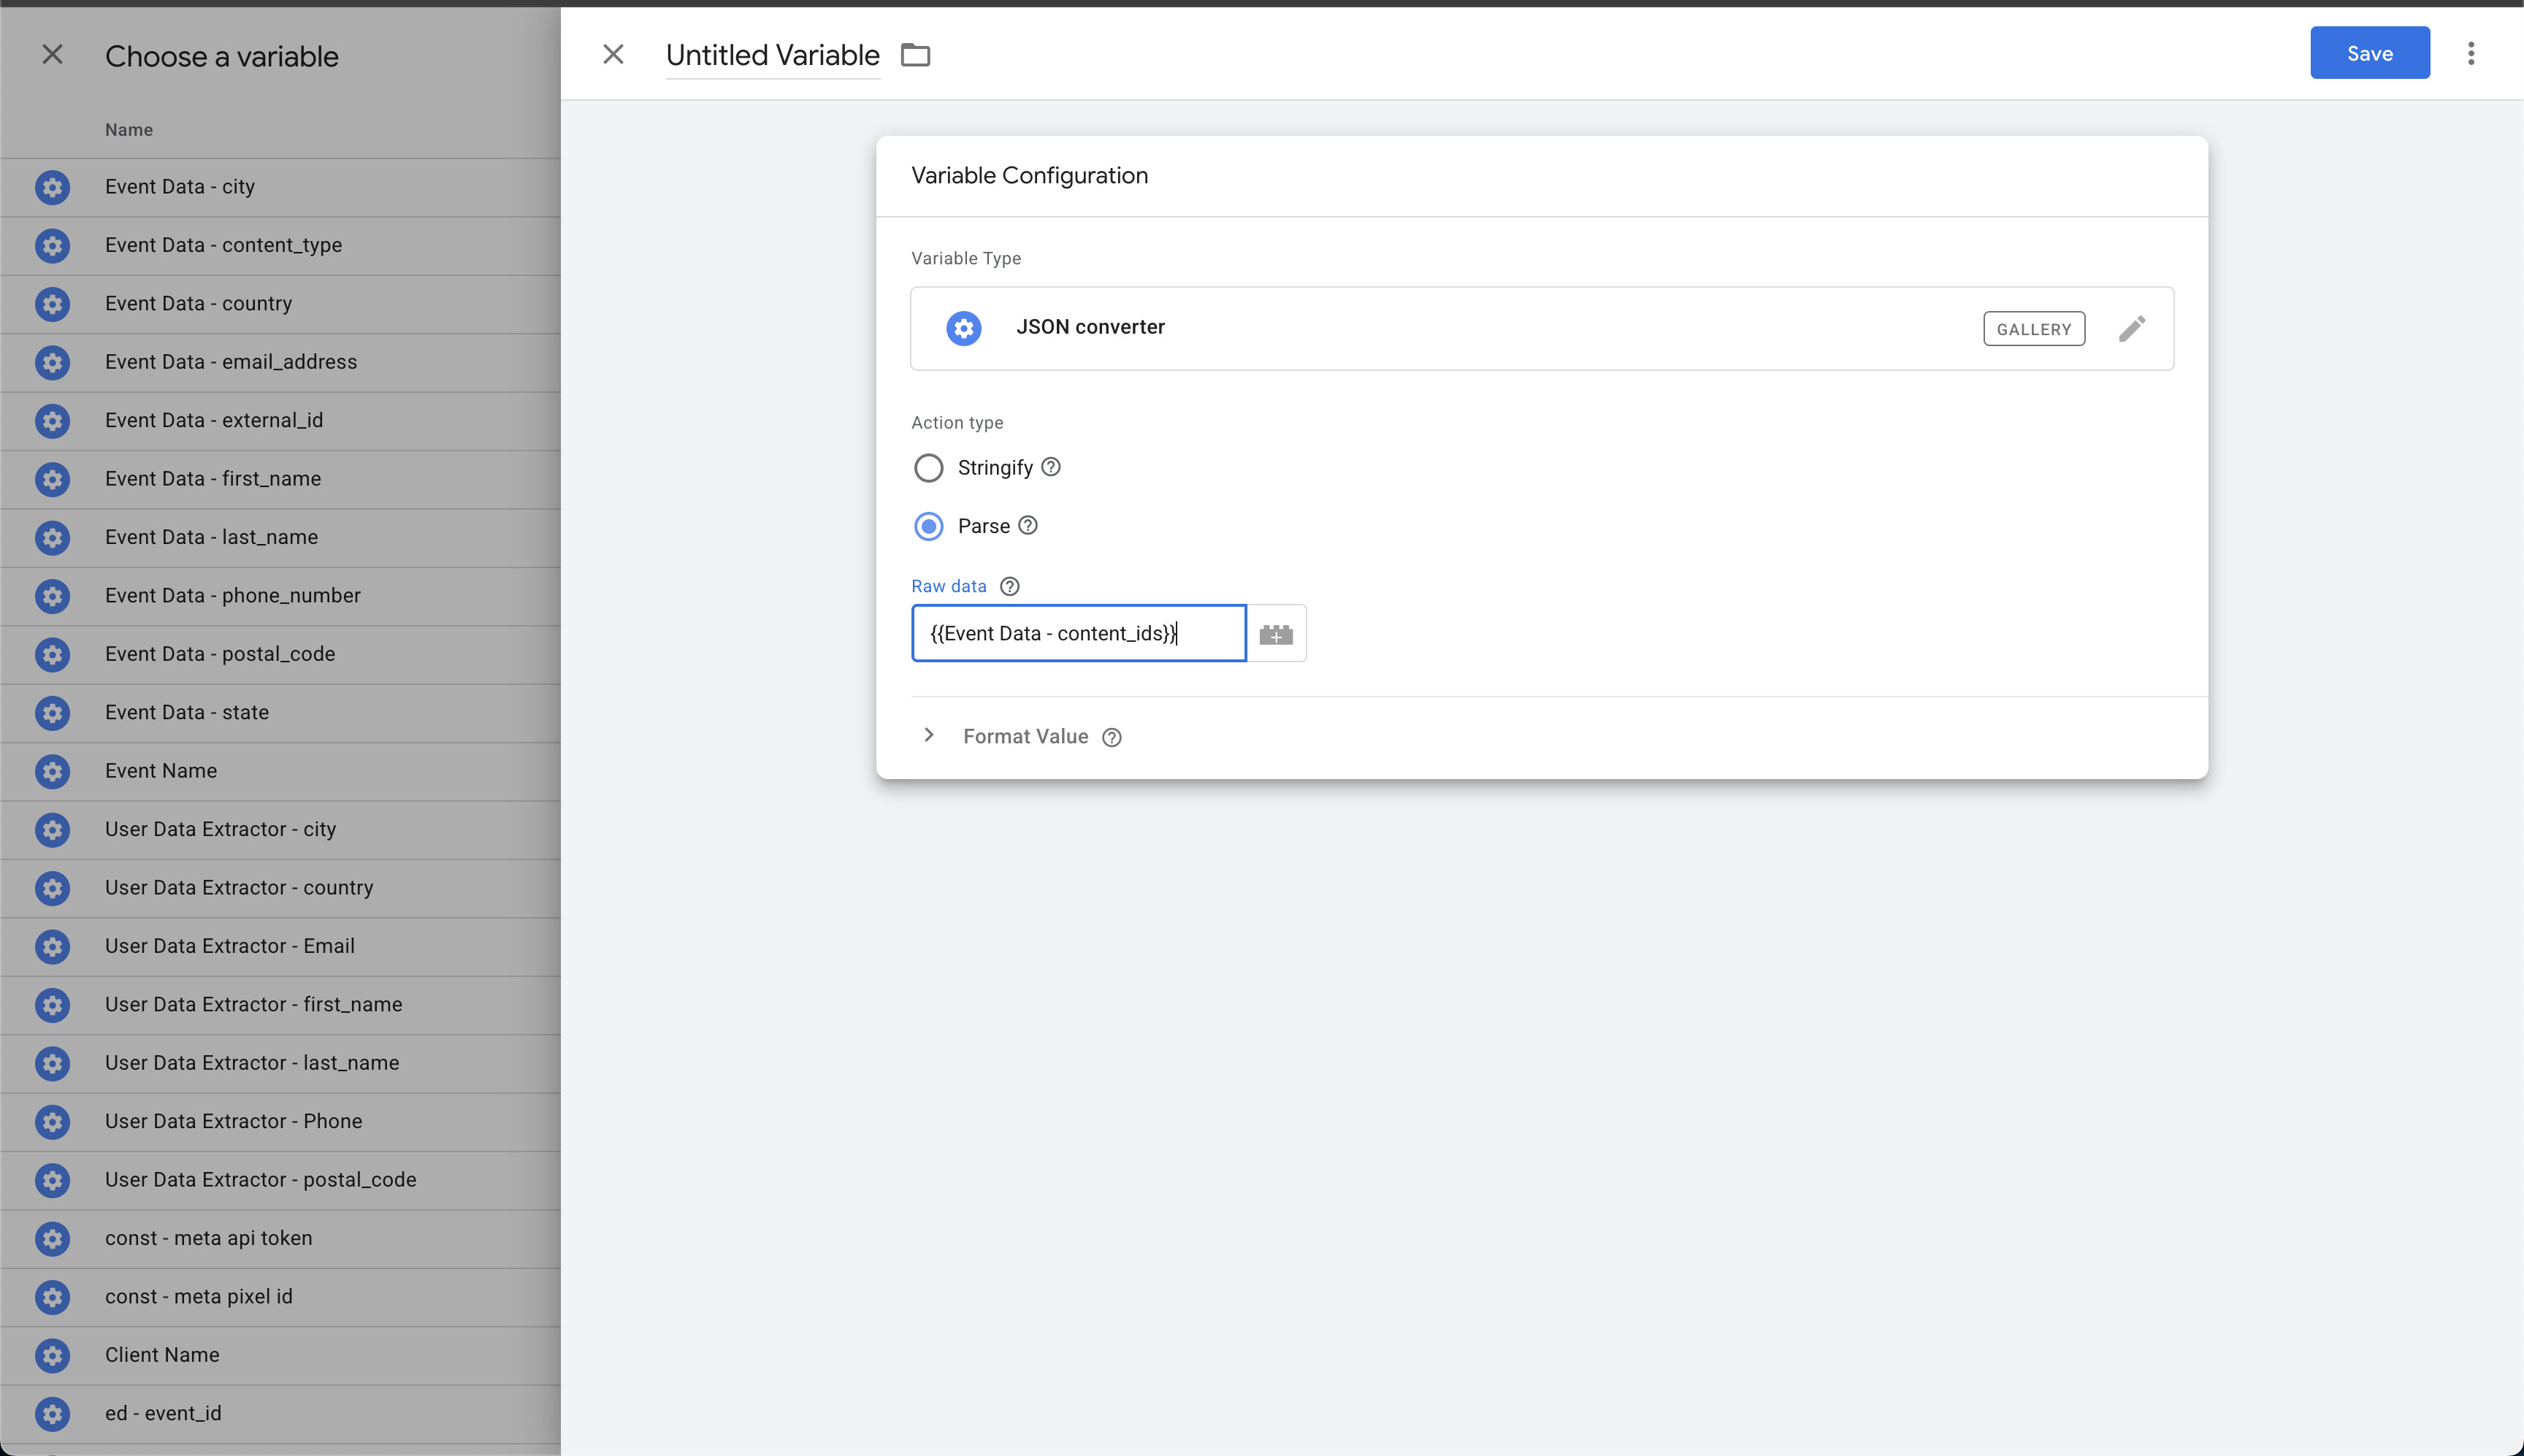
- If contents/content_ids are strings (you see [Object, Object]), convert to JSON via a helper variable
When GA4 items are passed to the server, they may arrive as stringified objects rather than proper JSON arrays. This causes Facebook’s Conversion API to receive malformed data like [Object, Object] instead of the actual product information. To fix this, you need to parse the string back into a proper JSON object using a JSON Converter variable before mapping it to Facebook’s contents parameter. This ensures Facebook receives structured product data it can use for optimization and attribution.
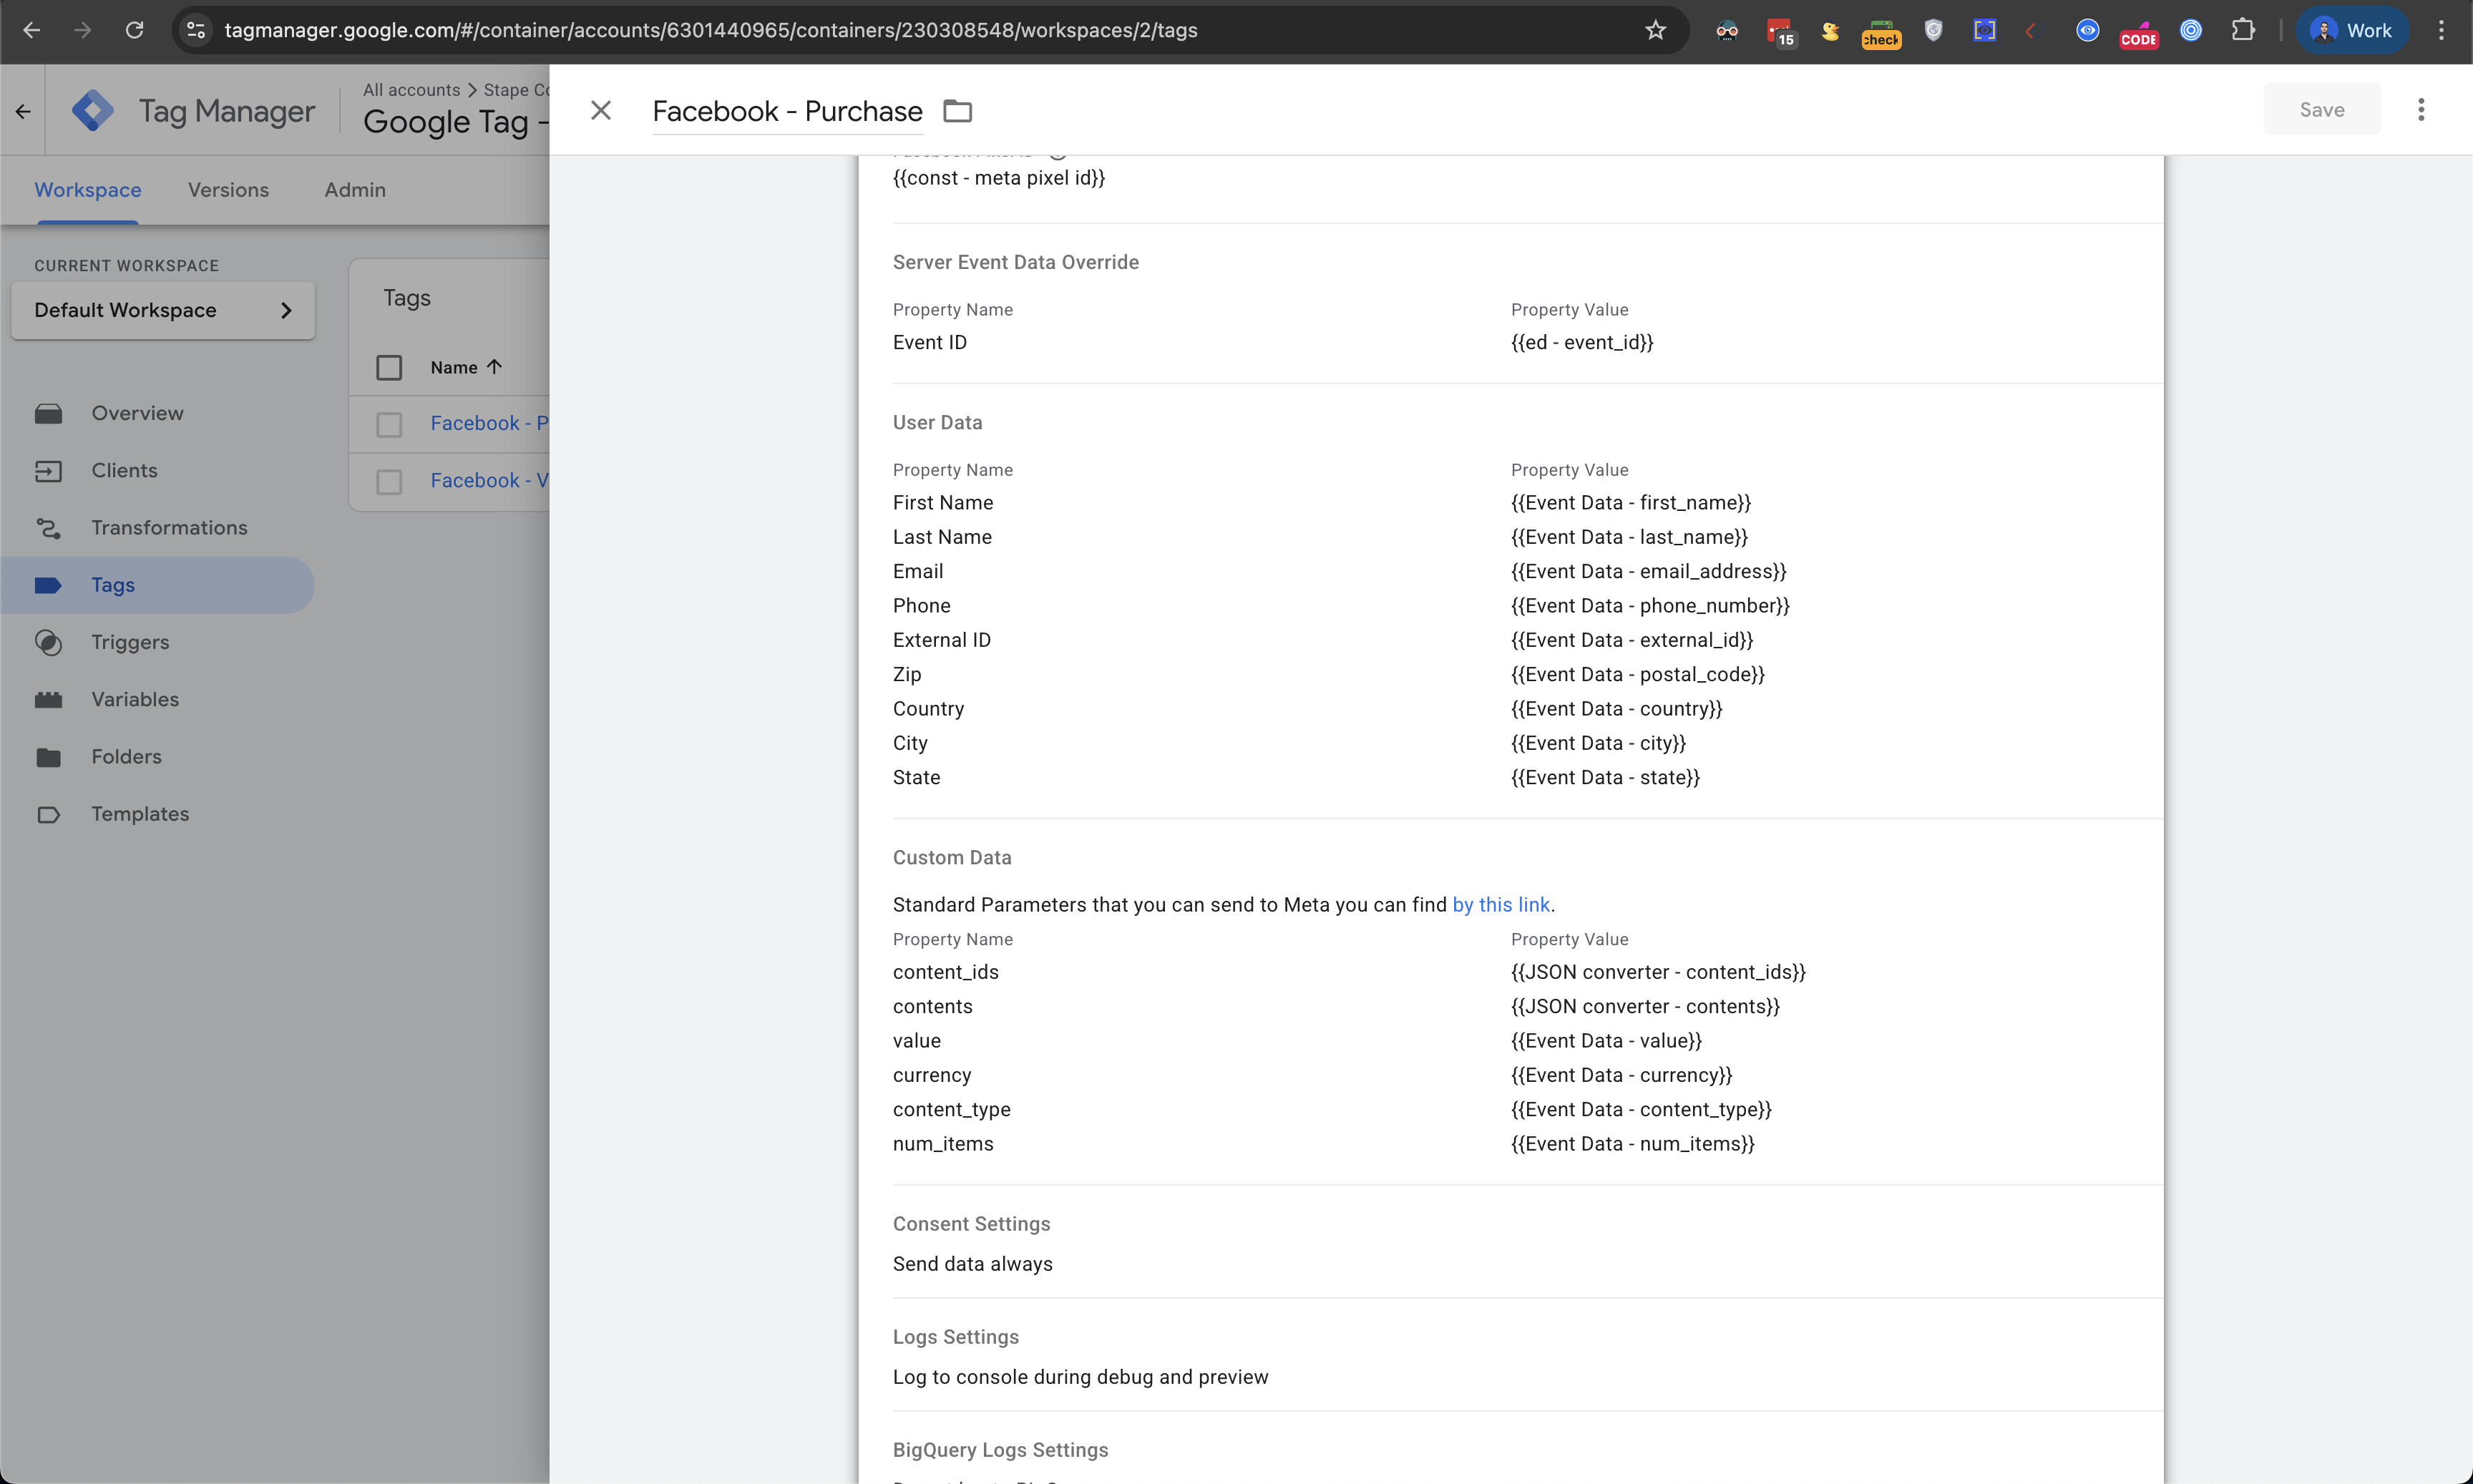
- Set event_id to match the client event for deduplication; add User Data and Custom Data
Consent handling (client + server)
- Client: Ensure CMP initializes before GTM. Map CMP to Consent Mode v2
- Hosting: sGTM server URL and custom domain with valid SSL. This checklist focuses on the tags and debugging part of Facebook—you should already have a working server by this point.
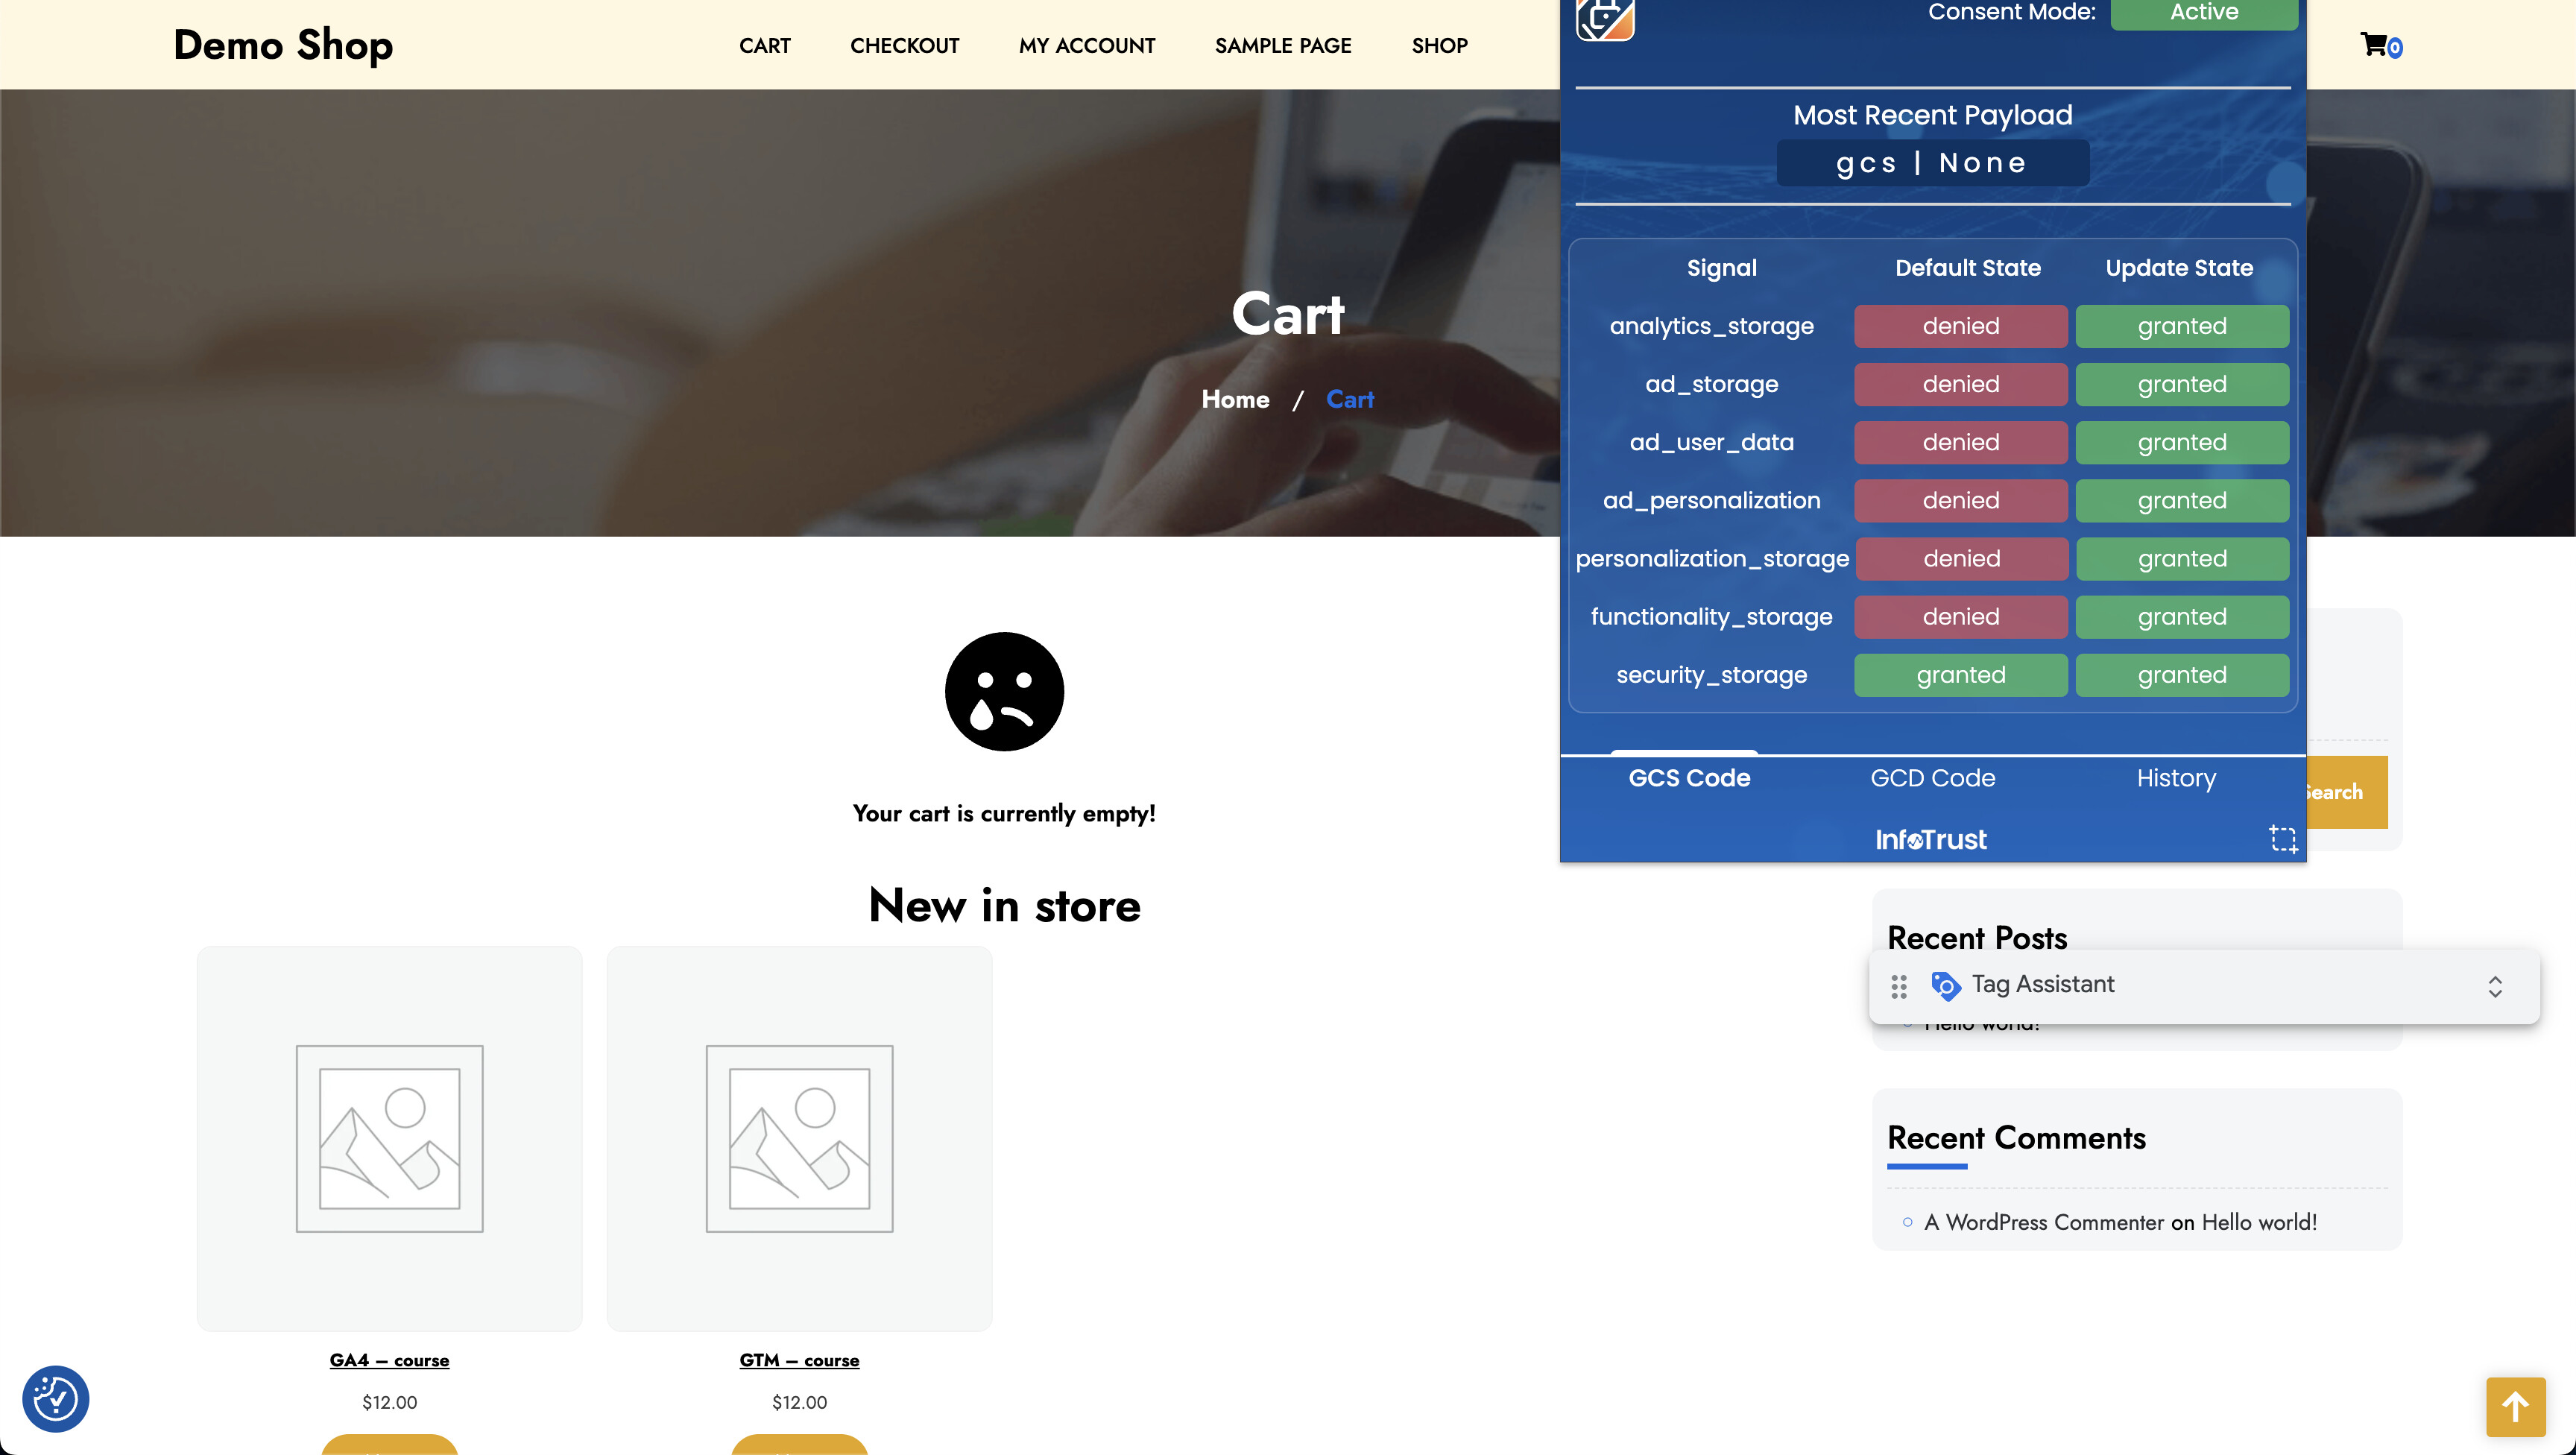
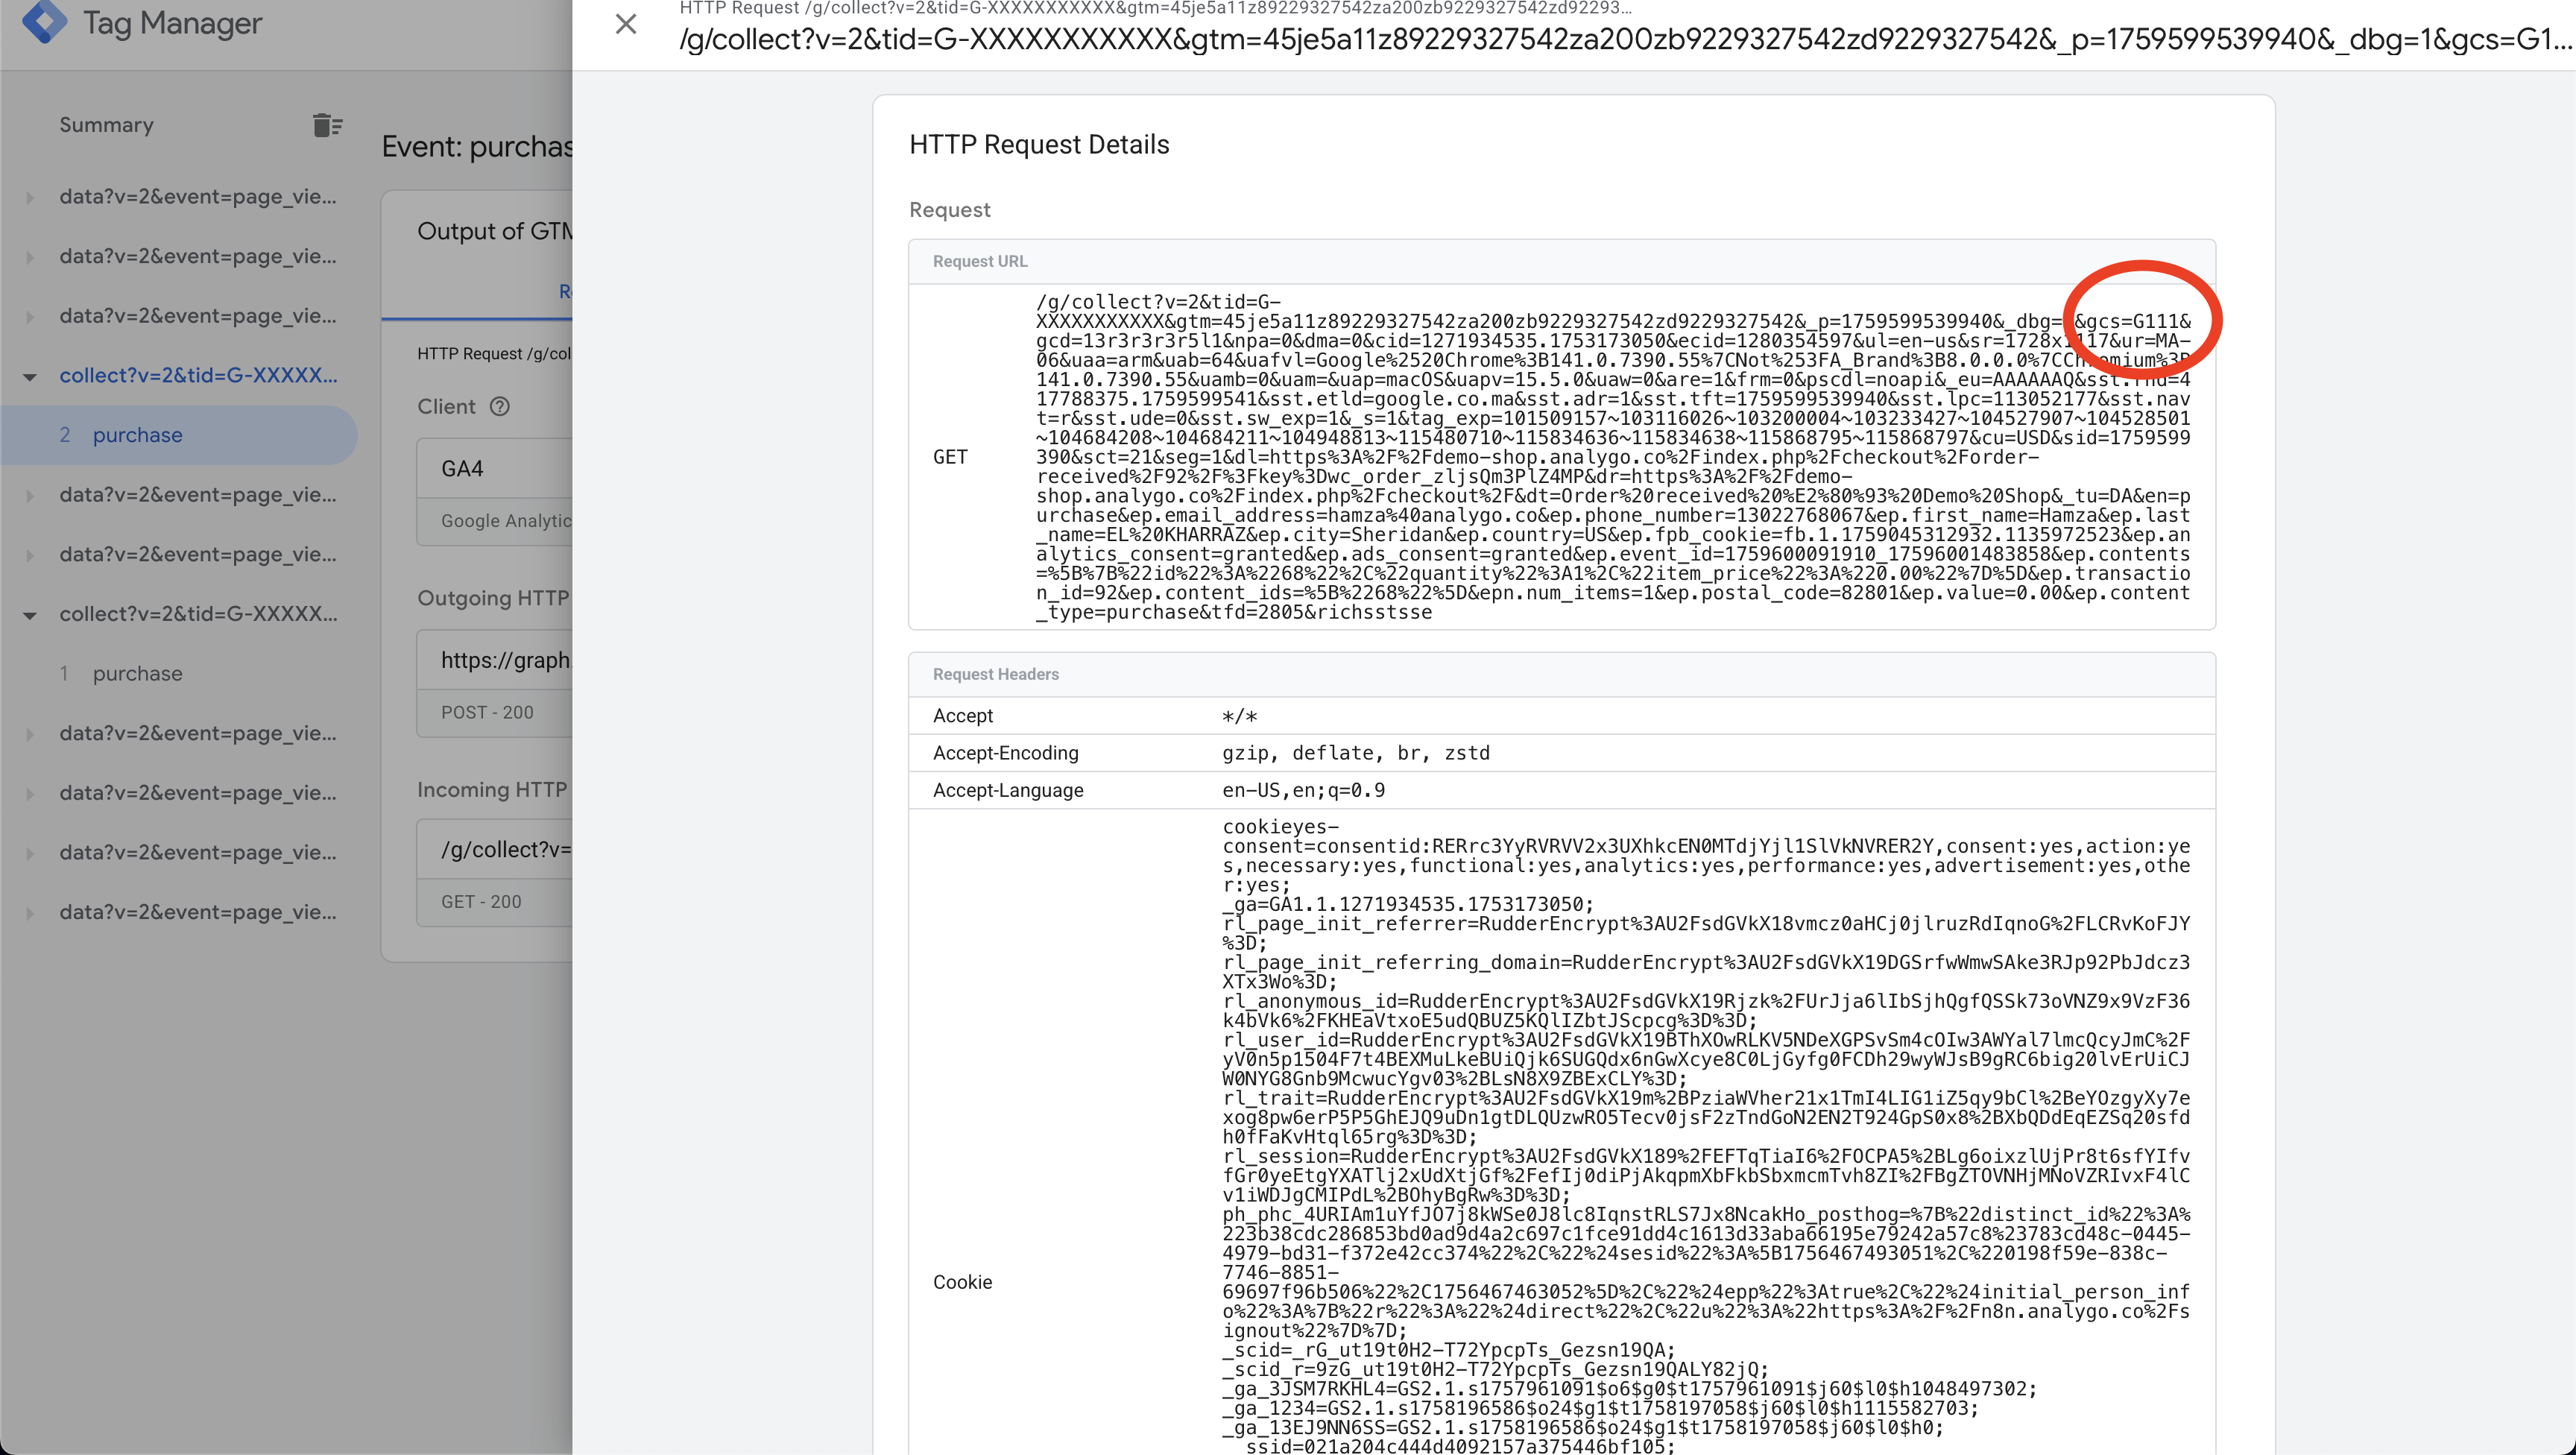
- Verify gcs or similar consent params present on network requests
The gcs (Google Consent Status) parameter is a URL parameter that encodes user consent choices into a compact string format. It’s passed along with tracking requests to communicate whether users have granted consent for different purposes like analytics and advertising. The parameter uses a specific format where each character represents a consent state for different consent types (e.g., analytics_storage, ad_storage, ad_user_data, ad_personalization). For example, a value like G111 indicates that all consent types have been granted, while G100 means no consent has been granted. This parameter is crucial for ensuring that your server-side implementation respects user privacy choices and only processes data according to the consent granted. When checking network requests, you should see this parameter appended to your tracking URLs, typically in the format ?gcs=G111 or similar variations depending on the consent states.
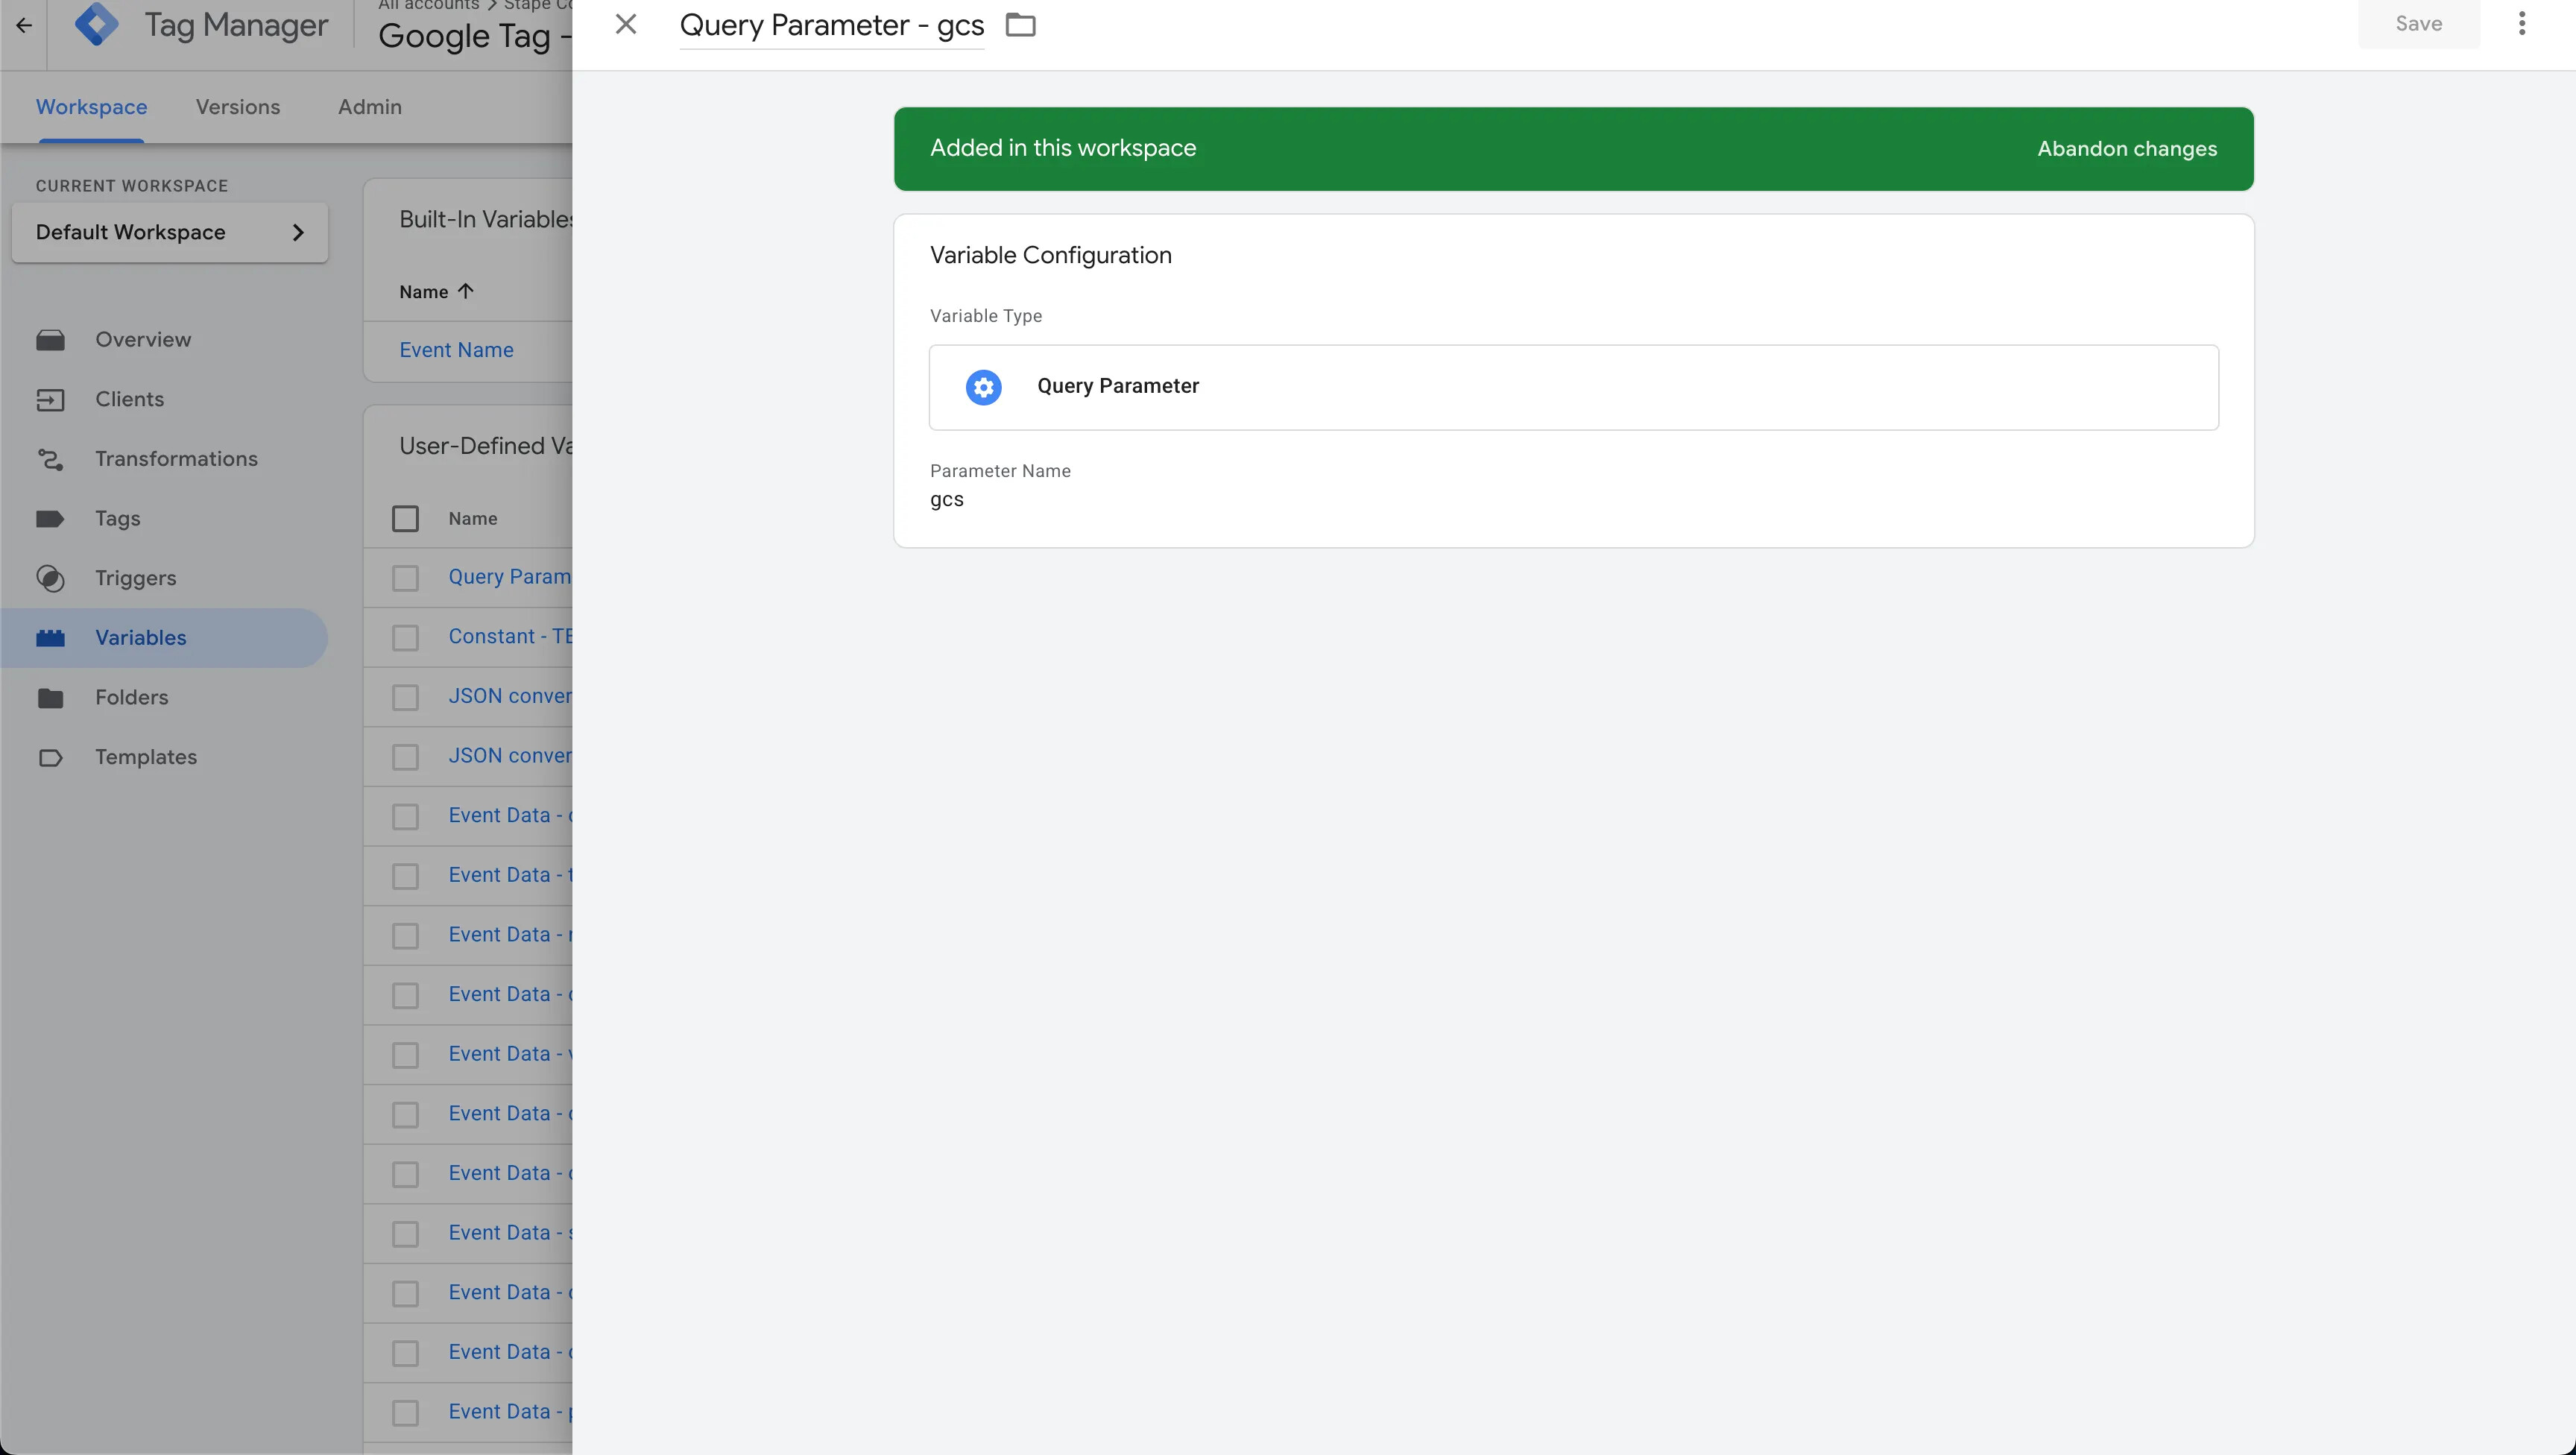
- Add a query parameter variable that fetches the gcs signal
This variable extracts the gcs (Google Consent Status) parameter from incoming requests to your server-side GTM container. By reading this parameter, you can determine the user’s consent state and conditionally fire or block tags based on their privacy choices. The variable type should be set to “Query Parameter” with the parameter name set to gcs.
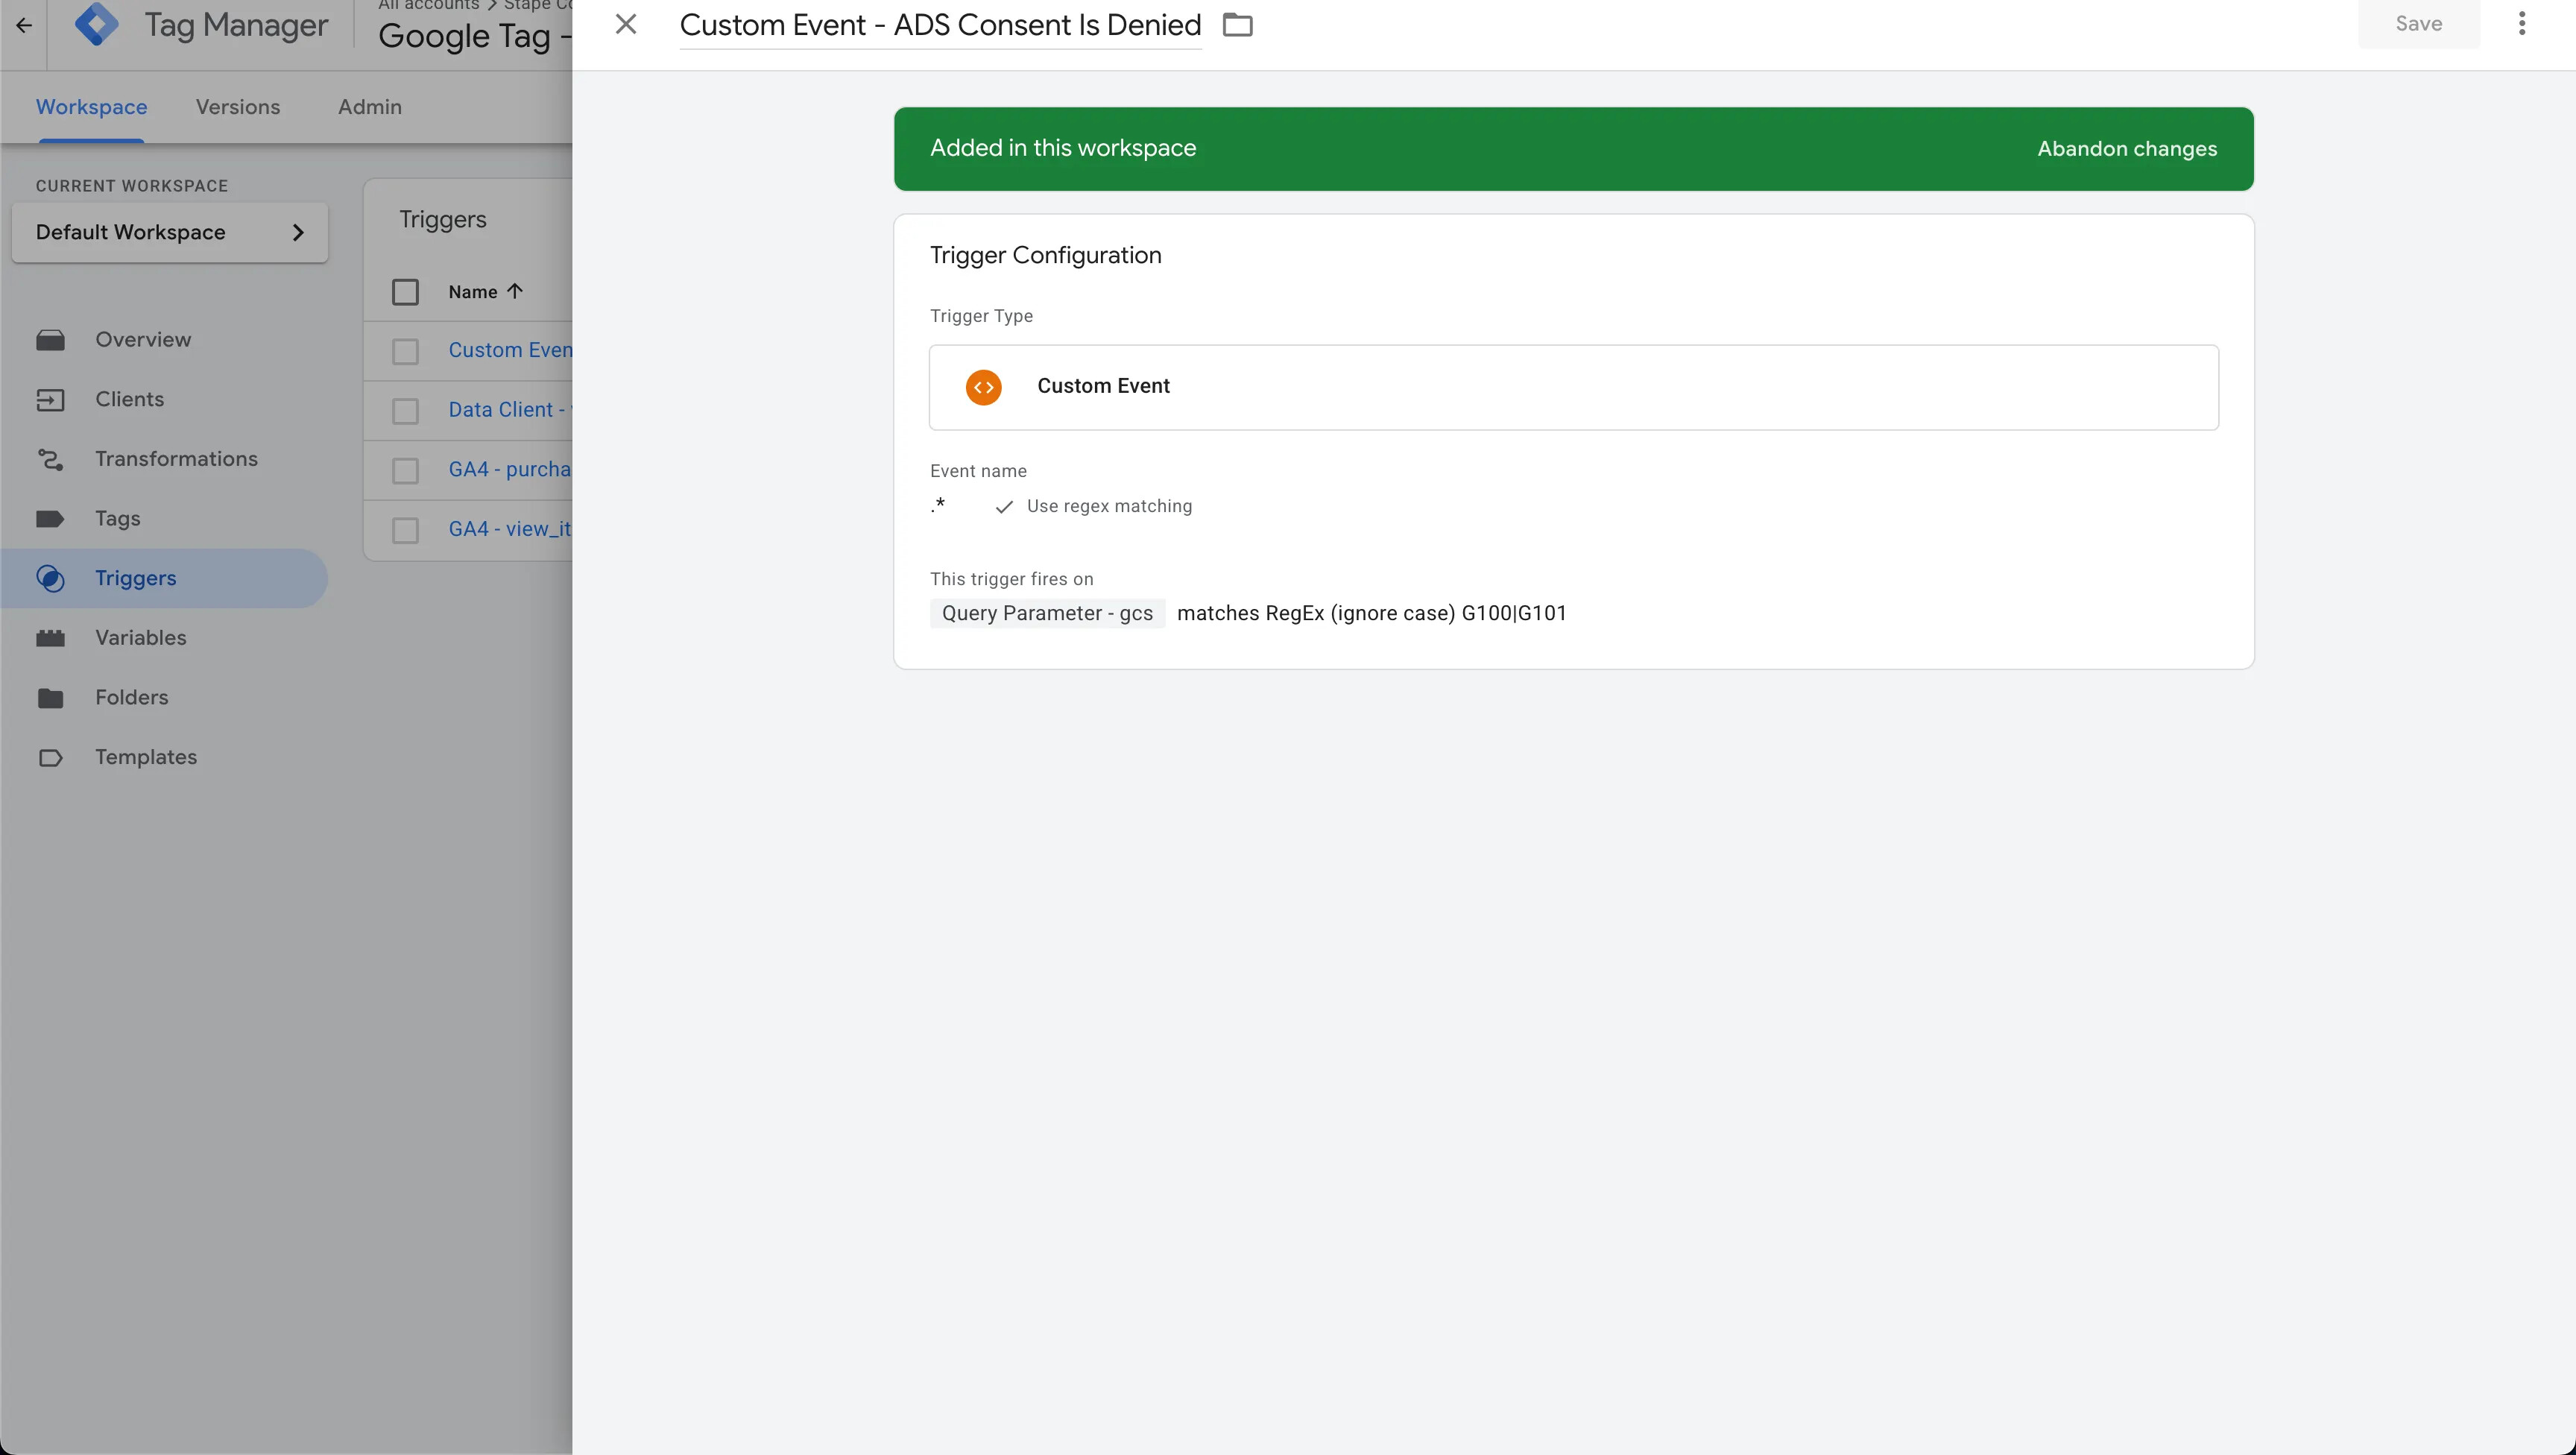
- Use this variable as an exception trigger to control the behavior of Facebook tags by adding blocking triggers for denied states
- CMP: Running on all pages. Plan to pass consent to server (gcs / ad_user_data, ad_personalization). Although this is not a compliance guide, any marketing platform should respect user privacy choices—you should block Facebook tags if ads consent is absent. Of course, this choice is up to you, but we’ll show you how.
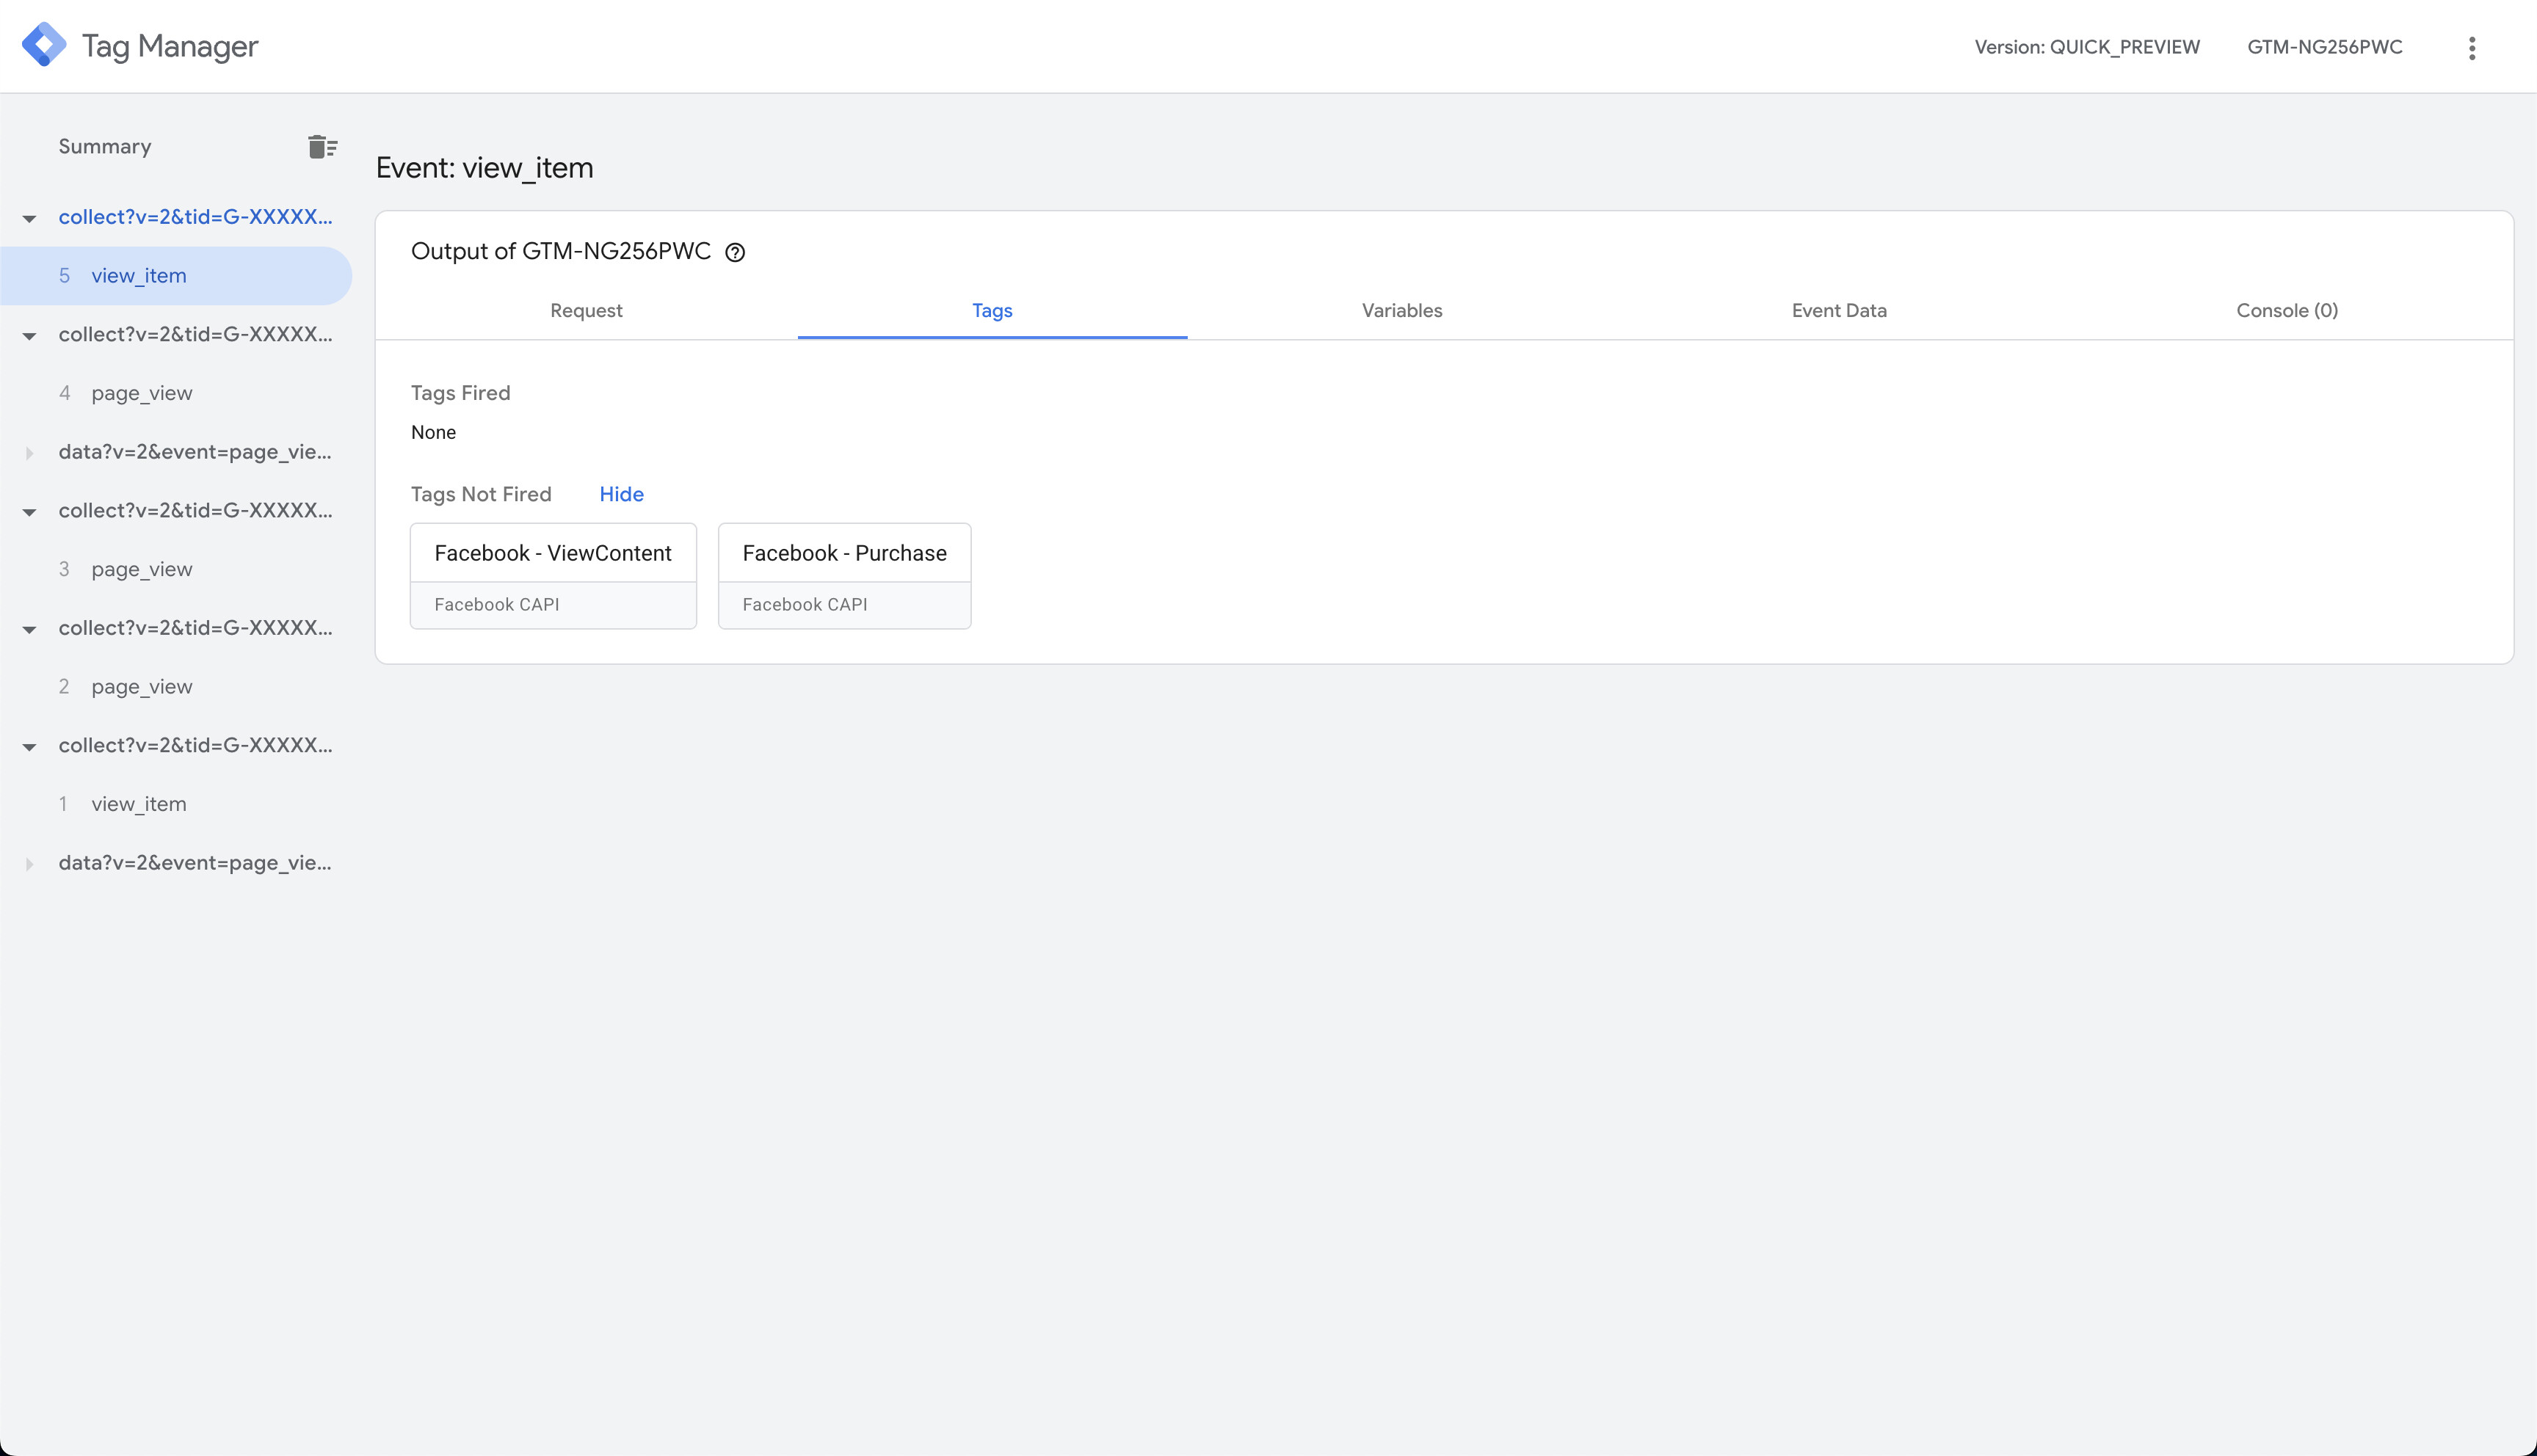
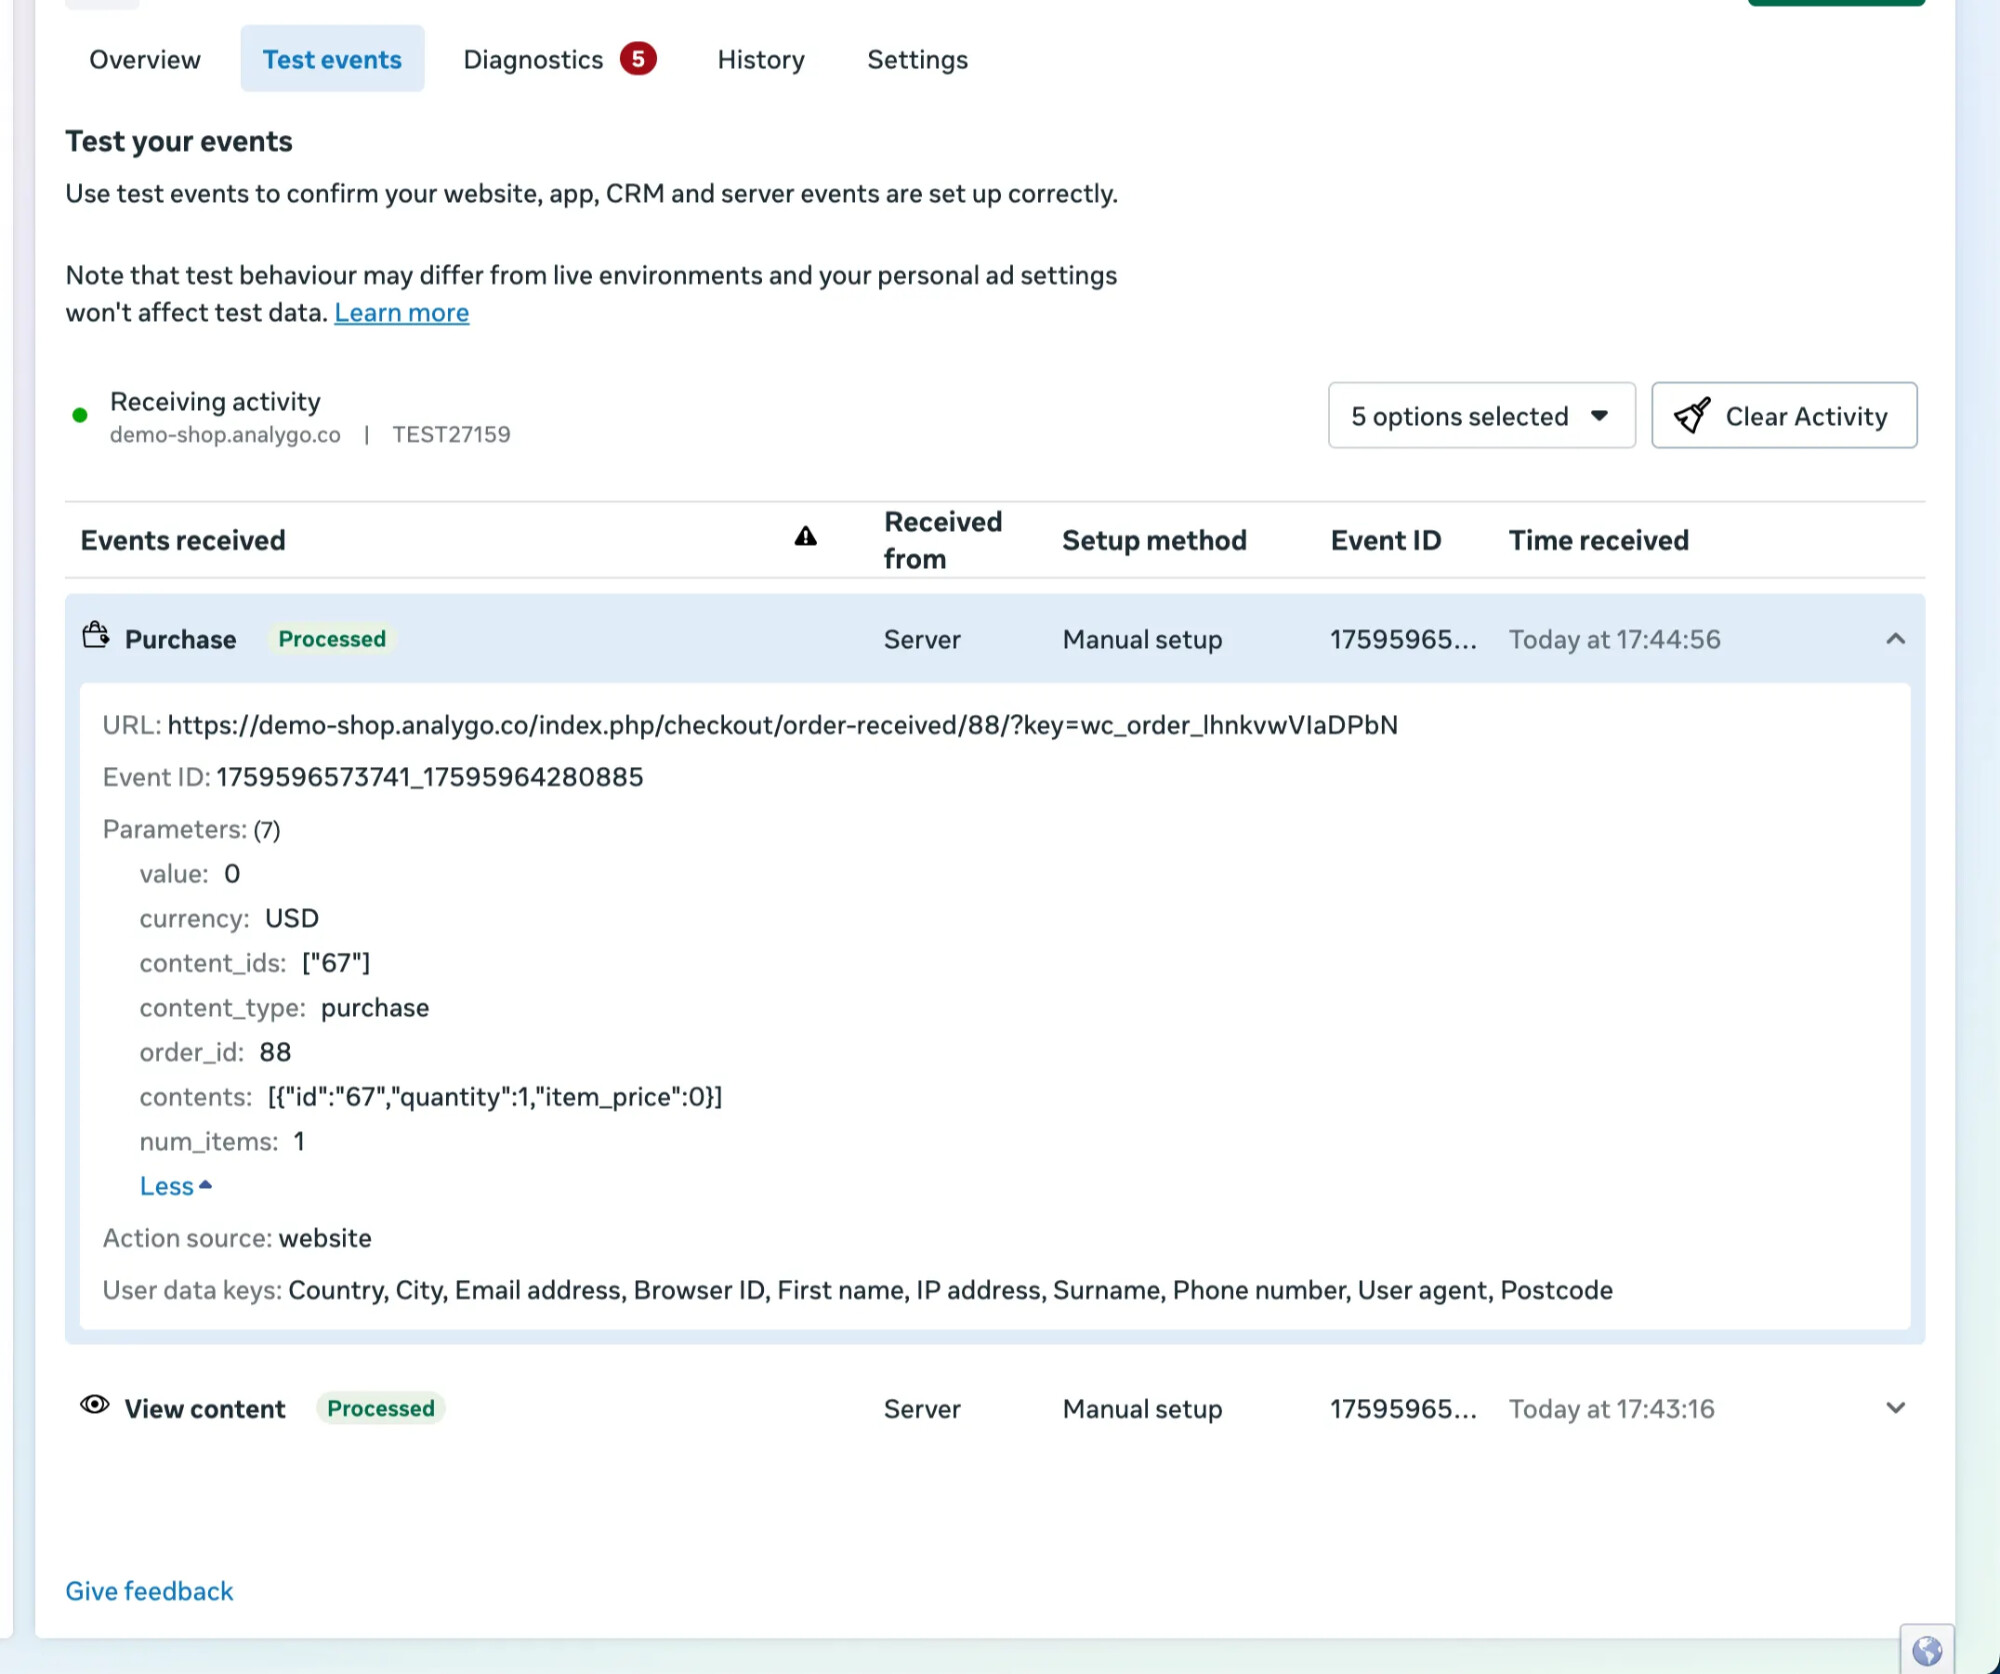
Test end-to-end
- Open GTM Preview for both Web and Server containers. Try denying tracking and check if your tags are blocked from firing, as shown below.
- Test events in Meta Events Manager. Copy the Test Events code from Meta’s UI and add it to your server tag as the “Test ID”. Trigger events on your site and confirm they appear in Test Events.
Prepare client-side (Web GTM)
- Validate deduplication: Pixel + CAPI with same event_id results in a single counted event.